• Our software update is now concluded. You will need to reset your password to log in. In order to do this, you will have to click "Log in" in the top right corner and then "Forgot your password?".
  • Welcome to PokéCommunity! Register now and join one of the best fan communities on the 'net to talk Pokémon and more! We are not affiliated with The Pokémon Company or Nintendo.

Guide: Daily Style, Writing and WordPress Guide

bobandbill

one more time
16,920
Posts
16
Years
PokéCommunity Daily Style and Writing Guide

So you've pitched your article idea and it's been approved. The thread has been started for you within the Workshop subforum and you're eager to write. But wait - how should you write it?

Here is a list of guidelines for you to follow for any article you may write.


Writing procedure
how i write article

  • If you're not using Daily, use a word processor! And save regularly. There's multiple benefits, but the biggest is that you will have a backup for your work. It sucks to spend a good deal of time writing an article only to lose it all.

    For those without a word processor, Google Docs and the like are free-to-use online alternatives and perfectly acceptable to use. There is also OpenOffice, a free-to-download word processor.
  • Use a spelling and grammar checker! These are tools in your browser/word processor that point out typos and grammatical errors! While anyone else can point them out and the Daily Staff will check your article before approving, we're rather not have to point out simple mistakes that these tools would fix for you. We're people after all.
  • Proofread! This isn't the same as using a spelling/grammar checker. Simply re-read your article and check for mistakes missed by such tools, and that what you wrote actually makes sense. Again, it will help save us time, and may save any potential embarrassment from other people pointing out you wrote 'I forgot my forgot something' or something equally silly.

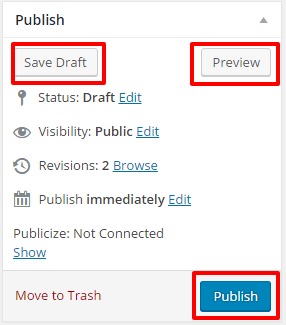
    Bonus points if you take a break between finishing the draft and proof-reading. It helps to look at things with a fresh mind. Using the preview post button is also wise.
  • Structure the article sensibly. This means for the majority of articles you should have an introduction, content with one paragraph per point (in general), and a conclusion. The conclusion needs to either finish/summarise the content, or engage with readers (for instance, if the article was a music choice list, you could ask readers which is their favourite songs, and/or if they felt something else should be in the list, and to let us know in the comments. The main thing is that the article is rounded off in some way.
  • If in doubt, check other articles and/or ask a staff member. There's going to be other articles to follow in terms of structure or writing style. Just don't plagiarise. Meanwhile, we're here to help!
  • Please post when your draft is completed, or when you have applied edits. It'll make it easier for us to keep track!
  • Don't take constructive criticism the wrong way. We all make typos, and we're not all going to always agree what is the best way to represent an article. Having a tantrum over mistakes being pointed out helps nobody. If someone isn't providing advice in a respectful manner however, please use the report button or talk to Daily Staff.

In short - use spellcheck, save your drafts regularly on a word processor or Google Docs, please proofread and check out other articles for examples/ask for help if confused.


Phrasing and Grammar
weather theirs' are pokeymanz in mah article ain't not the Question

  • Please refer to this project as "PokéCommunity Daily", or "Daily", as opposed to 'PC Daily'. Why? Branding and consistency, in part!
  • "Pokémon" with the capital P and the accented é, always. This means that pokemon, pokémon and Pokemon are not fine. If you're lazy, simply apply a Find and Replace at the end of your draft. Easy!
  • Always capitalise species names as per the games/Pokémon Company trademarks (so Eevee rather than eevee). This also applies to things like abilities (Intimidate), moves (Water Gun) and items (Poké Ball - note again the accented é). Again, consistency is key, and this is the way we've chosen.
  • Game-based/community-used abbreviations (e.g. Pokémon RBY) can be used, but only if it is to occur multiple times in an article, and after it is written in full (e.g. "Pokémon Red, Blue and Yellow (RBY)", and thereafter RBY; or "Hidden Power Ice (HP Ice)").
  • Regular abbreviations and slang are often better avoided. Don't be colloquial, be legible. Not all readers will know your slang, game-based or otherwise, so if it must be used, introduce it first (see above point). Meanwhile, "it is", "I will" and "might not" is usually better than "it's", "I'll" and "mightn't", but this isn't a strict guideline.
  • Avoid abbreviations in your article title. Clickbait titles aren't ideal either - aim to be informative as to what the article is actually about.
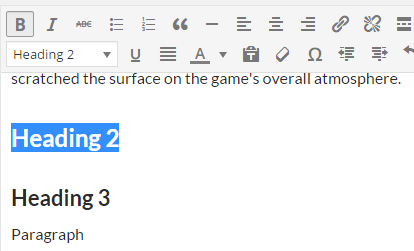
  • Water-type attack, not Water type attack. Italics for game titles, other websites, and usernames.
    [*]Use one English for your article. Whether your randomize like an American or colour in like a Brit, stick to it for your article rather than swap between them. Given articles are to be written by members across the world, we're allowing both sorts on Daily, but it should be just colour or just color in the one article, not both. Australian English is also fine, mate. The choice is down to the lead writer.
    [*]Be sure your using the wright word. Yes, that was a joke.


Note that there will always be exceptions, e.g. an article about alternative ways to type Pokémon names will naturally have to go against the 2nd/3rd point. A dose of common sense may help, and in all other cases feel free to ask staff if unsure.


Formatting and Other Aspects
i'll use 500 unsourced gifs with no relevance in this article!

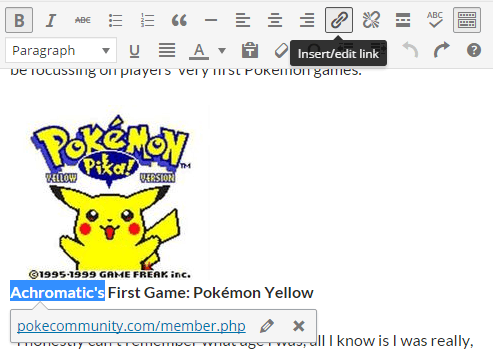
  • Source all your information and other content. If you've put together information you found on another site, give them credit! If you're using an amusing image in your article created by someone else, be sure that we know who made it and link to the source! On that note:
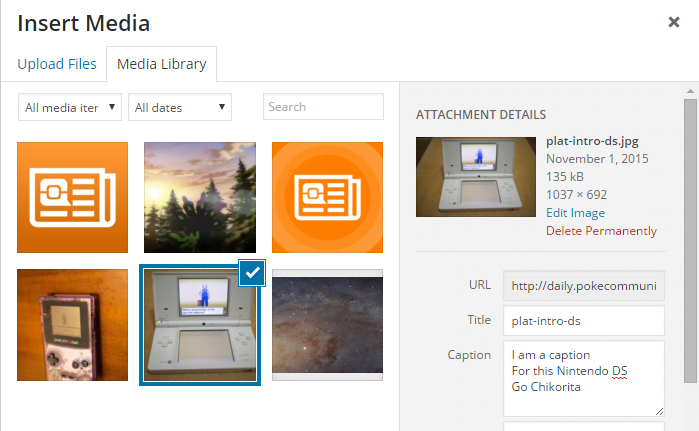
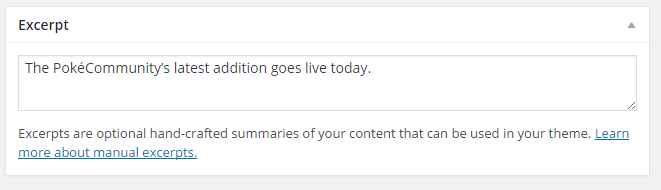
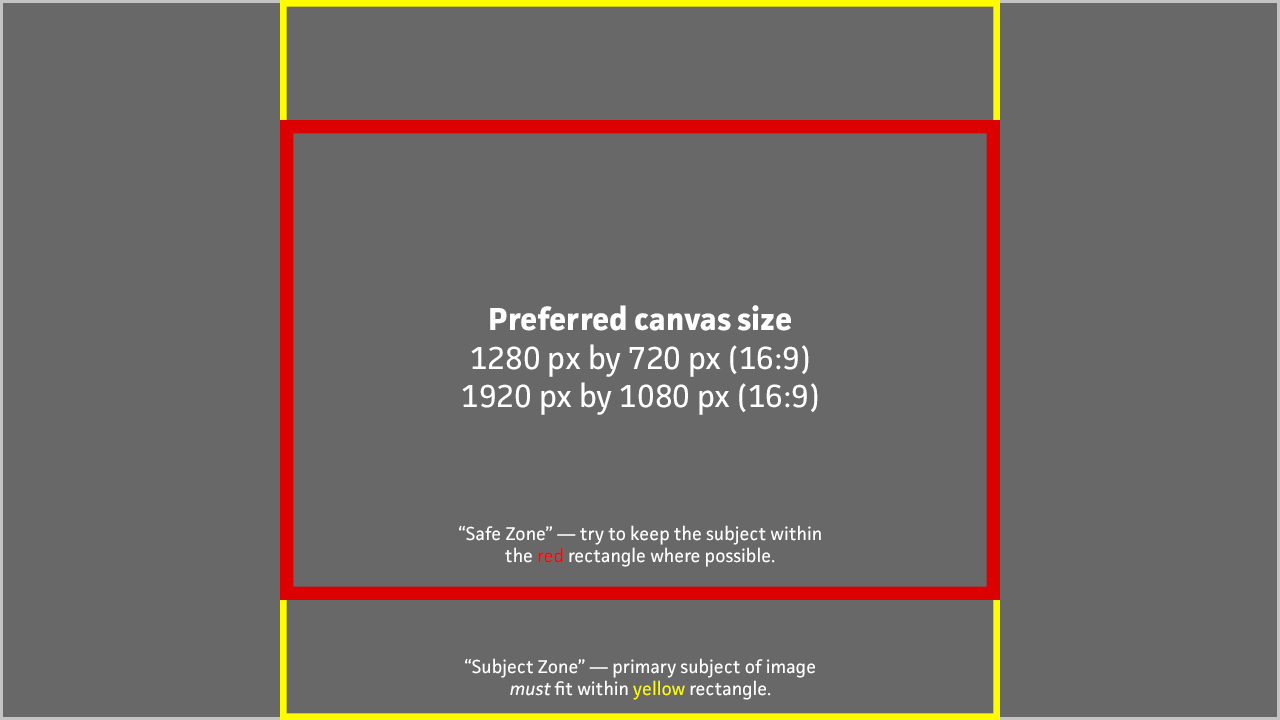
  • Info credit goes at the end after the article, and image credit either at the end of an article or in a caption below the image. For example: [image]"Some caption that is witty in nature. Source: The source website/artist", with a link to the original artist/creator/location if required. Screenshots of the games can be credited to the companies that made the games. Images will be re-uploaded when the article is posted on WordPress.
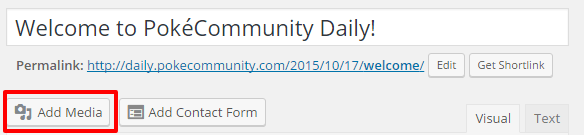
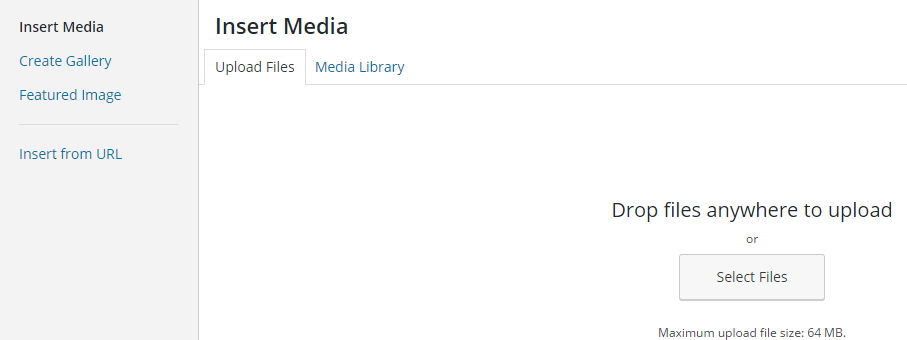
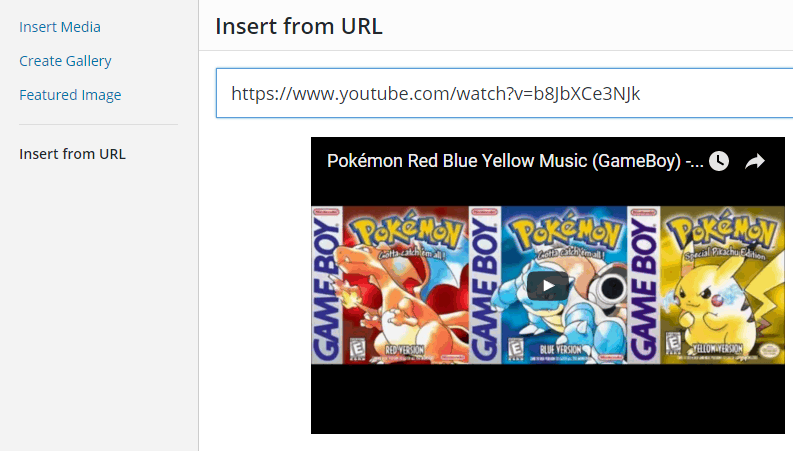
  • Pick images wisely. Don't provide a pixel or a desktop wallpaper if possible. With videos, the video link or use of the
 

bobandbill

one more time
16,920
Posts
16
Years
WordPress Posting Guide

This guide covers all the basics - and more - on using the Daily Wordpress side to write and publish your articles.

Logging In

If you are new to the Wordpress side, you need to create an account first. Ask Laslow, Rabinov, or myself (bobandbill) to create the account for you. We need your email of choice and desired username (cannot be changed) and nickname (displayed if you are listed as an author for an article), and then check your email afterward for password activation.

Author Accounts
For Lead staff only.

Spoiler:


Posting New Articles

From the main dashboard page, you will see a sidebar on the left. Select Posts --> Add New, or follow this link after logging in: https://daily.pokecommunity.com/wp-admin/edit.php

Spoiler:


IMPORTANT IMPORTANT IMPORTANT

Save regularly. To the right is a 'Publish' box and within it 'Save Draft' button. Hit that regularly. Should something go wrong, you can access drafts from the left sidebar: Posts --> All Posts. There is an autosave for Drafts, but don't rely on it. If necessary, be sure to check the Revisions window at the bottom of an article's edit page.

Spoiler:


Title

Please make sure that the article title makes sense and accurately reflects what the article is about. Avoid abbreviations within it as well (e.g. Pokémon Let's Go or Ultra Sun and Moon, not Pokemon LGPE or USUM). The title goes in the top text field, not the second.

The Article

If you are taking a draft from elsewhere, such as say a thread or Google Docs, the first thing to do is to attempt a full copy and paste. If you are lucky (i.e. the written draft in the thread isn't weirdly formatted), it will save you most of the effort required. However, there are a few important things to check.

If in doubt, check how other articles are formatted, and imitate that style. Also refer to our style guide!

  • Spacing - Check that the spacing between paragraphs is sensible. Have one line of spacing between each paragraph and image (much like this post!). Use a hard enter/return (not two 'shift + enter/return' - this can cause problems with headings!)
  • Alignment - Except for special circumstances, text should be in the default left alignment, and images with no alignment. Images gain left or right alignment only if you want a text wrap effect on them.
  • Headings - For main section headings, make sure they are in the 'Heading 1' format. Highlight the title (or replace it by retyping it if it came pre-formatted) and then select 'Heading 1' from the drop-down menu in the formatting options bar directly above the text field (default option is 'Paragraphing'). If the article has sub headings, use Heading 2 for those. Go smaller if there are sub-sub-headings, but there probably shouldn't be three different types of headings in the article in most cases.

    IMPORTANT - WordPress can change more than the selected text into the format you selected, which is annoying. In such cases, the solution is to make sure you have pressed Enter (NOT Shift+Enter) both before and after the text you want to convert. If that fails, delete and retype the heading text and then repeat the Enter trick. Only that segment will now change.

    Spoiler:

  • URLs - Highlight the text you want to become the link (please avoid raw urls in the text itself - this is better than www.pokecommunity.com), and use the Insert/Edit link button (right of the alignment buttons).

    Spoiler:

  • Images - This is important - you need to upload all images. While it isn't bad in the short term if you don't do this step, and certainly saves time, doing it this way will upload the image to Daily and avoid dead images later on, and will also assist with any captioning if required. Note that you will hence need to save all images beforehand to your local folder (that said, afterwards there is no need to keep them yourself).

    Above the main text field is an Add Media button. On the Insert Media tab, upload the image. Upon upload it will appear in Media Library, as will any other image previously uploaded.

    Spoiler:


    When you select the uploaded image you want from Media Library, to the right will be some options including a caption field. Fill that in, and you won't have to worry about formatting any image caption text! Also make sure that the image has 'No alignment' (unless you want to do text wrap). Afterwards hit 'Insert into post' at the bottom right (make sure that beforehand the cursor is where you wanted to put the image in the post!). Rinse and repeat for all images.

    Spoiler:


    You can click on an inserted image to bring up options including editing, for instance if you want to edit the caption.

    If the image is a game screenshot, please do the following: hit edit, scroll down to Advanced Options, and in the Image CSS Class field type in 'screenshot-lodpi' (without the quotes). Afterwards update the image. This is done so that for newer displays (e.g. phones, iPad), or if the image is displayed at 2x its size, it won't blur.

    Credit images that come from another website and isn't, say, a direct screesnhot/screencap of official Pokemon media, with the following code in the caption:
    Code:
    <span class="image-source"><a href="somewhere">Where ever in the world</a></span>

    You can add more text beforehand to make the caption more interesting as well.
  • Videos - In most cases, it's a Youtube video. You can insert the url for the video on a separate line of the article, and it should auto-convert into an embeded video!

    However... if it doesn't convert to a video in the article within a few seconds of being inserted, it hasn't worked. In these cases, from the Add Media button, go to the Insert from URL option and use the video's full url. Then use the Insert into Post button. Make sure that it shows up as a Youtube video (and the right video) in the text field before continuing.

    The same can be done for e.g. Twitter tweets.

    Spoiler:

  • I SURE HOPE YOU'RE REMEMBERING TO SAVE A DRAFT
  • Quotes - for cases when you want to quote something separately (e.g. a section from a developer interview), use the Blockquote button (top row of options, looks like a quotation mark).


The Final Touches

There are a few extra things to do. Firstly, if something below is missing, check that you have the right options. On the very top right of the edit/write post page is a 'Screen Options' tab. Click it to bring down a bunch of options. Make sure that Author, Excerpt, Format, Categories, Tags, Custom Fields and Featured Image are selected. You can minimise this tab by clicking Screen Options again.

The checked 'two column' box is correct even if the article won't be in two columns. Just go with that.

Spoiler:


Author

Below the main text field. This is important! We will create a WordPress account for every lead author. Simply select the correct author from the drop-down menu. Whoever has created the articile draft originally will be the default choice.

For articles written by multiple members, go with "CollaborationArticle" as the account, and give credit to the writers at the end of the article text instead.

Spoiler:


Format

Right of the main text field. This should be ''Standard" pretty much all the time.

Categories

Right of the main text field. Check all relevant boxes here. If required, create a new Category! Only pick one category! Two messes up the forum display of articles.

Tags

Right of the main text field. You can use existing tags as well. Common sense is the order of the day here - don't use too many, don't use irrelevant stuff!

There are special tags:

- featured - makes the article appear at the top of the Daily home page.
- tags that have the article appear at the top of the forum section's news area: sm (Sun/Moon), usum (Ultra Sun/Moon), lgpe (Let's Go P/E), anime (Pokemon Anime), swsh (Sword/Shield), pokemon-go, magikarp-jump, pokemon-duel, shuffle (Spinoffs, deprecated), and masters (Pkmn Masters).

Excerpt

Below the main text field. This should be a short sentence or two describing the article. KISS - Keep it Simple, Sexy Stupid! Jokes are fine as long as it's to the point and not demeaning to anyone/anything, including the author. Ideally these should tell readers what will be in the article, especially if the article title does not.

Spoiler:


Comment Threads

You can make a thread on the forums for the article, and link both together (so a link to the thread appears in the article, and the thread links to the article!). If you want to do this for threads not by yourself however then you'll need a forum staff member to help you, as only forum staff can follow the forum-side steps for other people's threads.

The url for the editor page has an article id number – you'll need this number once you publish the article and go to make a new thread. This is also the same id that appears in the article preview url.
Spoiler:


Write whatever you want in the opening post – at the top of the thread above your post will be the article preview and link. Upon posting the thread (or, alternatively, for any existing threads you want to use instead), click Thread Tools --> Edit Thread in the top right of the first post. Note that if the article isn't by yourself, you should make a post highlighting who the author is in the thread.
Spoiler:


Insert the article id number into the field for it, and then click the tick.
Spoiler:


Now, examine the threadid in the url of the thread. If the format is not like the below image (that is, a number following 't=', but instead a 'p=' [t for thread, p for post]), exit the thread and revisit it, rather than clicking on latest post/any other post, for the threadid.
Spoiler:


Going back to the editor screen, in the Custom Fields section (somewhere below Excerpt), add a new field titled 'threadid', enter said id in the value field, and then click 'Add Custom Field'. Afterwards update the article. A 'Read Comments' button will now appear below the article on Daily.
Spoiler:


You can, if desired, use the following template for the opening post of comment threads (remove all *s however):
Code:
[url="Daily article link"][img]Article cover image here - optional[/img][/url*]

Excerpt goes here.

[url="Daily article link"][class="btn btn-lg btn-success"]Text here[/class*][/url*]

[i]If the article is not written by yourself, Author credit here. Cover image credit here too.[/i*]

Featured/Cover Image

Right of the main text field. Choose a featured image from the Media Library. You will need to upload it first. All feature images should be uploaded as high-quality JPEGs. Unless the image demands pixel-perfection and accurate colors, avoid using PNG where ever possible, particularly with large images.

Spoiler:

The image below is a guide to how you should design your feature images.

Feature images should ideally be 720p or 1080p. The height they appear as in articles is generally capped. Export feature images as JPEGs, as PNG images are usually left alone by WordPress and get pretty big. As a rule, only use PNGs for fine pixel art. As a guideline, try to keep the file size of the image under 100 KB.

Feature article images may be clipped when displayed on Daily or The PokéCommunity. Images may be automatically cropped to fit a certain container, and it's often cropped at a variety of ratios. The yellow "subject zone" defines the area you must try to keep the subject matter in. Images are always centered. At times, the feature image may be cropped vertically to fit the contents of the image, so try to keep the subject of your image within the red "safe zone". Avoid placing additional content outside the subject zone.

Try to avoid placing text in your feature images, as not only does it often get cropped, but at various scales it's actually hard to see. Adding logos are fine, but make sure they're within the subject zone.

If the image was made or edited by someone (e.g. not just a screenshot or official art), credit through the caption. Use the following code (can be also used for images within the article text):
Code:
<span class="image-source"><a href="somewhere">Where ever in the world</a></span>

Examples:
https://www.dropbox.com/s/ofh1a9fy60kt0vr/Screenshot 2016-09-30 22.53.30.png?dl=0
https://www.dropbox.com/s/cu0nw1dgb717ynb/Screenshot 2016-09-30 22.54.25.png?dl=0
https://www.dropbox.com/s/zyty1vu88ozmoc2/Screenshot 2016-09-30 22.55.12.png?dl=0

These are recommendations. At times, it may be hard to adhere — particularly if you're using screenshots or material that you didn't create. That's okay! Sometimes it's the easiest option, and sometimes official art which doesn't necessarily fit is the sensible option, particularly for breaking news articles.

Permalinks

Above the main text field (right below the title text field). We want words rather than numbers; this improves google indexing and the like. This however should be done automatically. If you must do so manually: select edit, and change the last part of the url to something that reflects the article's title. It may use the article title to make one for you as well. For example: https://daily.pokecommunity.com/2015/11/01/first-experiences/

Spoiler:


Extra fancy bits

Here's some code for fancier presentation. This isn't necessary for most articles.

For longer articles, another way to break up the text besides images are pull quotes. This highlights a selected sentence (or two) of your choosing in the article. In the Text tab (next to Visual; right side of the formatting options below the article title field), add in the following at the start of a new paragraph (ideally a paragraph or two below the one containing the sentence you are highlighting!):
Code:
<aside class="pull-quote pull-right">This is the sentence you want to highlight.</aside>

Go with pull-left for quotes on the left hand side. Change it up regularly with pictures, so you don't have a lot of pictures/quotes on the same side in a row. Avoid making the quote too long, and be sure to check how it looks in preview before publishing!

For competitive battling articles, try a table for presentation of sets. Insert these from the Text tab as well. For example:
Code:
<table class="table pokemon-stat-table">
<thead>
<tr>
<td class="pokemon-image" colspan="2"><a href="https://daily.pokecommunity.com/wp-content/uploads/2016/08/lopunny-mega.gif"><img class="alignnone wp-image-3385 size-full" src="https://daily.pokecommunity.com/wp-content/uploads/2016/08/lopunny-mega.gif" alt="Mega Lopunny" width="67" height="88" /></a></td>
</tr>
<tr>
<th class="pokemon-name" colspan="2">
<h2>Lopunny</h2>
</th>
</tr>
</thead>
<tbody>
<tr>
<th>Held Item</th>
<td>Lopunnite</td>
</tr>
<tr>
<th>Ability</th>
<td>Limber</td>
</tr>
<tr>
<th>EVs</th>
<td>252 Atk / 4 Def / 252 Spe</td>
</tr>
<tr>
<th>Nature</th>
<td>Jolly (+Spe, -SAtk)</td>
</tr>
<tr>
<th>Moves</th>
<td>
<ul>
 	<li>Return</li>
 	<li>High Jump Kick</li>
 	<li>Fake Out</li>
 	<li>Power-Up Punch / Ice Punch / Drain Punch</li>
</ul>
</td>
</tr>
</tbody>
</table>
will create a table with a set for Lopunny. Adjust for your own set and Pokemon!

Last Steps

SAVE THE DRAFT

Check that all credits have been done. This includes the author. For additional credit to e.g. other writers, image/information sources, etc, add this information in a paragraph at the end, in italics. List people in alphabetical order.

Check once again that all other fields have been done correctly.

This next part is very important. PREVIEW THE ARTICLE! You can do this from the Publish box to the right of the title text field (the Preview button). This opens a new tab. Give it a good look and see that everything makes sense with information, layout and so forth. Other daily staff may be able to proofread an article if given the preview url as well.

Spoiler:


Once you are satisfied, hit the Publish button (again, to the right of the title text field).

Editing

If you realise there's a mistake, or need to add in additional information, you can edit articles. You can do this from the left sidebar --> Posts --> All Posts (https://daily.pokecommunity.com/wp-admin/edit.php), or visit the article page and from the WordPress bar at the top of the page (while logged in) select 'Edit Post'. If you are not Daily Staff or do not have the right permissions, you can only edit articles you are the lead author for.

Spoiler:


Article Updates

Sometimes, when a small bit of news related to an article comes out (for instance, clarifications from source material, or just an update like any particular event now becoming available) you might want to keep the same article (and comment thread) but add the content to it. This will bump the article in the "Top Stories" or "Recent" and also in the "New from Daily" box. Here's how it's done.

1. Edit the "Published on:" date — set it to the current date (which is in New York time, accounting for Daylight Savings).

Spoiler:


2. Add the suffix "[Updated]" to the article title.

3. Whenever you choose to make an edit to the article, add the following to the top of the article in the text editor tab mode.
Code:
<p class="alert alert-info"><strong>Update</strong>: Update message goes here.</p>

4. At the bottom of the article, in italics after the author credits, also add the original publication date (use the date according to what WordPress lists the publish date as):
Originally published on June 1, 2016

5. Please notify a Daily staffer to redirect the old url to the new one (and make sure you have the original url!). This is done via this page: https://daily.pokecommunity.com/wp-admin/tools.php?page=redirection.php
 
Last edited:

bobandbill

one more time
16,920
Posts
16
Years
Update: a guide on making a comment thread for your article and linking the two together!

The url for the editor page has an article id number – you'll need this number once you publish the article and go to make a new thread. This is also the same id that appears in the article preview url.
Spoiler:


Write whatever you want in the opening post – at the top of the thread above your post will be the article preview and link. Upon posting the thread (or, alternatively, for any existing threads you want to use instead), click Thread Tools --> Edit Thread in the top right of the first post. Note that if the article isn't by yourself, you should make a post highlighting who the author is in the thread.
Spoiler:


Insert the article id number into the field for it, and then click the tick.
Spoiler:


Now, examine the threadid in the url of the thread. If the format is not like the below image (that is, a number following 't=', but instead a 'p=' [t for thread, p for post]), exit the thread and revisit it, rather than clicking on latest post/any other post, for the threadid.
Spoiler:


Going back to the editor screen, in the Custom Fields section (somewhere below Excerpt), add a new field titled 'threadid', enter said id in the value field, and then click 'Add Custom Field'. Afterwards update the article. A 'Read Comments' button will now appear below the article on Daily.
Spoiler:
 
Last edited:
Back
Top