
UPDATE LIST:
-v1.01: Added Yosuke Section
-v1.01: Added Yosuke Section
Persona 4 Arena: The Guide For Beginners!
(v1.01)
Table Of Contents:
(v1.01)
Table Of Contents:
(You'll be able to use CTRL+F here to find what you're looking for. Ain't I nice? <3)
- Introduction
- Terms And Conditions (Yes, I need this)
- Basic Mechanics and Things
- Button Layouts
- Pad or Arcade Stick?
- Priorities and Invincibility
- Hit Confirming
- Using your Persona
- Attacking and Defending
- Status Effects
- Dashing: The dirty little secret
- Recovery (Tech)
- Auto-Combo
- Furious Actions
- Evasive Actions
- Skill Boosting
- Supers
- Awakening
- Instant Kills
- Advanced Mechanics
- Bursting: When, when not, and how
- Once More Canceling
- AOA (All Out Attack)
- Guard Canceling
- Frames Explanation
- Safety and Punish
- Hit/Block Stun
- Okizeme (Wakeup)
- Mix-Up
- Cross-Up
- Zoning
- Other Terms
- In-Depth Character Guides
- Yu Narukami (My Main. BD)
- Yosuke Hanamura
- Chie Satonaka
- Yukiko Amagi (MY WIFE. STAY AWAY.)
- Kanji Tatsumi
- Naoto Shirogane
- Teddie (Kuma!!!)
- Mitsuru Kirijo
- Aigis
- Akihiko Sanada
- Elizabeth
- Labrys
- Shabrys (Shadow Labrys)
- Score Attack Guide
- Strategies and Tips
- Extras
-NOTE: THIS GUIDE IS NOT FULLY COMPLETED. PLEASE, BE PATIENT. I AM WORKING DILIGENTLY ON THIS GUIDE, AND I CAN'T PICK UP AND PLAY EVERY CHARACTER PROFESSIONALLY. THANK YOU. :3
Introduction
Alright, SO. This thread, title, hell, even the pictures speak for
themselves. I REEEAAAALLY love this game, and I feel that a lot of people
should get into it, but that's besides the point. I saw a thread of it, and
seeing how deep I am into the current FGC (I'm REEEAAALLY good at this game,
you know, so this guide won't be a scrubby one!), and how much I love this
game, I figure I should make a guide for you guys so you can all get into the
competitive scene! Or at least be well versed and not get ate alive/see
stupidity on SRK and dustloop. I'll do the best I can, explain what I can,
and if you want to contribute, you are MORE than welcome. I'll be editing
this as I go along, so what I'm posting here will just be little things and
simple template settling, so I won't have to return to it later while I write
the core portions of the guide.
Most of this thread will be filled with User-Generated content based off of knowledge of the game, but for some things that I'm not sure on, I'll most likely have found the info somewhere like...well, you guys, or places like Dustloop/SRK. If you want more advanced information, you can go there, but do be cautious. I haven't heard many good stories about them taking kindly to newcomers as this thread should hope to be, and it'll most likely not include the detail that I'll be giving.....as far as it goes for beginners.
Terms and Conditions
This guide, in the majority of it, is comprised out of my good will and time. You are more than welcome to refer anyone to this, and even use the information gained from this guide in your own should you make one, provided you give credit to it. Just...DON'T try to take credit for this. I wasted hours on this, you know.However, I will not tolerate any debauchery in this thread, and for those who are actually well versed in the FGC, don't come into the thread going "lol, noob" and calling people Casuals. Also, let's try to keep trolling and whatnot to a minimum. FGC/FB is bad, so I REALLY don't feel like having to read it here. I know some of you are out there.......
I won't have it, and I'll make sure that you penalized for it. Be cool with everyone, and I'll be cool with you. Okay? <3
NOW TIME TO GET STARTED
Basic Mechanics
(And other stuff)
(And other stuff)
1. Button Layouts
You should probably try to definitely get this instilled in your head immediately. When I mean this, I don't mean the typical "HURR YOUR L2/LEFT BUTTON SHOULD BE YOUR BURST" (It should be, by the way. L3/R3 for burst and cancels is SO bad, it's not even a joke....), I mean....well, this.
789
456
123
456
123
Look at your D-Pad, and refer to this guide. In this case, your down arrow on the D-Pad is 2. This is the number orientation for the D-Pad (or Fight Sticks if you have one). This is what I'll be using for when I discuss attacks and such from this point on.
Example: A standing Heavy Normal will be called a 5B. For the attacks........
PS3
Square: A
X: B
Triangle: C
Circle: D
360:
X: A
A: B
Y: C
B: D
You are MORE than welcome to change them to whatever makes you more comfortable, and I implore you to attempt to. Play around with the buttons and see what you like. And PLEASE, change your burst and cancel to a Trigger/Button. I use L2 for my burst, and R2 for my Cancel.
2. Pad or Fight Stick?
You know, honestly, this is just a manner of preference. I brought this up because I know a lot of people question the usefulness of a Pad (That's controller for you, since I didn't mention it sooner...), and it's all manner of preference. I'll list some pros and cons, though, and help you make a decision. (XB360 pads are questionable, since some still have that horrible d-pad...)
Pros of a Pad:
-Universal Style (Usually)
-Quick to adapt to
-More affordable than Fight Sticks
-More or less easier/quicker to obtain
-Easier to use, technically speaking
Cons:
-Easy to wear out
-Subject to oddities, such as inputs that you didn't actually do happen
-Doesn't feel as Precise as using a Fight Stick
-In a mass room, connectivity issues
Pros of a fight stick:
-More precise
-Broad range of customization
-Multiple Designs, able to adapt to any playstyle
-Dual Modding, allowing one fight stick to be used on both XB360 and PS3
-Just really damned fun to have, and look good to use
Cons:
-OMFG EXPENSIVE AS SHIIIIIIIIT
-Have to be careful resting your fingers on the buttons, as some of them have sensitive buttons
-Need to get a GOOD (Or at least usable) stick to really be good with them, and good ones will run you close to a bill, and some waaay more than that (I.E SSF4 Tournament Edition Fight Stick)
-Not all that easy to adapt to
So it's really preference. Use whatever you feel, and don't feel bad for not having a fight stick. I play on pad, myself. ;D
3. Priorities and Invincibility
While I don't know the numbers down to a FACT, I'll explain how the system works.
Some moves beat others, because of...well, priority. Pretty much, "This move beats this move because of range, or speed, or hitbox, or this move has invincible frames compared to this move, so it beats it".
For example, a 2B from Yu will nine times out of ten beat a 5B in the Air from Labrys, because....well, it kinda just does. I'll get into that later. ;)
Invincibility is pretty self explanatory. Certain moves gives you small frames of invincibility when you use them. Just about every character has AT LEAST one Super that has invincibility frames. Some regular moves have this, and all Furious (I sometimes say Fierce) Actions have this too. Yu's 2B has some frames of invincibility on startup, for example. It's really good to use these moves as counters when you can, and if you can get a Super off with it, all the better.
4. Hit Confirming
Hit Confirming is the action of using a move on your opponent until you hit them, then going into, say, a combo or something unsafe. You are basically confirming if your attack is going to hit or not. (Feel free to correct me.)
For example, in Street Fighter 4, I'm using Ryu. I use my crouching jabs. If you block them, I can just jab a little more, or block. I'm safe, and you can't punish me unless you REEEAAAALLY wanted to. Proceed to jab until I score a hit, then I Shoryuken(Which isn't safe). Bam, damage. Analogy here is: Use safe stuff until you hit them/open them up for damage.
NEXT TOPIC
5. Using Your Persona
Pretty unique to most fighting games (Though Jojo's Bizarre Adventure uses this system as well, so I guess this borrows from that), is the ability to use your Persona in combat. Your Persona is used for many things, such as Special Moves, Combo Extensions, and more. Your Persona can attack, AND defend for you. (They can negate some attacks at the cost of a break) Shadow Labrys's Persona can even block attacks! HOWEVER...they can also be attacked and broken.
If you look right near the time bar, you'll notice the cards that have the "P" on them. Those tell you how many times your Persona can be hit before suffering from a "Persona Break", and you start with 4. When you're in "Persona Break" state....it's not gonna be good. You can't do certain Supers (The Move List for each character tells you what moves can and cannot be used without Persona, but I'll describe them here in this guide) without them, you can't do certain Special Moves, you won't be able to use your Light and Heavy (C and D) Persona Attacks, some Fierce Actions are restricted, and worst of all, you CANNOT Burst. Some characters are MUCH more dependent on their Persona than others are (I.E: Yukiko Amagi), so be VERY careful. However, if you play someone who isn't that Persona dependent (Such as Akihiko), then you won't have TOO many problems, but you should still be cautious.
6. Attacking and Defending
Pretty much the core of almost any fighting game, Attacking is...well, attacking, as well as defending is defending. But did you know there are multiple WAYS you can attack and defend? O.o
So, when you attack, you have High, Overhead(Mid?), and Low. The core idea behind this is kinda like RPS. High attacks can be blocked while Standing and Crouching, Overhead attacks can only be blocked while Standing, and Low attacks can only be blocked while Crouching. (Furthermore, pressing A+B will perform a sweep, instantly knocking down your opponent) This is where a lot of the mixup game comes in at, which we'll get to in the Advanced Mechanics section.
*Note: When you get hit while trying to attack, it gets counted as a Counter, which does more damage, and lets you do more in a combo. If the attack is a strong enough one, the counter is considered a Fatal Counter, which is better (Or worse, depending on the receiving end) than a regular Counter.
Also, you can also be attacked from behind (No gutter joke intended, guys....) in this game! We call this "Crossup", and it's used as a way to throw you off balance. More specifically, it's the act of attacking you in a way that the attack is considered an attack from behind your back, which means that blocking normally will NOT work. This will ALSO be explained more in the Advanced Mechanics section.
There are also, as in most fighting games, Throws. Throwing is a way to do damage to your opponent if they consistently block you all damned day. You have to be QUITE close to do this, however, so you don't want to make it too obvious. You can also block a throw (!) IF you are quick enough to input another throw command while they throw you.
*Note: One thing to include here is the Negative Penalty. If you play too defensively and don't get in your opponent's face, you will suffer a Negative Penalty, and you will take more damage. So do yourself a favor and get up in dat face!
7. Status Effects
ANOTHER little unique tidbit to this game is the Status Effect system. Some moves inflict Status Effects, causing abnormalities in your character, making you unable to move, poisoning you, reversing your left and right, and even making you unable to block! Here's a list of the possible Status Effects.
Shock: You won't be able to move. You can still Block, Evasive Action, Furious Action, Attack, pretty much everything BUT walk.
Poison: Your health will gradually decrease at a fixed rate.
Charm: Your opponent will leech you of your SP. Sharing is caring, you know~
Fear: Every attack will be counted as a Fatal Counter. Ooooooohhh~......
Panic: Your left and right get reversed. STOP PANICKING, GOD.
Rage: You can't block. RAGE RAGE RAGE AHSFBUISHJAAAAAAAAAAAAAA
Mute: ........ (Silence for: You can't use your Persona, or do anything Persona related.)
Freeze: You can't do ANYTHING at ALL. Moving left and right speeds up recovery, though. Hope you got some Ice Heals!
Most of these status effects can be healed simply by scoring a hit on your opponent, except for Rage, which takes a little time, and obviously Freeze, since you can't do anything at all.
8. Dashing, and the Pros/Cons of it. (There's CONS to DASHING?!)
This title is NOT misleading. Anyway, dashing/running is simply a quicker way to get close to your opponent. Some characters have a slower dashing speed than others, and some are faster than others. (Yosuke being the fastest bastard in the game is a prime example of this.)
Dashing allows you to close distance, and if you're REEEAAALLLY quick enough, you can use it to get closer in while in the middle of a combo to keep yourself close, allowing more combo time. You can also backdash, evading some moves, and getting distance on your opponent. However, recklessly dashing WILL hurt you, as it does in most games. You'll be unable to block during the beginning of a dash, so be careful. ALSO, you are vulnerable to damage at the beginning of a jump, so DO try to play defensively instead of mindlessly jumping away. <3
9. Recovery (Technicals)
A Tech is a sort of evasive move that can be done after you are knocked to the ground by your opponent (Well, when you are done being combo'd anyway...) to get you back on your feet quicker. When you are knocked down, hold any attack button to perform a Tech, and you will get back on your feet faster than you can say Izanagi-No-Okami. You will also be invincible while performing a Tech.
You can ALSO perform a Tech while in the air. Same rules apply, except you can tech in any direction while in the air. Except for straight up, but...
You can Tech left, tech right, or just do a neutral Tech whilst in the air. It's typically good to usually Tech every chance you get, but sometimes, you can escape some things by timing your Techs right. We'll get to that later on in the character guides.
10. Auto-Comboing! HUZZAAAAAH
Simple enough here. Mashing your A will let you Auto-Combo, a simple one, but a combo nonetheless. Think a scrubbed down Stylish Mode on BlazBlue games. Auto-Comboing is okay when starting out, but after that...yeah, stray from it. Some auto-combos build up meter, but most of them always lead into a Super, and they take away health. So if you REALLY want to use this, I suggest doing it until you get that big meter boost, then just leaving it alone. But it's okay for beginners, I suppose. SOME of these however, are staple combos, and branch out to staple combos, so for THOSE cases, AUTO-COMBO LIKE HELL
11. Furious Actions. FINNA GET FIERCE UP IN HEAA
GET YOUR BLOOD READY, IT'S FINNA GET FURIOUS-Er, anyway...
Furious Actions (I call them Fierce Actions, but from this point on, we'll call it DP (Like DPs in Street Figher) or FA for the sake of orientation), are special attacks/skills that each character has, and they're quite unique. Some characters do attacks that have special properties, counters, and Yukiko's DP allows her to heal HP!
These all have invincibility (Well, on startup), and have something special about them, which will be explained in-depth in everyone's character guide.
*Note: ALL Furious Actions cost you a small bit of HP.
12. Evasive Actions (inb4Double Team/Smokescreen Jokes)
Evasive Actions, something ALSO kinda unique to this game. With the click of a button, you can do a special dash, rendering yourself invincible to some attacks for a slight moment, and you can use it to get behind your opponent (as opposed to jumping over them). You can also do a Short Hop by holding down on your pad while doing it, evading some other attacks. It doesn't prevent throws, or certain supers though, so be careful. Doing this in the air turns your character around, meaning that you HAVE to do this if you jump over your opponent to face them again. Kinda techy, but VERY awesome imo. If you're fast, you can do 360's in the air! WHEEEEEEE~~
13. Skill Boosting
Skill Boosting is basically similar to the EX Special Move system in Street Fighter 4, or BlazBlue. By pressing both of the attack buttons associated with said special move (In this case, for Yukiko's Agi Special Attack, by pressing the command plus C and D at the same time, the skill will be boosted, doing something a little extra special. Some moves are faster, make you more safe, have extra range, do more hits, or something of the sort. Using these cost you 25 SP, which will be called meter from now on.
14. Super Combos (NO KILLER INSTINCT JOKES HERE GUISE. SORRY. :D)
Super Combos (Which will now be called Supers) are GREAT ways to inflict some SERIOUS damage. Each character has at LEAST 2 Supers, and they all do something special. Hell, some Supers give you buffs or even HEAL you! Supers are usually used in combos, due to the difficulty in getting them to land, but some are VERY good as Counter Attacks, such as Yu's Cross Slash. If you can hit with them, definitely try to do so. But...don't ever just throw them out. Also, some Supers can only be done when in Awakening state, which will be explained next. Using Supers will cost you 50 meter. USUALLY....
Everyone's Super will be explained in detail in the Character Guide section.
15. Awakening. WHICH MEANS WAKE YO' ASS UP
No but seriously.
Awakening state activates when your health drops below 40%. (Or 35%, I'll remember it later on for you guys)
When Awakened, your SP can hit a monstrous maximum of 150, and on top of that, you are given 50 SP upon being Awakened. When Awakened, you can also perform Awakened Skills, which are very powerful Supers. You'll know when you hit the Awakened state when your SP bar turns red, and your character's face pops up on the screen. THIS IS BASICALLY CLUTCH MODE, SO MAKE IT COUNT!
16. Instant Kills
I don't think I need to explain these here, but I will.
Insta-Kills are what they say, pretty much. They're impractical as ****(Except for maybe Yukiko and Naoto and others), but they are VERY flashy and cool. I wouldn't recommend using them, though. They are unsafe as hell, and can be blocked. Some cannot be blocked though, however, such as Kanji, Akihiko, and Naoto.
NOW ON TO THE ADVANCED STUFF!
Advanced Mechanics
1. Bursting: When, When Not, and How
Bursting, as some of you BlazBlue players know, is a Defensive, and sometimes Offensive mechanism, used to get you out of a combo, or extend combos as a cancel. Bursting is done by pressing one of your trigger buttons(You DID CHANGE THOSE, right?), or if you DIDN'T change those, the A+C+D buttons. Bursting has lots of uses, so let's get down to explaining them.
Reversal Bursting is a Burst that gets you out of a combo, or start of a combo, that you feel could be potentially dangerous. It's usually smart to Burst at the beginning few hits of the combo. You can only Burst once per match (USUALLY), as indicated by your Burst Gauge. When you Burst, the Burst Gauge will go back to being a plain ol' B. Getting hit/Giving hits refills the Burst Gauge. Be careful though, if you do a bad Burst, such as bursting at the end of a combo, or bursting while your opponent is on the ground and you're waaaay in the air, you'll wiff, and you CANNOT do ANYTHING when your Burst wiffs. We call this a "California Burst".
Max Bursting is simple. If you perform a Burst while not being attacked, and it hits your opponent, your entire SP gauge will be refilled, giving you some meter to burn. If you miss, you only lose half of your Burst Gauge, and it's not as unsafe as wiffing a Reversal Burst. Use it sparingly though.
There is also Once More Bursting, which allows you to Burst in the middle of a combo, allowing you to extend your combo and do more damage. These combos can really inflict some serious damage, so try to get these off if you feel you won't need your Burst later!
2. Once More Canceling
Once More Canceling is Persona's version of a Rapid Cancel, or Focus Cancel, or *Insert similar system here*. By pressing one of the triggers/buttons (SERIOUSLY, CHANGE THEM, PLEASE), or A+B+C while attacking, you can cancel your current attack animation and go into blocking, dashing, backdashing, pretty much whatever you want. HOWEVER, you cannot Once More Cancel certain attacks (Explained in Character Guide), or on wiff. You can only Cancel on Block, or on Hit. Using a Cancel after using an unsafe move is a good idea, because then you become safe again, and using them after a combo string that was blocked can keep pressure on your opponent. You can also use these cancels to extend combos, which can do some serious damage! Using these cost you 50 meter however, so try to be careful about using these.
3. AOA (All-Out Attack)
All-Out Attacks are executed by pressing A+B at the same time while standing stilll.
AOAs are overhead attacks that cannot be blocked while crouching, and do something pretty familiar to Persona fans. XD
When doing this, mash A and B like you're playing DBZ! Pressing C at the end of an AOA (Or whenever you want to launch, but you should do it at the end, which is on the 15th hit, because it makes it a Fatal Counter) will launch your opponent into the air, and pressing D at the end of it will knock your opponent back. If close enough to the corner, it will have wall bouncing properties. Be careful though, these attacks are sorta unsafe on wiff, but they can be combo'd into. HOWEVER, these moves DO have Armor properties, which make you invincible to certain attacks for a little bit.
4. Guard Canceling
Guard Cancelling is another alternative to Bursting. While blocking, press forward toward your opponent and hit A+B. This really should have been in Basic Mechanics, but NO one seems to use this.....but it's good, because it gets you out of heavy combo strings that might be pressuring you. Costs 50 meter.
5. Frames Explanation
Frames are...sorta tough to grasp, but I'll explain them as best I can.
So basically, each moves require an amount of frames to fully animate/execute. This is basically meaning how many frames you are vulnerable for.
For example, say Aigis's 2B leaves her open for...mmm, 14 frames or something like that. It's not as safe as doing a move that only leaves her open for 6 frames. It's a complicated system, but you'll figure them out as you go along. It's just a fancy way of comparing safety values of each move, imo. I Don't really do frame data too much, since I just learn what's safe and not safe as I play. Frame Data is more of a SF/KoF thing, but having this knowledge can help you.
6. Safety and Punish
Being Safe, and being Punished. Two relatively simple terms in the FGC. Let's get to it.
Being "Safe" perse doesn't necessarily mean that you block and you're safe because of it. Being Safe means that you can say, do a certain attack, and be safe after doing said attack. If I do a 2A with Yu while I'm deadass in your face and you block, I'll most likely be safe, compared to me doing a FA and you block it. I'll get punished for it.
Punish is self-explanatory. If you do a move that would leave you open because you did it, and I blocked/evaded it, I'll respond with my own attack to damage you. That's basically a punish.
7. Hit/Block Stun
Now we're getting into the waters of the FGC! (See what I did there? COME ON, IT WAS GOOD!)
Hitstun, and Blockstun. Let's keep it short and sweet.
So, generally speaking, hitstun is the case of when you're hit with something, it takes some time for you to recover from the hit. If you get hit with an attack, you'll be stunned for a short bit, and this is where combos mostly come from. Some attacks stun longer than others do obviously. Blockstun is a little more complicated, only because it affects the safety of the opponent and things like that.
When you block an attack, you can't just go "HURRINSTANTCOUNTER". right after it. You have to recover from the stun of the move. So, some things you think might be punishable might NOT be, because of the blockstun the move gives you, like Labrys's in-air Axe Special move. It has MASSIVE blockstun.
(Don't know the name of it, didn't have booklet on me at the time. Remind me to fix this. xD)
8. Okizeme (Also Called Wakeup)
OH MAN. Oki. This is like, my entire gameplan.
Okizeme, or Wakeup, is basically the act of attacking your opponent while they're waking up from a knockdown, giving you, shall I say, either some freedom as to not worry about response, or setups. (Think jumping and attacking your opponent before they get up in Street Fighter) Certain characters do it better than others, and is a GREAT way to establish mixup/crossup game.
So, for example, I go into a simple combo, then I use sweep, then I go into Yu's 5D attack. Yu's 5D hits you while you're on the ground, and while you're standing. Because of the way Izanagi slides on the ground, it also pushes you back a bit. You either have no choice but to block, attempt an Evasive Action, or MAYBE Special/Super/Furious Action my persona away, in which I can move in, and punish you, and lead back into Oki game.
Okizeme can be VERY dangerous in the right hands, so the best way to defend against it is to learn what characters are dangerous with it, and practice your blocking abilities.
9. Mix-Up
Ahhh, Mix-Ups.
Mix-Up is, in simple terms, the act of using high and low attacks to mix up your opponent's guard, causing you to open them up for a damaging combo. I'll use a slight combo string here (Using Yu as my character reference) as an example. Assuming I'm facing the right.....(As in, I'm on the left side of the screen)
5D, 2B, 5D, 214A, 2A, 5C, 2B, 5B, 5C, 2B, 5B, 2AB.
So, this is somewhat of a staple combo. 5D in this case starts off as a lower, goes high, and my 2B jabs low. So you have to block low, high (5D hits multiple times), low, then back high again because of Raging Lion (214A) being an Overhead, THEN block low again, then block high. However, I could make this string shorter, going into a 2A, 5C, 2B, 5B, 214C. Then you have to block low, high, high, high, low. OR, I could add a throw into the midst of the combo, forcing you to guess if I'm going to perform a throw after a combo string! Things like this are mix-ups. All characters have the potential to do some mix-ups, so experiment with your main and find them out! (I'll post some staple combos for every character here, but not too many.)
10. Cross-Up
The counterpart to Mix-Up, Cross-Up is the act of attacking your opponent in a way where the attack is hard for you to tell if you should be blocking left or right.
In SF, let's say I knocked you down. Using Ryu as my example, here.
So, I knocked you down with a sweep or something. I jump over you, and do a jumping middle kick JUUUST right, so I hit you, but still jump over you.
Because the attack is considered coming from the right side, you'd have to block left, even though I'm technically still on the left side of the screen during the midst of the attack. Crazy, right!?
Cross-Ups are a GREAT way to open up your opponents defense, so whenever you can get these tools out, you should definitely abuse them.
11. Zoning
Zoning is the act of keeping your opponent in a position where you can punish your opponent from any angle, or react in time when your opponent does something to close distance, or something of the sort. We can also use this term as a way to say "You're out, and I'm going to keep you out/away from me". Something like Spacing.
Watch a Professional Ryu player in a match. That's how Zoning is done. xD
12. Other Terms
There are so many terms I could talk about, I wouldn't know where to start. There is a wiki link here that has an explanation of all the other ones, but some of them don't apply to this game. Use it if you want, or ignore it. It's up to you. Some of it is a fun read though, and somewhat accurate.
ALRIGHT, NOW WE'RE DONE HERE. TIME TO GET TO THE JUICY BITS!
In-Depth Character Guides
This whole part will be dedicated to introducing you to the characters, telling you of their strengths and weaknesses, their moves, all types of things. This part will get regularly updated, since I have to play with everyone to get familiar with them. THIS IS WHERE THE CONTRIBUTING PART COMES IN EVERYONE! ^_^Alright, let's get started!
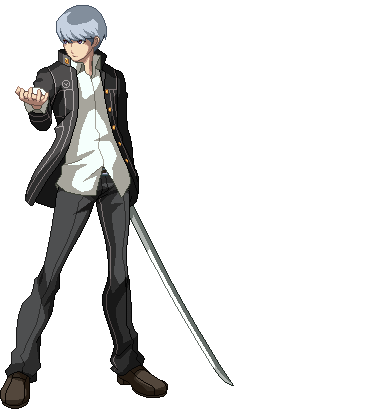
Yu Narukami
The Sister-Complex Kingpin Of Steel
The Sister-Complex Kingpin Of Steel
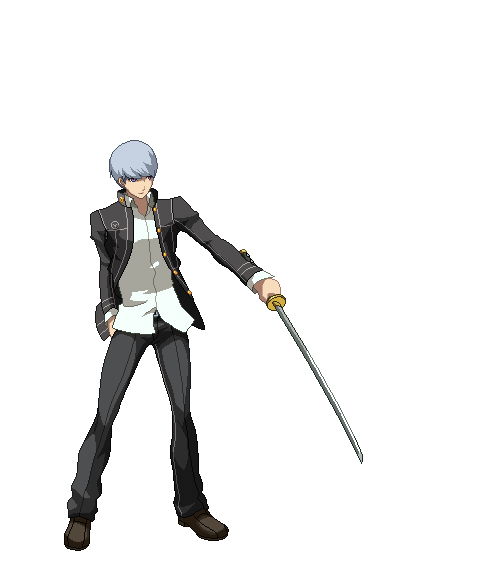
"It's only natural."
MY MAIN FKN CHARACTER.
Yu Narukami is one of the best characters in the game, imo. He has a good health value, sitting at 9500, pretty quick, great range, great tools for punishment, a projectile for zoning enemies out(And for inflicting Shock), very good Persona attacks, amazing pressure, good rushdown and an excellent Okizeme. They even gave him a dive kick. (XD) He's also not that reliant on his Persona. Plus, his AOA is very good, due to the range it has, and the limited aerial coverage it has. Couple that with one of the best Anti-Air tools, and you've got P4U's very own Ryu.
But all these tools make Yu the proverbial Jack. Good at multiple things, master at none of them. He has good Persona attacks, but his Supers all require his Persona, and his in air D attack leaves something to be desired, only being situationally useful, or on setups. He has a good projectile, but it's not like he can spam it, and it's easy to jump over, lacking the appeal of Zoning Characters like Yukiko, Naoto, and to a slight extent, Elizabeth. He has a good Anti-Air, but it's not the BEST, because of the more-to-be-desired recovery time. He has a good Projectile Super also, but by itself, the damage isn't really something you want to waste 50 meter on. He can rushdown, but he's no Chie or Ahihiko.
However, should you take on the flag of Yurope, you had best be prepared. Yu Narukami is a VERY excellent character, and one mistake can cost you a fourth of your health bar. He is just like Ryu. Easy to pick up and play, but a lifetime to master.
Special Moves:
- Raging Lion: 214A or B
- Swift Strike: 214C or D
- Zio: 236C or D
- Cross Slash: 214214C or D (Can only be used when Awakened)
- Ziodyne: 236236C or D
Spoiler:
Well, might as well get down to business. Things that you should keep in mind about Yu, is that he has VERY good range for a melee character. As such, he is good when it comes to punishing and hit confirming. His 5B is very good at scoring some hits at a distance, and if you happen to hit with it while at the farthest distance possible, you can still land a 214C to close distance and still do damage.
For Anti-Air, his 2B is VERY VERY VERY good, outprioritizing a LOT of things, and you can insta-air combo if you hit someone with this while they're in the air. For Air Combos, you're just fine with a 5B (It hits twice, but you can be safe and just 5B twice instantly), 5B, jump, 5B, 5C, 214A. 214B can be used if you're in the corner, or if you're hitting them off of a fatal counter. Just don't wiff, or you WILL get punished for it, because it has quite the recovery.
His 2C Persona attack is REALLY good, and it took me a while to actually get around to appreciating it. If you get a counter off of this, it becomes a Fatal, scoring you a nice 1100-1200. In the corner, you can go into all sorts of combos. It's kinda slow on startup though, so be careful about using it.
His 5C is really just a combo extender, but it has good uses. It has some range, is quick, and just plain useful. Pretty much the same in the air, too.
The 5D that he carries is really good, having all types of uses. It has some range, can force your opponent to block, jump, or attack Izanagi, leaving them open. After the first scooping motion, press 5D again to have Izanagi swipe down. The air 5D however...is....well, it's good for setups, but otherwise, I recommend not using it casually.
Yu's Sweep is one of the best, having very good range, and is relatively quick enough. I BELIEVE even if you wiff, it can still hit if they decide to run in while you're still in animation. Also, it can hit behind you. It's gimmicky, but it works. :D
The Auto-Combo for Yu isn't that great though, so you'd be better off using something more staple, like 5A, 5C, 2B, 5B, 5C, 2AB. Something along those lines.
Raging Lion serves as an Overhead attack, and has some small Anti-Air utility. A version is faster and has less recovery time, and doesn't knock down. B version takes longer, but has ground bounce, and is stronger.
Swift Strike (Or the Izanagimobile) is a distance closer, and a good combo finisher. It avoids most, if not all projectiles, and evades some high attacks. C version is quicker, less recovery time, and is more combo friendly. D version is less combo friendly, but has more distance, and does more hits+damage.
Zio serves as his projectile, and is pretty good. C version is just like a fireball, and is quicker. D version is sort of like a...well, idk how to explain it, but it's more melee electric fist than it is fireball. It also has Fatal Counter properties. His skill boosted Raging Lion is faster, and has less recovery time. His boosted Swift Strike goes almost all the way to the other side of the screen, and does more hits and damage. Boosted Zio does 2 hits, and inflicts shock if it hits.
Yu's FA, Big Gamble, is sorta just like a Shoryuken. Good height, but not that range like. Does 2 hits if started on the ground, and the first hit is air unblockable if you did it while on the ground. It can also serve as a combo finisher, but it's not as good as a Raging Lion would be.
Now, for advanced Yu things.....
Yu has AMAZING Okizeme game. Like, omg. If he sweeps you, it's go time.
So, your objective here is to basically get a sweep, or a combo that ends with a sweep, and then go into your 5D. After that, go in for pressure. Mix it up like me when I mix my Kool-Aid.
(I'm Black, I had to. Okay? XD)
From here, you can go into lows to open your opponent, go into a AOA, and if your opponent blocks it, you can still have a 5D in reserve to keep your opponent in block stun, keeping you safe.
Air combos with Yu are really good. Either you can AOA into an air combo, or catch a 2B on someone who is jumping in. From here, you can go into 5B, 5B, jump, 5B, 5C, Raging Lion A. In corner, you can extend this using the same moves.
For some more combos (As the ones I want to get into detail about are NOT entry level, and videos are more useful), check out this Japanese Combo Video!
Spoiler:
Yu Synopsis:
- Beginner Friendly, Expert Dangerous
- Very well-balanced fighter, with tools for any situation
- Not best at anything, but good enough for everything
- Is not supremely Persona dependent
- Does require some skill to play competitively, because of him not being best at everything
- One of the best Anti-Air tools in the game
- No supremely glaring weaknesses
- OKIZEME OKIZEME OKIZEME
Captain Ressentiment
Yosuke Hanamura
Yosuke Hanamura
"Hey, this joke isn't funny anymore!"
Yosuke is, by far, without question, the fastest SOB in the game. He's VERY fast, has lots of mobility, and his Mixups/Cross-Ups are really good. His regular throw/air throw inflicts Poison, and his Tentarafoo is good, inflicting Panic, and can be used in combos, AND it's Unblockable. Moonsault is just free damage if you connect with it, and in conjunction with Mirage Slash, can really trick the opponent, and train them into expecting another SaultSlash/Mirage Slash. Yosuke also has one of the best DPs, countering....well, almost EVERYTHING. I think it counters literally ANYTHING. Plus, it taunts! He also has very good blockstrings coming from his 5B attack, capable of good frametraps, and it's plus on block, making it very dangerous. His buff, Sukukaja, speeds him up to an absurd....hell, I don't think there's a count for how fast he gets. And he has a very good 2B as an Anti-Air, which is Air-Unblockable, and has beasty hitbox. It can even be jump cancelled on block! But imo, not as good as Yu's, since it's not as safe on block if you don't jump cancel it.
However, not is all excellent for the Windy Speedster. His health is pretty low, capping at 8300, which is pretty bad. Also, you DO have to be sorta quick with the guy, since....you know, his health being low, and him being fast. His normals don't really inflict that much damage, either. (Althogh damage doesn't technically matter, it CAN have an impact on a KO or you BEING KOed.) His AOA is weird also, because it's not like Yosuke has the best Oki game, so he can't just throw it while in the midst of a combo like Yu/Chie/Akihiko can, and the AOA itself is sorta odd. Also, is it just me, or is his range somewhat questionable? Sure, it's not Akihiko bad, but....hmm.
But this is just me being picky, and not knowing Yosuke that well from a con making perspective. Yosuke is still a good character, albeit overlooked. He's fast, has great offense, good attacks, and if you let him, he will turn your inside defense into a wind sport. Captain Ressentiment will get bored of you pretty fast, and just like he says, everything that bores him has gotta go.
Special Moves:
- Dash Spring: 236A or B
- Flying Kunai: 236C or D, 214 C or D (Only in air, can be thrown in the opposite direction, even if not facing that direction)
- Moonsault: 236A or B, 214 A or B (Same as Kunai)
- Crescent Slash: A or B during Moonsault
- Mirage Slash: 2C or D (Only in air, requires at least one air action (I.E Moonsault, etc))
- Tentarafoo: 236C or D
Supers:
- Garudyne: 236236C or D (Can also be used in the Air)
- Sukukaja: 214214C or D (Can only be used when Awakened, makes him faster, beginning of Dash is nigh-invisible, changes the properties of some moves)
Spoiler:
Brosuke Awesomura. This man has an appropriate moniker. The man is fast, and boy, does he take speed to an extreme. He has the fastest Walk speed, fastest run speed, everything. You name it, he outspeeds it.
Now, something cool that Yosuke has is this little thing called Gliding. What you do is airdash, cancel the dash into j.2B (Jumping 2B, since Air 2B took too much typing time), and then cancel into A+C. This little technique can REALLY cause some scary mixups, and are hard to react to, provided you do it right. This is a staple, so you should probably get it down, as it's his biggest mobility tool on deck.
His DP is amazing, because it DOES counter just about ANYTHING. As a result, you get a crisp little chip of damage, and, more importantly, the opponent lands right at your feet. You can use this oppurnity to start setting up. His 5A is VERY fast too, so if some loose blockstrings are pinning you down, give a 5A a shot, you just might get out of it. And if you have some annoying flies flying around, do toss out that 2B. It'll give them a nice taste of a Kunai-Swatter. His 2C, from what I've experimented with, is decent, and has Fatal properties. His 5D can also be used as a mini-oki, and is good for Persona Combos. The jumping version doesn't have the combo property, but it goes fullscreen, so you can do some things with it, like space out a little, and catch some backdashers. His 5B is a pretty utility like, since it does everything good enough. Safe on block, good entry tool, good in blockstrings, you name it. In conjunction with 5A and 2A, it's godlike. For more closers, your EX Dash Spring goes just about to Africa, throws out the middle finger to projectiles, and, on counter, can do at least 2K on hit.
Dash Spring is good for combo extensions, and A version is pretty fast. B version causes ground bounce, almost fullscreening. Flying Kunai shoots your opponent in the air, and can you can airdash right after all 3 versions. C throws it at a 70 Degree angle, D throws it at 55, and same with SB. D throws you higher in the air than C does, and SB throws you farther than both. Moonsault A tosses you more into the air, B tosses you more across the screen, and SB goes into auto-crescent slash, but according to Dust, doesn't have any horizontal (Left Right) movement. Mirage Slash C is shorter, but faster. D is more ranged, but takes a little longer. SB stops you where you landed. Tentarafoo C is shorter range, but quicker, I believe. D is the opposite. SB tracks opponent. I'll add more as I get more knowledge on him.
Yosuke Synopsis:
- Fastest dood in the game
- Has good entry tools, and great mixup/crossup capability
- Unblockable Confusion Tool, and a Poison normal throw
- Yucky health, requiring some carefulness, which is odd considering his playstyle of Rushing
- Questionable Range, but not so bad, seeing his speed
- AOA? YOSUKE, WAT R U DOIN'
-Here, have a combo video until I get the orientations going!
Spoiler:
*Note: (Props to my boy Kaimon for kicking in a couple of tips extra!)
- Try using 5A, JA/B, J.C and 5B for getting in/keeping pressure
- 5D and Kunai are good spacing tools as well
- You can also "Persona Combo" after the 2nd "D" input
The Carnivore Who Has Discarded Womanhood
Chie Satonaka
Chie Satonaka

"FSTEAAAAAAAAAAK"
-Chie is coming up next, guys. Be patient with me!To-Do List...
- Score Attack Guide
- In-Depth Character Section Completion
- List of Combos
-If you have ANYTHING you would like to contribute, please, by all means, shoot me a PM. I'll be more than happy to accredit you for your suggestion, should it be usable.
Last edited: