• Our software update is now concluded. You will need to reset your password to log in. In order to do this, you will have to click "Log in" in the top right corner and then "Forgot your password?".
  • Welcome to PokéCommunity! Register now and join one of the best fan communities on the 'net to talk Pokémon and more! We are not affiliated with The Pokémon Company or Nintendo.

[Game Journal] Crawling through games

24,633
Posts
3
Years
  • Age 35
  • Seen today
Fire Emblem Fates: Revelation​

Played Birthright and Conquest a few years ago. Liked them mechanically-speaking. Improved on some of Awakening's features, like pair-up and children. Dropped the ball on story and sometimes map design.

Heard about Revelation not being great. Wanted the complete experience, though. Held off for a sale...for several years. Never happened. Pulled the trigger with the 3DS E-shop going down soon.

Played on Hard/Casual. Chose a +Skill / -Magic Corrin with a Samurai talent. Worked fairly well in one run. Yields a much stronger growth rate in Skill (+25%) for triggering skills and a solid hit rate, plus a small amount of Strength. Dropped Magic for being the most useless. Selected Samurai mainly for Swordfaire.

Thoroughly enjoyed the first few chapters. Beat them in the other routes before. Simply felt refreshing to jump from chapter to chapter without fiddling with base stuff. Promptly ruined that by beating every "challenge" map available. Whoops. Fuels the desire for a minimal grind run of Three Houses later, if nothing else.

Realized two problems with this route quickly:
1. Sticks you with Corrin, Felicia, Azura and Gunter for a while. Planned to keep Corrin and maybe Felicia. (Spoiler: Dropped Felicia. Sorry, Tomebreaker.) Finished Chapters 6, 7, and 8 with largely just them. Kept an eye out for planned team members. Added Kaze and Sakura at the end of Chapter 8. Waited until the end of 12 for Beruka. Flooded in after that: Elise + Effie at the start of 14, Silas at the end of 14, three in 16, and Leo in Chapter 17.

2. Heavily varying recruitment levels. Gives you Effie at level 8 in Chapter 14. Picks up Silas at level 18 at the end of that same chapter (a few levels under Corrin the level leader...probably). Gifts you with Shura at level 10 in a promoted class in Chapter 15. Why is there, essentially, a 22 recruit level difference in a game with a normal level cap of 40? (Increases that with seals, but shh. Costs a fortune.)

Planned the team out beforehand for children and skill inheiritance. Mixed Hoshido and Nohr characters for interesting combinations of skills (such as combining both healer classes on Forrest). Forgot about one problem: not being able to marry everyone with anyone. Grew too accustomed to Three Houses. Flipped around pairings to make it work. Resulted in more Hoshido/Hoshido and Nohr/Nohr pairings. Oh well. Accepts fault on that one.

Encountered one nice surprise: new maps in Revelation. Rehashed the same maps between Conquest and Birthright. Figured the same. (Still recycled several maps.)

Reports no particularly interesting new maps. Prepared to hate a certain snow map. Blanketed a town in snow. Digs out a small section by attacking it. Uncovers enemy units with droppable items. Becomes tedious, certainly, but not as annoying as the Wind Tribe map (also in Revelation) or the kitsune level in Conquest.

Neither loved nor hated the story. Stumbled across spoilers about the betrayal and identities of the shadowy Vallites from playing Fire Emblem Heroes. Likely lost some of their impact. Criticizes more pointless plot deaths. Seriously chooses male Corrin to not deal with female Corrin's screeches after deaths.

Completed the game without too many issues. Trashed Anankos pretty hard. Demolished every part except the final piece (2 hitpoints left) in one combat each. Likens the game to Birthright far more than Conquest in terms of gameplay. Dealt with relatively few map gimmicks. Leans very hard on Corrin throughout the whole game. Recorded stats.

Spoiler: MVP and Victories Stats

MVP Appearances by Amount
1. Corrin (23)
2. Kaze (9)
3. Felicia, Hinoka (7)
5. Effie (6)
6. Beruka (5)
7. Elise, Mitama, Midori, Silas, Sakura (2)
12. Forrest, Leo, Rinkah (1)

MVP Appearances by Map
2: Corrin + Felicia
3: Corrin + Felicia
4: Corrin + Rinkah
5: Kaze + Sakura
6: Corrin + Felicia
7: Corrin + Felicia
8: Corrin + Felicia
9: Corrin + Felicia
10: Corrin + Kaze
11: Corrin + Felicia
12: Corrin + Kaze
13: Kaze + Beruka
14: Corrin + Effie
15: Corrin + Effie
16: Silas + Hinoka
17: Corrin + Hinoka
Paralogue 1: Sakura + Leo
Invasion 1: Kaze + Beruka
18: Kaze + Beruka
Para 16: Corrin + Effie
Para 6: Corrin + Elise
19: Corrin + Hinoka
Para 5: Corrin + Hinoka
Para 12: Corrin + Elise
Para 2: Kaze + Beruka
20: Corrin + Mitama
Invasion 2: Midori + Forrest
21: Hinoka + Mitama
22: Silas + Hinoka
23: Kaze + Beruka
24: Kaze + Hinoka
25: Corrin + Effie
26: Corrin + Midori
27: Corrin + Effie
Endgame: Corrin + Effie

Look at all those Corrins. Appears in 23 of 35 possible maps (65.7%).

Battles/Victories by character
Jakob: 0/0
Hayato: 0/0
Kagero: 0/0
Arthur: 0/0
Odin: 0/0
Niles: 0/0
Nyx: 0/0
Camilla: 0/0
Selena: 0/0
Peri: 0/0
Benny: 0/0
Charlotte: 0/0
Fuga: 0/0
Mozu: 0/0
Hana: 1/0
Setsuna: 1/1
Scarlet: 1/1
Saizo: 2/1
Orochi: 2/1
Oboro: 2/1
Laslow: 2/1
Kaden: 4/1
Shura: 4/1
Rinkah: 6/1
Azura: 7/1
Subaki: 8/1
Reina: 2/2
Hinata: 4/2
Xander: 4/3
Keaton: 8/4
Gunter: 10/5
Takumi: 14/5
Ryoma: 6/6
Felicia: 108/48
Leo: 45/36 + Sakura: 95/57
Sophie: 94/67
Kana: 94/68
Mitama: 114/83
Azama: 21/11 + Hinoka: 182/110
Forrest: 78/54 + Midori: 128/78
Silas: 186/91 + Elise: 123/114
Kaze: 290/213 + Beruka: 290/161
Corrin: 421/244 + Effie: 240/105

Somehow managed the same number of combats on Kaze and Beruka. Wonders if Kaze's 213 is correct. Wrote all of these down quickly. Shrugs. Recruited Kaze earlier than most. Countered casters for quite a while. Capped Strength before promoting.


Credits all the challenge maps for the battles and victories. (Spent a load of cash on Heart Seals for skills.) Notes a commanding number of both battles and victories for Corrin. Tends to happen, though. Won the top spot in every other Fates playthrough except the very first (Birthright, 4th place behind Hinoka, Silas, and Setsuna).

Verdict: An okay version of Fates. Holds a similar niche as Birthright on low impact map design (for better or worse). Allows more options of skill combinations, weapons, and character choice than Birthright. Comes at the cost of later recruitment and levels all over the place. Views it like a sidegrade, or perhaps a slight upgrade, of Birthright.
 
24,633
Posts
3
Years
  • Age 35
  • Seen today
Knights of the Old Republic​

Elected to play Knights of the Old Republic (KoToR 1) for the month's theme of Choices. Cleared this game once before. Invested more time into the second game by a considerable margin. Seemed time to revisit the original.

Was greeted by technical issues. Displayed a black screen upon loading. Heard game sounds while moving the mouse. Assumed a graphical error. Snapped into a correct state by alt-tabbing in and out.

Brought another graphics issue to mind. Crashed reliably in the Undercity the first time. Discovered the cause to be the computer's "graphics card". Places that in quotes due to being an integrated graphics chipset. Fixed it by doing...something. (Probably changed two lines in a text document.) Transferred everything over to a new laptop since then. Should be good, right?

Back to the actual game. Chose a melee-focused, Light Side character last time. Wanted a Force-oriented, Dark Side character this time. Named the character Hei. (Originates from Darker than Black. Wields electrical powers.)

Next up: choose a class. Breaks down into three options. Quick versions of all three:
- Soldier: Heavy armor. 10 Vitality (see: hitpoints) per level. Lots of feats. Weak on skill points.
- Scout: Medium armor. 8 Vitality per level. Middle of the road for feats and skill points.
- Scoundrel: Light armor. 6 Vitality per level. Low on feats. Earns lots of skill points. Picks up Sneak Attack (extra damage under certain conditions).

Settled on Scout. Likes decent skill points. Also gives you Implant (another equipment slot) feats for free. Did not matter too much, honestly. Will go into why later.

Prompts you to select a portrait next. Offered nothing close to Hei. Settled on the one with the most hair and kind of dark hair. Compared the two side-by-side below.

Hei Side by Side.jpg
...Yeah. (Sidenote: Tried taking several screenshots. Captured a black screen most of the time. Fixed it much later. Loaded saves for some screenshots.)

Assigned stat points next. Ought to feel more familiar to Dungeons and Dragons Third Edition players, as well as other systems, from here on.
- 8 Strength. The minimum amount. Shuns melee combat.
- 12 Dexterity. Helps blaster attacks and defense.
- 12 Constitution. Never neglect your Vitality too much.
- 12 Intelligence. Deviated from a build here. Suggested 8. Wanted more skill points. Turned out to be a bad move for reasons explained much later.
- 14 Wisdom. Boosts force points and save DC (see: difficulty class). Becomes harder to resist your force powers.
- 16 Charisma. Also boosts force points and save DC. Affects different skills than wisdom, but otherwise similar.

Filled in skill points and feats next. Invested in Awareness (for traps), Persuasion (for dialogue choices), and Repair (for a party member later). Chose the Toughness feat for more Vitality.

Ends the character creation phase. Note the lack of force powers. Learns none for a while.

Endar Spire
Acts as the game's tutorial. Finds little to say about it. Felt ineffective in combat, though. Missed a lot. Piloted an escape pod to the next planet.

Minimized the game automatically upon playing a movie. Describes the struggle against the game itself to be more tense than any of the tutorial ones. Stopped the movie by hitting Escape. Removed the black screen with a few alt-tabs and blindly picking dialogue. (Disabled movies entirely later, due to an unavoidable crash.)

Taris
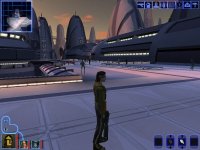
Hei Taris.jpg
The first real section. Plops you into a city's apartment building with Carth, a soldier from the Endar Spire. Tasks you with finding Bastila (a Jedi on the Endar Spire) and escaping the planet overrun by Sith. Kinda wanted to join them, but whatever.

Looted the apartment building. Hit the streets. Ran into debt collectors for the Exchange harassing a merchant. Barreled down the path of the murder hobo. Killed the debt collectors and extorted the merchant for credits. Resulted in some more valuable Dark Side points. Reduces the force point cost of Dark Side powers (and raises the cost of Light Side powers).

Terrorized the local population some more. Become buddies with some Sith at the cantina. Attended a really dull-looking Sith party. Seemingly agreed as they drunk themselves into unconsciousness. Stole some of their armor to look official.

Praises the game for changing the dialogue when equipped with the Sith Armor. Reacts to you like a Sith member. Sadly traded it away for identification papers to progress the plot.

Sidenote: Also thanks this game for the "Return to Base" button. Teleports you back to the apartment. Fully restores your health for free. Returns to your previous spot instantly by hitting "Transit Back". Leaked Vitality like a sieve with such poor combat capabilities. Saved a lot of medpacs.

Dove into the Lower City. Died to Calo Nord a few times. Read about them having good armor somewhere. Referred to a later time. Instakills you with blaster pistols currently.

Crept into the Undercity next. Did not crash, thankfully. Met up with Mission, a Twi'lek companion. Used Mission frequently in the first playthrough. Brought good skills with acceptable damage. Desires darker companions this run, though. Kept them in the party for now, due to having no one else. (Party composition at this point: all ranged.)

Reached level 4 somewhere around now. Explains an earlier point about the class not mattering too much. Opted to not level up for a while. Saves those levels for after becoming a Jedi. Earns neither Force Points nor Powers as a Scout. Accepts weakness now to become much stronger later. Will be stuck at 40 Vitality for a while, however.

Rescued Mission's friend, Zaalbar, in the sewers leading to the Black Vulkar's base. Gladly accepted a melee companion. Shoved Carth out.

Interjects two combat annoyances here.
1. Initiates combat with a blaster attack. Seems to struggle with line of sight every so often, more so in the twisty sewers. Ran right up to some enemies to shoot them. Really hurts on a weakling like Hei.
2. Apathetic party members. Started the fight! Do something! Usually waits a combat round before engaging. Sometimes decided to twiddle their thumbs the whole fight (unless prompted).

Infiltrated the Black Vulkar's base (see: slaughtered everything moving) to grab a Swoop bike part to eventually save Bastila. Met some slimeball offering a deal to betray the person you were getting the Swoop bike part for. Naturally agreed to clean out a second gang's base. Yay for murder.

Participated in the Swoop bike race on the Black Vulkar's side. Won with no problems. Turned to violence when Brejik refused to hand over Bastila. Looted Brejik's Belt. Grants 5 damage resistance to bludgeoning damage. Amaz...wait. Bludgeoning? Only lists "physical" on melee weapons. Consists primarily of swords. Is this a troll? Looked into weapons. Sees stun batons (a very low damage weapon) and quarterstaves. Who even uses those? Might affect some monsters, perhaps?

Worked on the next task at hand: escaping Taris. Meant "infiltrating" a Sith base. Really started to feel power deficit against the Sith Governor. How is a 40 Vitality Scout with a 1-8 damage blaster rifle supposed to compare to a 7-21 damage melee swing and 148 Vitality? (Technically only missed out on roughly +2 Attack, 30 hitpoints, and a feat or two from not leveling.) Packed a secret weapon, however: grenades. Hits for a flat 20 damage (10 on a save) with a Frag Grenade. Backs those up with a stun chance from Concussion Grenades. Defeated the Sith Governor after a few reloads.

Saw the end of the chapter coming. Strolled over to the arena. Used the power of money grenades to emerge victorious. Gladly accepted a new blaster pistol (and cash and experience).

Closed out the chapter by hijacking the Ebon Hawk. Invited Candorus, a Mandelorian skilled in melee, along the way. Definitely wanted them. Suits a Dark Side character's lust for battle.

Dantooine
Left Taris and the fleet demolishing it far behind. Landed at a Jedi place. Finally reached the promised land. Selects a second class here. Cannot gain any more levels in your old class (and good riddance). The options:

- Jedi Guardian: Melee. Initiates a Force Leap on targets within 10 meters. 10 Vitality and 4 Force Points per level. Weak on skills. High on feats. One Force Power per level.
- Jedi Sentinel: Hybrid? Gains Fear immunity. 8 Vitality and 6 Force Points per level. Medium on skills and weak on feats. One Force Power per level.
- Jedi Consular: Caster. Raises the DC for force powers. 6 Vitality and 8 Force Points per level. Weak on skills and feats. Learns one Force Power per level, plus one extra every four levels (1, 5, 9, ...).

Dumps on Consulars hard this game. Trades a rough early game with little relevance to your primary stats for...poor skill gain, poor feat gain, low hitpoints, slightly better (and more) Force Powers, and good Force Points? Gross.

Became a level 4 Scout / level 5 Jedi Consular. Doubled from 40 Vitality to 80. Discovered the error on Intelligence here. Gains 1 + (INT mod / 2) skill points per level. Equals 1.5. Rounds down. Gains almost nothing from 12 Intelligence.

Forgets all the Force Powers selected. Took Dominate Mind and Force Lightning, at minimum. Whines a bit about Force Lightning. States "enemies up to 16 feet in front". Expected something conical. Passes right by enemies between Hei and the target far too often. Illustrates this with a screenshot from later in the game.
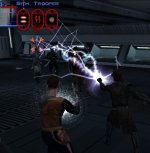
Force Lightning Hitbox.jpg

What is the hitbox on this thing? Literally went through someone's head. (Oh, one more thing. Cannot wear armor while using Force Lightning. Permits Jedi robes and clothing. Nothing else.)

Sends you into a grove twisted by the Dark Side as your first Jedi task. Battled Juhani there. Begins a conversation upon getting them low on Vitality. Provides an opportunity to bring them back to the Light Side and become a (handy tank) companion.

...Successfully lied to the Jedi Council about killing Juhani being the only solution.

Describes the conversation with Juhani as odd. Hoped to convince them to remain on the Dark Side, but fool the Jedi elders. Will copy/paste some choices and answers (from various parts in the dialogue tree).

Hei: "I just want to talk."
Juhani: "Talk?! You who have beaten me so easily just want to talk? I do not believe it. Kill me now, while you still have the power."

Hei: "I suppose there is no hope. I must kill you then."
Juhani: "What? No! I will not let you take me now!" (Resumes combat to kill Juhani.)

Juhani: "I do not know what to do. Now that I have caused such suffering to my Master and those around me..."
Hei: "Life is suffering."
Juhani: "Life is suffering, yes... but it was by my conscious choice!"

Would have liked better Dark Side responses. Wants to be a Sith Lord luring others down the path of the Dark Side for fame, power, and/or glory. Usually just results in a pile of corpses, such as with the family feud sidequest on this planet. Cannot exploit the dead.

Entered a mysterious ruin. Learned about the also mysterious Star Forge. Needs four additional mythical Star Maps to find it. Creates some welcome freedom in the game.

Tatooine
Debated between this and Kashyyyk. Sought the other likely companion first: HK-47 the assassin droid. Also wanted to stop putting points into Repair. Forked over a hefty sum of 4000 credits. Immediately repaired them fully for the extra Dexterity and regeneration.

Describes HK-47 as kind of bad, power-wise. Invested quite a bit into Strength, a useless stat for a character unable to equip melee weapons. Begins with an underwhelming 14 Dexterity (+2). Boosts up to a respectable 18 (+4) after full repairs. Only affects to-hits, though, and not damage. Gains none of the sneak attack damage that Mission does. Learns some useful skills (unlike Candorus and Zaalbar) along with the Dark Side lean, though.

Hunted down the Sand People (see: Tusken Raiders) for Czerka Corporation. Grew a bit irritated about wearing a Sand People Disguise. Turns all Sand People to neutral. Broke the disguise by getting too close (or talking to?) a Sand Person, switching some of them hostile. Fair. Warned about that. Activated the defense turrets on the next map, however, which instantly kill you. Recovered the chance to eradicate them by loading a save.

Found the Star Map next. Dealt with Calo Nord's ambush. Marveled at their amazing armor for Candorus (after upgrades): 12 Defense, damage resistance 10 for Cold, Fire, and Sonic, immunity to critical hits, and immunity to mind-affecting. Wore this armor for the rest of the game.

Kashyyyk
Pushes Zaalbar into the spotlight here. Details their backstory about being exiled. Becomes unavailable here for the majority of the planet, sadly.

Hid the Star Map in the Shadowlands. Erected several forcefields on the path to it. Laughed at how pathetic it is.
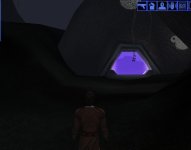
Kotor Shadowlands Forcefield.jpg
References this impenetrable defense in Jolee's dialog. "There are others, each blocking similar points on certain paths. It is all very calculated. Very precise. It would have been effective if it hadn't relied on the creatures to be walking. Climbers don't have much trouble getting around it."

Slaughtered the old Wookie ruler of Kashyyyk. Grabbed the Star Map. Agreed to the current leader's way of enslaving Wookies. Hightailed it to the next stop.

Yavin Station
Supposedly acquired this as downloadable content on the Xbox. Comes as a part of the game on every other platform. Shrugs. Sells expensive, high-powered wares here. Bought three main things:

1. The best armor for HK-47 in the game (a straight 13 defense).
2. The Baragwin Assault Blade for Candorus. Replaced the 1d10 + 1 damage blade with this monster's 2d6 physical + 2d6 energy + 2d6 sonic damage. Expanded the critical range from 19-20 to 17-20. Tops that off with a +5 to-hit modifier, versus the old blade's +1.
3. Tossed aside some wimpy 1d6 + 2 damage pistol (probably) for the Baragwin Ion-X Weapon. Doles out 3d6 ion + 1d10 physical damage, as well as +2d6 versus droids. Serves as a backup in case of running out of Force Points. (Sorry, HK-47. Will give you it later.)

Manaan
Really likes this planet's schtick. Produces kolto, a vital resource for healing. Sells to both Republic and Sith. Enforces a strict neutrality policy. Threatens to cut off one side for violating that.

Stole a transporter into the Sith Base. Blasted every living thing there (except for the Selkaths trying to become Sith. Gave them a thumbs-up). Prevents you from leaving the way you came in, for some silly reason. Walked out the front door like a dunce. Met a lot of angry Selkath guards there.

Cue the first trial. Note: Will kill you if they find you guilty. Handed the reins to the assigned defense lawyer, for fear of Dominate Mind not working. Did a poor job of it. Stepped in with the Sith's plans to overthrow the Selkath government. Got off scot-free.

Dealt with Jolee's character quest next. Investigated Jolee's friend, Sunry. Discovered video footage of Sunry killing the Sith.

Cue trial number two. Acted as Sunry's lawyer. The first move: show the judges the video footage. Guilty. Easy.

Back to the main quest: the Star Map. Went on a non-yellow submarine to a secret Republic kolto harvesting facility. Involves a sloooow-moving section wearing diving equipment and big sharks. Gives you a handy sonic emitter to one-shot the sharks.

The problem? A very short range. Matches the shark's aggro range. Used it one-tenth of a second too early. Closes the entire gap between you before you are able to act again. Will one-shot you back if it hits. Was sweating bullets while spamming that sonic emitter. Fired it off before the shark hit. Only died once in that section.

Discovered the Star Map behind a gigantic shark. Vented poison into the waters to kill it. Contaminated the kolto, but who cares? Jotted down the Star Map.

Turns out the Selkath care. Cue trial number three. (Got a lot of use out of the courtroom.) Cared even more about their mythical shark god dying. Suffered a planetwide ban from taking too much credit about killing the giant shark. Eh. Finished all the sidequests here anyway.

Oh, right. Also encountered Darth Bandon while completing said sidequests. Realized the importance of Force Breach. Cancels the enemy's Force buffs, which includes "Force Immunity". Did not learn that yet. Struggled pretty hard in that fight. Picked up Force Breach at the next opportunity.

The Leviathan
Captures your ship after completing three of the four planets. Chose T3-M4 as the one to free everyone. Expected a skill-based challenge for them. Was proven correct.

Reveals you to be *gasp* Darth Revan at the end of the section. Loses Bastila at this point too. No real loss there.

Korriban
Strutted around this Sith planet. Yeah, hey, Darth Revan here. Did not impress anyone.

Entered their academy to join up with the Sith. Competed against a few other chumps. Scared one away. Killed the rest. Won by default.

Brings up an extremely annoying bug here. Breaks something about companions on this planet. Suspects a cutscene setting up the usual flag for companions to halt, but failing to remove it. Resulted in companions doing nothing and typically not following you. Became a slog from having to "gather your party before venturing forth" from map to map. Essentially doubled the walking time on the planet. Fixed it with a later cutscene, thankfully.

Wandered into the tomb with the Star Maps. Had an epic battle versus two Terentateks. Resists Force powers very well. Survived by using Plague on both, then alternating Force Choke to lock them down.

Wrote down the final Star Map. Killed the Sith teachers. Told everyone at the Sith Temple about it. Failed to convince them to bow down before their new head teacher, Darth Revan. Wiped all the Sith out. Sighs. Such a waste of talent.

Yavin Station
Returned here for more stuff. Bought another blaster rifle. Deals better damage to all creatures, but less to droids than the Ion-X. Passed off the old weapon to HK-47.

Star Forge System
Jumped to the Star Forge, only to get downed by a disruptor field. Spoke with the locals. Agreed to eradicate some hoity-toity lizards in exchange for entrance to a temple to turn the disruptor field off.

Demands for you to enter the temple alone. Backs off over Jolee's insistence on tagging along. (Would have been Juhani as well, if not for dying.) Sure. Swept the temple easily.

Met evil Bastila at the top. Raved about how amazing the Dark Side is and how the Jedi Council was a bunch of elites using you. (Actually sounded a lot like some people talking about politics today.) Smacked Bastila down. Convinced them to come along, defeat Malak and the Republic, and rule the galaxy.

Unnerved Jolee. Refused to swear loyalty to the glory of Darth Revan. Cut them down there. Welcomed back Bastila.

Was actually blindsided by this. Usually knew what was coming between memory and some Wiki browsing. Thought Bastila would only ever rejoin you through a Light Side romance thing at the end. Did not know about Jolee dying period.

Kept the surprises coming. Told the rest of the companions what was up. Upset Carth and Mission. Could not kill Carth. Gave Zaalbar the honors of killing Mission with a little Dominate Mind. Niiiiice.

Star Forge
Forces Bastila in the party. Was not too sad about that. Performs better than HK-47 in combat. Brought Candorus, as a nice non-energy damage source. Regretted not buying fancy Lightsaber crystals from Yavin Station.

Harasses you the whole way to Malak. Sends groups of 3-4 Dark Jedi and Sith Troopers in constant waves. Reached level 20 (the maximum) on the companions. (Hit 20 on Hei somewhere in the Star Forge System.) No longer needed experience. Sliced through all resistance.

Ends the game with a one-on-one duel versus Malak. Hits quite hard, on top of strong saves and Force powers (including Force Immunity). Heals by draining captured Jedi throughout the room.

Prevailed with the use of Breach, Plague, Wave, and Storm. Sucked the Jedi dry before Malak could, also. Caused a bug, unfortunately, which rendered Malak unkillable. Darth Malak Bug.jpg
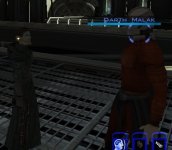
Mwah. Saved just beforehand, thankfully.


Displayed the credits in a very fitting way: bugged.
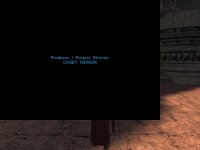
Kotor Ending Credits Bug.jpg
Enjoyed playing through once again. Was not without flaws, however. Suffered from bugs and two separate hard crashes (one from a movie, one randomly in Manaan). Feels a bit weak on build variety also. Technically increases when separating Light Side Consular and Dark Side Consular.

Felt a bit let down by the Dark Side choices most of the game. Redeemed itself a little at the end. Describes the final results as fairly evil, upon reflection. A rundown:
- Endar Spire: Destroyed
- Taris: Leveled by Sith bombardment
- Dantooine: Destroyed by Sith
- Tatooine: Committed genocide against an indigenous people
- Kashyyyk: Furthered the enslavement of Wookies. Gained some in-roads to its governing body.
- Manaan: Killed a god, ruined the planet's reason for existence, and got banned
- Yavin Station: Perfectly fine.
- Korriban: Killed most people there.
- Star Forge System: Killed half of the indigenous people. (Could not kill the other half. Needed the experience less then anyways.)

Defeated the Republic and became the overlord too, of course. Sounds like a proper Dark Side ending.
 
24,633
Posts
3
Years
  • Age 35
  • Seen today
Kirby and the Forgotten Land

[Kirby Rant]
(Provides some background into personal history with Kirby games within the rant. Talks about the actual game at the close of this tag.)

Played a lot of Kirby games over the years. Stormed through most of the mainline games, dating from the Super Nintendo to the 3DS. Loved Kirby Super Star, back in the day.

Waned in interest over time, however. Identifies one possible reason: shifting the focus away from completing the stage. Challenges the player to find all the hidden doodads nowadays. Cannot really call hidden objects a new development. Appeared in the Super Nintendo era Kirby games too. (Never liked The Great Cave Offensive either.)

Turned up this trend over the years. Tasks players to sniff out about three secrets per stage now. Applies to games besides Kirby too. Uses a similar template for newer 2D Mario games. Hated some newer Donkey Kong games for stuffing their numerous secrets behind solid-looking walls.

Why is this bad? Loses the "action" part of the game outside of boss battles. Rolls over enemies like the level 3 Rattatas on Route 22 on the way to Indigo Plateau. Might as well not exist. Spends the entire stage poking at suspicious-looking corners and watching the edge of the screen for a hint of a platform.

Arguably lost what made secrets great in the first place, also: rarity and purpose. Becomes far less special when regularly expected. Accessed things like a room of copy abilities or, to use a Mario example, Star Road and alternate paths for the older games. Doles out a piddly Secret Bit #104 nowadays.

Might hate Kirby games now, if not for one redeeming factor: The Arena. Brings the "action" part front-and-center with a boss rush. Remixed some bosses and even adds new ones solely for this mode sometimes. Describes Planet Robobot's True Arena as the best gaming rush in years.

Often comes with one unfortunate catch: 100%ing the game. Are those amazing 2-3 hours worth 20-30 hours of slog? Becomes harder and harder to answer "Yes" to that.
[/Kirby Rant]

Was not hyped for this one, consequently. Tried the demo. Threatened the usual problem. Borrowed this from a sibling, though. Lowered the bar of entry.

Begins with some praise.
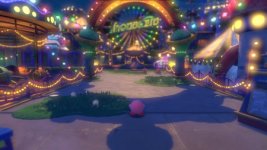
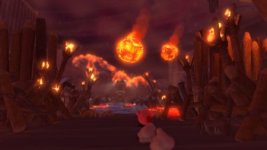
  • Stepped up their game on scenery. Snapped two screenshots.
    Kirby Forgotten Land Opening 1.jpg
    Kirby Forgotten Land Opening 2.jpg
    Typically appears at the start of a level. Provides a good introduction.

  • Made the secret hunting less irritating. Usually gave you an idea of its location based on the position of the missing piece. (As in, look before Piece #2 to find Piece #1.) Retained that (mostly), on top of also telling the player what to do. Reduces some frustration. Also permitted you to retry some parts to try to grab a secret again.

  • Enjoyed the upgraded powers. Buffed Fire and Ice to their best performance possibly ever with the damage over time and massive full freeze damamge, respectively. Highlights Chain Bomb as the real doozy, though. Could be the best designed power in the franchise. Links nearby bombs. Explodes for more damage with more bombs linked together. Becomes an interesting challenge of stacking up bombs for a massive explosion.

  • Hands out one more bit of positivity: the guard dodge. Allows you to dive while guarding. Grants invulnerability frames on top of slowing time on a close dodge. Feels great to swipe at an enemy in this timeframe.
    Captured a movie of it using the Switch feature. (An actual use for the Switch video? Yes, really.) Tried converting it into a GIF. Dropped the quality and made it larger in file size. Hopefully lags the thread less than a GIF.

    View attachment Kirby Forgotten Land Guard Dodge.mp4 (Warning: Contains a spoiler for the final boss.)

And now for the bad.
  • Undermined the great scenery with secrets everywhere. Immediately enters Secret Hunting Mode at the start of a stage. Bamboozles you like that sometimes otherwise. Never spent much time taking in the scenery. (Admits possibly not doing so without the secrets, though.)

  • Multiple pointless secrets. Scare off a few seagulls for a Waddle Dee. Do not touch the mud in some stage. Touch the glowing spot hidden between three cacti.

  • A bit too easy, including in the Colosseum. Died a total of seven times: once legitimately to Silly Armadillo, three times intentionally for a secret in a postgame area, and three times to the final boss in the hardest mode of Colosseum.

    Made the guard dodge a little too strong. Discovered it right after the Silly Armadillo death, coincidentally. Avoided guarding until then so as to not miss the Waddle Dee for taking no damage.

End verdict: Rates it negatively overall. Did not pay out enough at the end to compensate for the long, dull run-up. Met expectations, more or less.

Finished the game at 98%, also. (Could have avoided some of those Waddle Dees, apparently. Whoops. Never moved onto the next stage without grabbing all the Waddle Dees.) Fell short on full completion because of the gotcha capsules. Would be a long star coin grind for zero reward.

Ultimate Cup Z times:
  • 21:20.78 with Homing Bomb (fully upgraded). No deaths. Left two normal tomatoes uneaten before the final fight. Ate the stocked Maxim Tomato on Leongar or Primal Dedede unnecessarily.
  • 50:36.88 with Morpho Knight Sword (base power). Extended that time a lot because of deaths. Recalls being around 24 minutes on the first attempt of the final boss.
 
24,633
Posts
3
Years
  • Age 35
  • Seen today
Baldur's Gate 2: Shadows of Amn (Enhanced Edition)​

Begins with some background of this series. Played both Dungeons and Dragons (2nd Edition) and Baldur's Gate 1 as a child. Was dazzled by the starting town of Candlekeep. Provided very little fluff in games like Castle of the Winds, Moria, and Diablo('s demo). Would have called it the first RPG with voice acting, if not for Diablo. Never completed Baldur's Gate 1 for years. (Waned in interest after the kobold mines.) Enjoyed the first few towns, though.

Fast-forward to Baldur's Gate 2. Opens with you in a mage's prison. Tortures you and your other companions. Watched someone explode too. Was turned off by this much grimmer first impression. Probably never exited the dungeon. Never liked dark games. Holds fairly true today too.

Created an Evocation-specialized Wizard as the main character. (Consists of mainly elemental damage spells like Fireball and Lightning Bolt, but also useful spells like Web.) Considered going Enchantment for stronger Hold Persons and Charms. Killed Dynaheir (Evocation Wizard) in this game, though. Planned to just take some other wizard. (Did not look too deeply into companions on purpose.)

Cleared the first major hurdle of the game: weathering the dungeon atmosphere. Also contained a bunch of creatures in tanks. Powered up their tanks to resurrect them and listen to their mad babbling. Never went far in this game for a reason.
Stepped out into the big city. Looked around for new companions. Met Aerie in a twisted circus of deadly illusions. Bumped into Nalia next. Asks for your help on an urgent quest to save a stronghold under attack. Worried about quest timers rendering someone inaccessible. Took her along.
Glanced at the party makeup at this point.
  • Minsc (Ranger)
  • Jaheira (Fighter/Druid)
  • Yoshimo (Thief)
  • Sebitza (Evocation Mage)
  • Aerie (Mage/Cleric)
  • Nalia (Mage/Thief)

Exceeded the tolerance for squishiness. Bid farewell to Nalia, as well as Aerie. Looked up good-aligned companions. Settled on this as the final party:
  • Minsc (Ranger. Melee damage.)
  • Jaheira (Fighter/Druid. Tank.)
  • Keldorn (Paladin. Melee damage.)
  • Sebitza (Evocation Mage)
  • Neera (Wild Mage)
  • Imoen (Mage/Thief, when available much later.)

Will not defend this as a balanced party. Likely led to some extra difficulty. Liked no one else as the tank, barring maybe a Fighter/Cleric. Runs into the same problem as Jaheira of making in-combat casting difficult, though. Ultimately chose Jaheira for one reason: the voice line "Nature take the life she gave!" (~19:25). Sounded nice. Always had good lines.

Declines to give a blow-by-blow of each quest. (Tries not to ramble too much on the little details.) Will give a few highlights and more general thoughts.
  • Seems like a better game than Baldur's Gate 1 in some respects. Tromped through tons of forests and mines in the first game. Spent most of this game in buildings or caves. Preferred this game's variety. Led to lots of pathfinding hugs in those narrow corridors, though.

  • Allowed multiple paths to the same goal. Example: Chapter 4. Enters Spellhold (a wizard asylym) by convincing someone you are dangerous, taking a wardstone, or casting Protection from Petrification on your party at the screen transition. Gives you a choice later that chapter to chase someone by boat or go to the Underdark. Winds up in the Underdark either way. Completes a whole extra area by picking the boat. (Chose Underdark straight off.)

  • Accomplished some things by not fighting (or could have). Guarded some treasure in a stronghold with golems. Activates upon taking the treasure. Could have yoinked it and bolted. More or less did that for the Hammer of Thunderbolts. Could not defeat multiple Mind Flayers. Sent in Minsc hasted and invisible instead. Aggroed the Mind Flayers upon grabbing the treasure. Sprinted far enough away from the Mind Flayers to separate them. Handled one Mind Flayer + one Umber Hulk, resurrected Minsc, and left with the prize.

  • Brings up the next point: ridiculously nasty monsters. Fought groups of Level Draining monsters constantly. Dies very, very quickly to Mind Flayers stunning you, draining your Intelligence, and devouring your brain (upon hitting 0 Intelligence). Hated all golems, particularly the first Stone Golem. Who thought 100% Magic Resistance, 100% element resistance, 20% physical resistance, and immunity to weapons with less than a +3 enchantment to be a good idea? (Made Clay(?) Golems immune to all but bludgeoning damage. Ratcheted Adamantine Golems' physical resistance to 90%.) Counted on all enemy wizards having Contingency Globe of Invulnerability + Stoneskin ready.

  • Whines about Magic Resistance and layers of immunity. Exists for a reason, though: 2nd Edition's broken spell effects. Incapacitates someone with Web, Hold Person/Monster, and Polymorph Other. Usually amounts to "Save or Die". Killed an overwhelmingly powerful dragon thanks to Polymorph Other connecting. Had no business winning that fight. Lowered its Magic Resistance a few times. Tossed in a Greater Malison to lower its saves. Eventually hit the winning number after a few reloads. (Took a while without Resist Fear. Found that spell very late.)
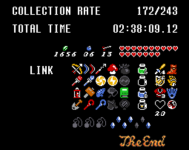
  • Another bad part about 2nd Edition: really boring levels. Screenshotted one of Jaheira's Fighter levels. Lowered THACO by 1. Gained 1 hitpoint (even with 17 Constitution). Nothing else. Sort of looked forward to weapon proficiency levels, though. Granted better THACO, damage, and extra attacks on a weapon type.

  • Obtained some fancy weapons. First weapon of note: Carsomyr. Dispels magic on hit. Tore through magical defenses so well. Second weapon: Crom Faeyr. +5 enchantment. Bumps up the user's Strength to 25. Effectively gave Minsc +10 to hit over an unenchanted war hammer (...or something like that. Forgot how THACO works). Also deals some electric damage and insta-kills some lesser golems on hit.

  • Completed the game in 46 real-time hours. Defeated the final boss at 69 days, 0 hours in-game. Kids you not. Does not even like the obsession over 69. Still screenshotted it.

  • Checked the Steam global achievement stats. Shows only 31.7% clearing the first dungeon. Sounds very low, even by first achievement standards. Must not have been alone in that first impression. Reports a relatively impressive 9.6% game completion, however. Apparently really struggles to get going. Retains players quite well after that.

Feels very torn on whether the game was good or not. Bases this on the desire to replay it. Probably would have been a great game using a more recent edition of Dungeons and Dragons. Hated all the immunities. Still enjoyed some of the quests and dungeon crawls. Left enough unexplored to justify an evil playthrough easily. Would it be fun? Shrugs.
 
24,633
Posts
3
Years
  • Age 35
  • Seen today
Dragon Warrior Monsters

Always smiles at seeing a game by Square. Hammers home how old a game is. Caught the other side this time. Produced this one under Enix's watch.

Starts out with your sister getting kidnapped. Chased them into a drawer. Wound up in a giant tree, fighting to win a tournament for some king. Moves this plot fast.

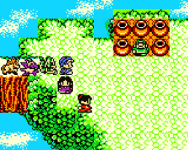
Slowly remembered bits and pieces of playing this. Recognized some of the town and the different meats for taming. Screenshotted one of the locations, the Bazaar, below.
Dragon Warrior Monsters Bazaar.png

Laid out the battle menu in both familiar and odd ways to Pokemon. Gives four options: Fight, Item, Plan, and Run.
- Fight: Continues fighting as they were last told. Cannot choose targets or skills.
- Item: Uses an item. Does not consume your monsters' turns. Leaves you unable to Plan, though.
- Plan: Splits into Charge, Mixed, Cautious, and Command. Selects a general idea with the first three. Chooses specific skills and targets with Command. May disobey any of these four options, in ways similar to Pokemon.
- Run: Run.

Read the instruction booklet. Only learns so much from talking to NPCs. Hoped to find more information on stats, type matchups, and so on. Describes each family of monsters (Slime, Plant, Dragon, Bug, and so on) briefly. Ran into a mechanics clash with Pokemon.
Instruction Manual said:
Bird Family
Fast in speed and fast-growing, they are strong against thunder magic spells and special skills. Dracky, Wyvern, and Blizzardy belong to this family.
What is this upside-down world?

Met someone who needed to light a grill. Asked for a monster. Worded the request like a gift. Saved the game. Called on Axew the Dragon (a boss monster) to light the grill. Stole Axew and opened a new gate. Sorry, what? Helped you out. Repays that by just taking the monster? Reloaded that nonsense.

...Is the king the antagonist? Seemed really pushy about winning this tournament. Hid the queen in a room behind the arena. Spoke with her. Definitely implied her to be your sister.

Progressed through more arena matches. Reached the breeding part. Read some short reviews. Praised this part of the game. Planned to stumble through it and talk to helpful NPCs. (Pushed it in-game pretty hard. Said to go breed a few times.) Ran into issues with that:
  1. Loses both parents by breeding them. "Returns to the wild".
  2. Saves as part of the breeding process. Cannot see the resulting monster beforehand when breeding with NPCs.
  3. Could result in creating a monster with better starting stats for its species, but be a terrible species worse than both parents.
  4. Starts off the newly hatched monster at level 1 (unsurprisingly)
Punishes experimentation while demanding it, essentially. Could get around some of the issues with save states. Cannot differentiate good monsters from bad, though.

Expected to have more fun from making deliberate decisions. Dug around for some kind of stat list. Found growth rates (and maximum levels) instead. Sufficed. Added it all up like Pokemon Base Stat Totals. Looked to benefit from the existing monster team (Dragon, Golem, SpotSlime) as well. Decided on:
  • Divinegon. Led the table in growths among "normal" monsters with 146. Also chose it for the highest possible level cap (80, versus an average level cap of 43.6 among dragons, for reference).
  • WhipBird. Strong growths (124) and a good level cap (60). Was less of a pain than RainHawk (133 growth, 80 level cap).
  • Unicorn. Seemed like a support kind of monster. (Looks very angry in its sprite, however.) Picks up Vivify (revives dead monsters). Still had good growths at 104, the second highest among the Beast family.

Messed up two things early, unfortunately.
1. Bred Healer with an NPC beast before looking up information. (Yielded Spotslime.) Did not learn HealUs (group heal). Only passes on skills that it learned, forgot, or declined to learn. Bred Spotslime with a Pillowrat to get another Healer. Releveled it for HealUs. Transitioned to Unicorn from there.

2. Misread the breeding table. Created a SkyDragon instead of Divinegon. Already had one of those. Was not wasted time, though. Needed a SkyDragon for Divinegon. Merged the WhipBird into this behemoth, along with some other monsters.

Spent a loooooong time breeding Divinegon (partially because of mistakes). Illustrated it in text below. (Hopefully formatted it okay. Looks fine in the preview.)
Code:
                        Dragon
            SkyDragon <          (Some Bird)
           /            Phoenix <          (Some Beast)
Divinegon <                       Grizzly <
	   \         MedusaEye             (Some Devil)
            Orochi <           BattleRex
		     Andreal <            Golem
                               Whipbird <           Bullbird
                                          LandOwl <
                                                   (Some Beast)
Totaled sixteen creatures. Used monsters on-hand or easily available whenever possible. Wound up being a +9 Divinegon. (Adds pluses after breeding, depending on the previous high and the parents' levels. Increases stats slightly at later levels.)

Decided to breed a RainHawk after all. Pulled it together relatively quickly with some wild monsters.
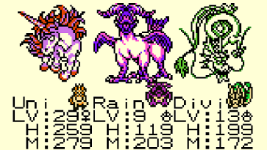
Dragon Warrior Monsters Team.png
Created an amazing party of top-tier monsters. Great. Should be ready to stomp everything after a little leveling, right? Well...no. Overlooked something crucial: experience curve.

Uses different experience curves in Pokemon. Points to them as references. Will look at Slow and Fast, rather than the more unusual Erratic and Fluctuating. Reaches level 2 with 6 experience and level 100 with 800,000 experience on Fast's curve. Hits level 2 with 10 experience and level 100 at 1,250,000 experience on Slow's track.

Could not find an experience table for Dragon Warrior Monsters. Supposedly contains 32 different curves. Seemed to break down into four different amounts to reach level 2. Fast: 2 experience. Normal: 5 experience. Slow: 10 experience. Very Slow: 100 experience. Jumps way up from Slow to Very Slow.

May have spotted the problem. Placed both Rainhawk and Divinegon in the Very Slow category. Levels at an agonizing pace. Effectively makes them weaker on offense than Unicorn (Normal speed), the "healer", until well past Unicorn's level cap. Definitely beats the game before that. Likely would have been better off not breeding them.

Notes some upsides to Divinegon and RainHawk. Accumulated a lot of skills. Combines them into stronger skills like GigaSlash eventually. Supposedly hits really hard. Learns additional strong skills for being these good species. Gifted these monsters with a ton of resistances and some immunities too.

Pushed onwards. Shoveled all the +stat seeds into the teams' hungry mouths. Alleviated some problems, like low hitpoints. Farmed a few Bards for random +20 stat gains too. Still suffered from low levels. Discovered a level requirement on top of a (previously known) stat requirement for the good skills. Sighs.

Entered more tournaments. Pulled out some mean tricks, like K.O. Dance (instant death chance). Had a similar move, albeit single-target, on RainHawk. Was not too big of a problem, however, thanks to some resistance (and straight immunity on Divinegon).

Remembered struggling with Metal Slimes in a tournament. Kept an eye out for MetalCut (+50% damage to Metal monsters) while breeding. Found its place versus a Metally spamming Explodet. Squashed the 10 hitpoint Metally with a critical MetalCut for over 100 damage (if not over 200). Managed the rest of that fight with no trouble...after losing the first time.

Appreciated resistances as time continued. Hit Unicorn hard with skills, in terms of percentage health. Generally viewed Divinegon as the sturdiest on the team. Should have considered tanking moves like Guardian. Oh well.

Reached the final tournament. Battles your sister (who is not the queen) in the last match of three. Does not play nice. Ripped Unicorn and Rainhawk to shreds with Megamagic and other multitarget damage. Lost really badly the first time.

Tried a second time with the same stats, not expecting much. Hung on with enough health to deliver a sorely needed HealUsAll (full party heal). Landed Beat on the enemy Rainhawk (twins!) and Coatol before going down. Left Divinegon and Unicorn to take down the remaining MetalKing two hitpoints at a time (with MetalCut).

Ended the game with:
Code:
          Lvl Atk Def Agil Int  HP  MP
Divinegon  21 278 268  220 200 284 267
Rainhawk   22 286 265  205 215 271 322
Unicorn    38 345 350  302 233 351 349

Looked back up at the earlier screenshot. Gained 8 levels on Divinegon, 13 on Rainhawk, and 9 on Unicorn between then and the end. Illustrates the leveling curve quite well.

Ends the game conflicted. Likes the idea of passing on stats, skills, and resistances to create a really good monster. Involves a lot of effort with monsters going back down to level 1 and no Undo button, however. Penalizes you for doing it blindly or badly. Seems far too easy to do either. Added to the grind.

Was not overly taken by the combat system, also. Wandered through a lot of semi-randomized maps. Describes every map but the last of an area as a slog. Spammed "Fight" a lot. Micromanaged attacks on boss fights like a normal Pokemon game. Took away that option during arena fights, strangely.

May be expecting too much from a Game Boy Color game. Dealt with many limitations back then. Bears some of the same ugly sides as early Pokemon games. May have improved in the later games.
 
24,633
Posts
3
Years
  • Age 35
  • Seen today
Metal Gear Solid (GBC)

Continues with old games. Dusted off Metal Gear Solid for this month's theme of Stealth.

Remembered fists being effective. Resolved not to use firearms as little as possible. Feels more stealthy.

Recognized bits of the first stage. Forgot about the Five-Seven...somewhere in the level. Placed none later in the game. Permanently missed a weapon in the first five minutes. (Found plenty of ammunition for it, though.) Never planned to use it much, but still.

Cleared the stage without killing anyone or being spotted. Received a rank of "Poor". ...Okay, game. Sorry for being stealthy and a pacifist? (Learned afterward about time being a big factor. Moved too slow. Deducts points for killing.)

Enjoyed some of the dialogue. Wanted that "E for Everyone" rating. Clearly frowned upon swear words. Used a French one and also a "damm".

Pressed on. Found other weapons. Saw something boomerang-like in the skies. Connected it to Boomer Kuwanger Slasher Hawk from the image of all the major baddies.

Called Weasel on the Codec. Mentioned being knowledge about enemies and especially mercenaries. Talked about the virtues of using only your fists, with no mention of Slasher Hawk. Sure, okay. Grabbed the cache of weapons and entered the boss area.

Placed Slasher Hawk up on a cliff. Cannot reach them to use your fists. ...Thanks, Weasel. Happens to be immune to guns too. Lobbed grenades as the only option. (Worried about running out. Resupplies you with weapons for other bosses, at minimum.)

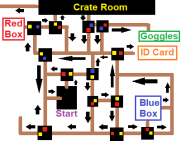
Entered a barracks next. Consisted of three floors: B1F, 1F, and 2F. Scoured B1F and 1F for anything. Contained nothing of use. Existed to waste your time, mostly. Took the elevator to 2F. Encountered the cardboard box maze.

Basic premise: Sneak along the conveyor belts as a box. Sends you different directions, based on your box's color. Swap between colors to influence where you go. Search for more colors to go where you want. Created a "low-effort" (close to accurate?) map in Paint.

Metal Gear Box Maze.png

What is this monstrosity? Spanned...eight screens for the conveyor belts alone? Considered the minimap useless. Meant tracking where you had been mentally. Often trekked back through the pointless floors after acquiring a new item. Spent wayyyy too long here. Colored the rest of the game, no pun intended. Made the backtracking in Paper Mario: The Thousand Year Door look decent by comparison.

Rates Marionette Owl as okay. Forces you into keeping Thermal Goggles on. Swapped places with the puppets to trick you into attacking the wrong one.

Metal Gear Owl Boss.png
Complains about an action section slightly later as well. Opens up on you with artillery rounds. Sprints back to the start to escape. Indicates the shell's trajectory with a single yellow pixel on your minimap going towards a second, stationary yellow pixel. Means "pixel" literally.

Metal Gear Artillery.png
(Also featured: mines. Same yellow pixels.) Effectively hit you at random for half your health. Plus side: Set a continue point at the start of this section. Tried again with minimal delay.

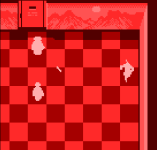
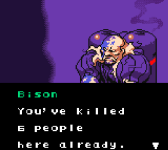
Fought Flame Stag Pyro Bison a few stages later. Talks about Snake trying to be a legend.

Metal Gear Fire Bison Kill.png
Blames backtracking for those deaths. Stuns on the first punch combo. Kills on the second.

Did not like Pyro Bison's fight, either. Seemed just as immune to guns as Slasher Hawk. Absorbed a Nikita Missile with no damage. Grenades again, then.

Another irritation: Flooded a base with water. Left electrified puddles around. Warns you about this...and then forces you to cross a non-electrified puddle, identical in appearance to the electrified ones. Checked for thermal changes. Nada. (Also on the same level: instant death pit traps.)

Beat Black-Arts Viper in a strange battle of running around an electric maze. Took damage from guns, at least.

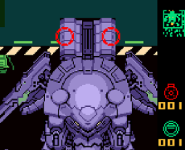
Finally reached Metal Gear. Took out the legs. Switched phases to the main body. Identifies three pairs of weak spots: gun turrets, circular fireball turrets, and the missile launchers in the back. Started on the gun turrets, as the closest target. Dumped tons of grenades and missiles into it. Took out maybe half of Metal Gear's health, with both gun turrets still up. Tried angling the guided missiles into Metal Gear's missile launcher. Zero damage. Game? Hello?

Had the wrong idea, apparently. Intended you to poke the gun turret. Provokes the circular turrets into popping up. Deals the most damage to them. Cannot harm the back. Screenshotted the game pointing out the missile launcher. Used the same indicators for the other targets.

Metal Gear Boss Target.png
Finished off Viper and the game from there. Snapped a picture of the stats.

Metal Gear Final Stats.png
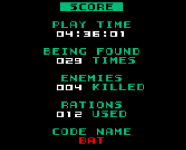
Notes 4 kills here. Said 6 at Pyro Bison. Counted Slasher Hawk and Marionette Owl for the latter, evidently.

Final verdict: Terrible. Awards its own ranking right back at it. Misleads or poorly conveys what the player is intended to do. Handed out weapon immunities willy-nilly. Wastes your time in the box maze.

Acknowledges the game's nice graphics and sound (for its time). Gave you generous Continue points. Does not redeem this game in the slightest, however.


Fire Emblem: Three Houses (Silver Snow)

Wanted to complete the fourth route. Already recorded this game here, though. Why do it again? Created challenge restrictions for it this time.

Grinded multiple things in every run thus far: fishing, skills for class qualifications, tea parties, lost item hunting, and random battles. Decided to skip all that this time. Stuck in a few extra bits here and there too, but for ease and for difficulty.

Route: Silver Snow
Difficulty: Hard Casual
Downloadable Content: Yes
New Game Plus: Allowed
Character Restrictions: Cannot recruit Golden Deer, Blue Lions, Yuri, or Hapi

Class restrictions:
1. May only qualify each character for one class per tier (Beginner, Intermediate, Advanced + DLC, and Master).
2. Forbids more than one person per Advanced + DLC class and Master class at a time. (Example: Allows two people to become Assassins. Cannot both be Assassins at the same time.)
3. Cannot qualify Petra for Pegasus Knight, Falcon Knight, Wyvern Rider, Wyvern Lord, Assassin, or Swordsmaster. Threatens to steal the spotlight again otherwise. Used Petra in all three prior playthroughs to good effect.
4. Cannot qualify Ferdinand for Dancer, Fortress Knight, Paladin, or Great Knight. Used Ferdinand twice before. Mostly wanted to lock out Dancer. Avoids the others like the plague.

Explore restrictions:
1. Cannot do anything requiring Activity Points. Exception: White Heron Cup dance lessons and for any quest below. (May or may not cost an activity point.)
2. No Fishing, Gardening, Advice Box, or returning Lost Items. Allows feeding animals, because why not?
3. Allows only mandatory quests and unlocking quests (such as for shops, battalions, and so on).

Battle restrictions: Paralogues, mandatory Battles, and unlocking quest fights only.

Other restrictions:
1. Finish battles in a reasonable timeframe. Means not fighting for 90 turns for skill points. May still dawdle to grab all the chests and/or defeat all enemies.
2. Cannot use the C-rank Lord battalions or any B/A-rank battalions until after the time skip.
3. Cannot purchase stat levels, support ranks, or mastered skills from past playthroughs.

Notable permitted things:
- The Chalice of Beginnings, Crests, and instant A+ Professor rank
- The altar in the Abyss
- A full battalion barracks. Includes several Paralogue rewards involving restricted characters.
- Save-scumming exams

_____________

Mapped out everyone future at the start. Added Anna and Flayn midway through to fill deployment slots. Wound up with the leftovers for class picks.

Byleth: Enlightened One / Assassin
Dorothea: Warlock > Gremory
Ferdinand: Wyvern Rider > Wyvern Lord
Bernadetta: Sniper > Bow Knight
Caspar: Grappler
Petra: Bishop (for the stats) > Dancer
Linhardt: Bishop
Balthus: War Cleric > War Master
Constance: Dark Flier
Anna: Trickster > Mortal Savant
Flayn: Valkyrie > Dark Knight

Noticed the lower levels on occasion. Met the Death Knight in Chapter 4 with no Thief in the party. Was not high enough level to qualify. Still struck down the Death Knight with the help of Blessing (survive lethal damage at 1 hitpoint).

Favored Seminars over Resting. Usually bumped up two skills for five units, plus some motivation for more skills.

Fell way behind in supports compared to other playthroughs. Did not marry anyone. Was not aware that was possible. Probably missed grabbing the ring on an Explore phase.

Was not impressed by this route, narratively-speaking. Followed a lot of Verdant Wind's path, but with Seteth leading instead of Claude. Felt divorced from the war, possibly from having beaten the game three times already. Basically chased Rhea the whole time. Ended unsatisfactorily, at that. Appreciated a different endgame map, though.

Felt like a good challenge. Fought real battles much more regularly. Relied on gambits far less for monsters (due to weaker Charm). May have been too restrictive on classes. Placed some, like Anna and Flayn, in undesirable classes. Became irrelevant. Could allow Byleth to receive skill tutoring in Explore too.

Asks an important question: how much time did this save? Calculated the time for each playthrough, based on Save Clear files. Played on Hard for all of them, except for Azure Moon.

Crimson Flower (First run): 65:13
Verdant Wind: 81:18
Azure Moon (Maddening + first DLC): 91:03
Silver Snow (Low-grind): 27:04

Completed this playthrough in one-third the time as the second playthrough.

Quick individual unit thoughts:
  • Byleth: Same Byleth as always. Dropped off towards the end, but never bad.
  • Ferdinand: Ridiculous this time. 41 Strength and 33 Speed at level 42. Beat everyone by like 8 Strength before stat boosters. Would have been a stupid good gauntlet user.
  • Caspar: The late game hero. Packed the Speed Balthus lacked. Delivered a lot of vicious blows to monsters.
  • Bernadetta: Possibly the best showing for an archer yet (more than Claude?). Treasured that Deadeye range with great Dexterity.
  • Dorothea: High power, but too slow.
  • Linhardt: A fine healer, as always. Only serves as that role, though.
  • Petra: The early game monster. Took a backseat with dancer abilities. Propelled Bernadetta and Caspar forward. Still a great dodge tank.
  • Flayn: Worse Dorothea. (-2 Magic, -7 Speed.) Smiled at making Flayn a Dark Knight, though.
  • Anna: Least valuable unit. Did not cut it with 21 Strength and 27 Magic at level 38. Decent Speed, but nothing else.
  • Balthus: The biggest disappointment. Barely had more Strength than Caspar. Cost a ton of Speed and Dexterity.
  • Constance: Nothing special, close to Dorothea. (+2 Speed, -2 Magic.)

Spoiler: Stat Comparison, MVPs, and Battles/Victories

Compared Petra from two playthroughs: Golden Deer (second playthrough) and this.

Petra on the Golden Deer before the final battle
Class: Falcon Knight
Level: 48
Strength: 33
Magic: 20
Dexterity: 40
Speed: 56
Luck: 29
Defense: 30
Resistance: 21
Charm: 41
Also two skills (Sword and Flying) at S+ rank, plus Authority and Bow at A+. (Did not check equipped items.)

Petra in this playthrough before the final battle
Class: Dancer
Level: 38
Strength: 24
Magic: 17
Dexterity: 31
Speed: 35
Luck: 23
Defense: 16
Resistance: 16
Charm: 29
Did not screenshot skills, but nothing higher than S for anyone. Guesses A in Swords and A+ in Flying for Petra, based on skills. Still managed that much Flying skill without setting foot in a Flying class.

Look at that difference: 10 levels, 9 Strength, 9 Dexterity, 21 Speed, 14 Defense, 12 Charm, and a few others. Was not even super impressed by Petra in the Golden Deer playthrough.

MVPs (in order)
Byleth
Petra
Balthus
Bernadetta
Byleth
Ferdinand
Byleth
Caspar
Caspar
Byleth
Constance
Caspar
Byleth
Bernadetta
Anna
Caspar
Bernadetta
Byleth
Byleth
Ferdinand
Constance
Caspar
Byleth
Caspar
Byleth
Bernadetta
Caspar
Caspar


Battles/Victories
Cyril: 0/0
Shamir: 0/0
Catherine: 0/0
Seteth: 4/2
Linhardt: 60/38
Flayn: 89/49
Dorothea: 91/58
Anna: 124/65
Constance: 137/93
Balthus: 152/65
Ferdinand: 212/107 + Petra: 161/56
Caspar: 196/116 + Bernadetta: 234/134
Byleth: 249/160

Stuck Byleth at the top of the heap, once again. Scored tons of those victories early with the Chalice of Beginnings. Was very surprised to see Bernadetta at #2. Did a great job, though.

Notes none of the mages doing well. Lacked the Speed to double. Recalls fairly few wizards for them to tank. (Usually tasked Ferdinand or Petra with that job.) Missed Thrysus too.

Tallied total Battles/Victories for this playthrough: 1709 battles and 943 victories. Also added up the Golden Deer's numbers: 9280 battles and 2465 victories. (Capped battles on one person too.) Won with about 1/6 of the battles and 2/5 of the victories as that Golden Deer playthrough.
 
24,633
Posts
3
Years
  • Age 35
  • Seen today
Rune Factory 5 (Revisit)

Managed to squeeze in a Rune Factory 5 playthrough before Scarlet/Violet. Never took advantage of some things the first time, such as spell sealing mosnters for drops or receiving gifts from villagers.

Rules
  • Hard difficulty. Beat it really fast last time (Summer 19, Year 1) on Normal.
  • Cannot use villagers in combat. Stressed villagers the first time. Wanted to go heavy on monsters this time.
  • Cannot enter Rigbarth Maze (postgame area), except to use as a teleport point. Could potentially subvert a lot of progression with early Orichalcum.
  • Cannot wield Hammers/Axe late-game or Dual Blades at all. Crafts an amazing hammer with basically just Orichalcum.

Came into this with a gameplan:
  1. Capture all the 3-star Wanted Monsters for the crest to see invisible chests.
  2. Stay below level 20 to take advantage of free baths.
  3. Gift items to Terry to get a Heart Pendant (bonus skill experience)
  4. Use the high-level recipes from invisible chests to powerlevel crafting skills by failing recipes.
  5. Create some amazing equipment with high difficult boss materials...or something like that.

Caught all the Wanted Monsters without too much trouble, thanks to Failed Dishes and Object X. Died a few times from one-shots, but nothing too bad.

Went less than great on Heart Pendant. Apparently gifts items based on your relationship with the person. Started at 1 LP. Received mostly Charms and Cheap Bracelets. Took the Star Pendant (bonus experience), though.

Bumped up the relationship to 2 LP. Saw reports of getting one then at low odds. Probably gifted over 500 items through reloading. Saved a Field Pendant (stronger monsters) and a Fluffy Scarf before finally grabbing the Heart Pendant. Estimates this to be around Spring 13.

Wants to talk about the Fluffy Scarf for a moment. Requires about level 96 Crafting to create (max Crafting level: 99). Found the recipe for it in the final main story dungeon, coincidentally. Completely negates the rune power cost for offensive spells, weapon attacks, and some non-combat farming/mining stuff (uncharged). Usually considers magic-based builds bad because of the drain on rune power. Sidesteps that problem. Also combines great with the high level magic spells from invisible chests.

Ran into a snag on the high-level recipe. Misremembered where it was. Thought it was in town or somewhere similarly easy. Picked it up in the fifth dungeon (Atohl's End). Approached level 20 during the second dungeon. Turned off experience gain to keep free baths. Became a bit scarier towards the end, particularly with enemy casters hitting for 80%+ health. Grabbed the recipe in the end (and also the Cooking one in the next dungeon, just because).

Next up: powerleveling. Cleared out inventory space. Failed the recipe in batches of 30 (dependent on inventory space). Managed maybe 150 "attempts" before needing a bath. Rinse and repeat, no pun intended. Yielded 3 levels per 30 craft attempts at the start. Dropped to 1 level per bath at the end. Made it to 95 in Forging, 95 in Crafting, 90+ in Cooking, and 60+ in Medicine (for fun).

And finally, make something amazing. Knew exactly where to go for this: Sirens at Lake Yumina. Finds low-level Sirens at one specific spot. Accesses this from the start of the game. Farmed Sirens for Melody Bottles, a 94 difficulty material with a high drop rate. Yields the second highest straight Magic Attack increase in the game. (Technically. Lands around #9 after factoring in Intelligence from other materials.) Forged a simple Ice Staff (level 31 recipe) with 80 base Magic Attack. Crammed four Melody Bottles into it, bringing it up to 760 Magic Attack. Literally doubled the base Magic Attack of the best staff craftable before postgame (Crimson Staff with 380).

Also combined the accessories from Terry together. Decided on 0 rune power spells, bonus experience, bonus skill experience, and stronger monsters. Upgraded it with a Melody Bottle for good measure.

Followed the plan to fruition. Came time to drown the world in Delta Lasers. Turned experience gain back on. Transformed into an unstoppable force of nature. Doubled in health from levels just from cleaning up the most recent dungeon. Ripped everything apart with a glance.

Did not even bother with creating other pieces of superpowered armor. Beat the game with:
  • Unupgraded Sneaking Boots (6 Defense)
  • Really good unupgraded body armor from a chest (385 Def + 320 MDef)
  • Unupgraded White Ribbon (28 Defense)
  • Turtle Shield (20 Def + 16 MDef) upgraded with a Big Bird's Comb + Double Steel (100% Faint Resistance).
Added a Double Steel onto the accessory for another 340 Magic Attack also. Sufficed (barely) until halfway through postgame.

Replaced the weapon and shield for the final push, as well as upgrading the current accessory further. Catapulted from ~2200 damage per Impact Laser hit to ~16000 damage. Hit the phase change (50% health) on some bosses in a single Gatling Comet. Turned the final postgame boss to ash in seconds.

Cleared the main story on the morning of Summer 1 and postgame on the morning of Summer 4. Beat the final postgame boss on Summer 19 in the first playthrough on Normal difficulty, for reference.

Wrote about some shortcomings in the last entry (such as being done way too quickly). Realized one of the game's flaws with this playthrough: monster scaling. Wore trash gear, defensively. Took hits, but barely any damage...most of the time. Identifies a few outliers. One example: Rigbarth Maze dragons. Spawns as a normal monster. Hits harder than the final boss.

Found some stats. Chose a dragon and another normal enemy only in Rigbarth Maze.

Yellow Dragon
Basic level: 130
HP: 24905
Atk: 5464
Def: 3802
MAtk: 4824
MDef: 2602

Lorelei
Basic level: 150
HP: 7500
Atk: 1194
Def: 810
MAtk: 1373
MDef: 780

Look at the difference in stats. Quadruple the offenses. Triple the hitpoints and defenses. 20 levels lower. Might as well compare Hoppip to Mega Mewtwo X. (May actually be a little less lopsided, in terms of stats.)

Actually proved more dangerous than the final postgame boss. Rematched that boss with the old staff and shield (although boosted considerably with the upgraded accessory). Won with those.

One more shortcoming: kind of trash offensive spells.
  1. Huge delays between casting for some spells. Locks you into a 5+ second spell in some bad cases.
  2. Bad range. Designed quite a few melee range spells.
  3. Terrible damage. Why use Light on something weak to Light when neutral Water hits harder?

Wonders if a no-armor run is possible. Removes some of the fun of making your own gear. Maybe weapon + accessory? Seems more than doable with (fully geared) villagers. Perhaps another playthrough.
 
Last edited:
24,633
Posts
3
Years
  • Age 35
  • Seen today
Persona 5 Royal

(Vague spoilers ahead)

Watched playthroughs of Persona 3 and 4. Stayed away from watching 5 in the event of getting a port one day. Actually happened. Received high praise too.

Breaks this down into three major sections: main story, combat, and everything else.

1. Main story. Centers around the injustices of society. Presents people in power abusing that power. Falls to you to "steal their heart" to make them realize the magnitude of their transgressions.

Hammers this home in the first chapter. Witnesses threats against you, your friends, and the other students at every turn in a scummy way. Compounds this with everybody else refusing to speak up. Really wanted to beat that boss.

Lost some of that motivation in later chapters. Never felt as personal. Rarely made direct contact with them in real-life. Learned about them as much in their Palace (see: their distorted view of the world) as in the real world. Credits that first chapter for being a good hook into the rest of the game, however.

Fused the story with the setting very well. Points to the Casino as a great Palace. Stressed the drive to win at all costs in an unfair system. Manifests as cheating at rigged gambling games.


2. Combat. The game's weakest point. Defeated most overworld encounters without getting attacked. Ambushes monsters very easily. Rewards you heavily for that. Enables you to hit the monster's weakness, giving you another turn. Grants you a turn on top of that for hitting a different monster's weakness. Spirals out of control quickly.

Cuts both ways, however. Prepare for pain if anyone in your team is weak to their attacks. Means two big spread attacks (sometimes) on top of hefty damage to the weak party member. May also take that weak party member hostage. Give them what they ask, or they kill your party member outright. Comes in addition to some insta-death spells. Oh, and also the Despair status. Robs the afflicted character of their next three turns (unless removed). Dies on turn 4.

Gives your main character the ability to hold multiple Personas. Also contains mechanics to fuse Personas into stronger ones. Was not impressed by it. Generally wanted the same things: a -50% SP cost for an [element] ability, a single target [element] attack, and a multi-target [element] attack. Ideally adds status moves, buffs/debuffs, +[element] damage, and anti-weakness passives. Passes these abilities and skills through fusion. Made all of the Personas feel the same.

Explains how bad that is with Pokemon. Imagine starting out with a team of unevolved Pokemon of every type: Pidgey, Pikachu, Weedle, Horsea, and so on. Rarely levels up. Fuse Pidgey and Pikachu together to obtain Pidgeotto. Knows all of Pidgey's moves (and maybe one better move). Now repeat this for the seventeen other Pokemon. (Allows you to resummon Pikachu, Pidgey, and any others.) ...Now go through this process five more times. Becomes tedious. Benefits so much from doing it, though.

Struggled to create specific Personas (for Advanced Fusions requiring multiple Personas). Could not help but think of Dragon Warrior Monsters from an earlier journal entry. How do you get the monster you want? Try "Fuse by Results". Not there? Look it up. Seriously. Only does so much good too. Searched for a fusion calculator. Throws it out of whack if one of the Personas leveled a little too much. Wasted a lot of time that way.

Did a lot of what Dragon Warrior Monsters did wrong, right. Did you lose something good by fusing? Just resummon it. Never needs to worry about leveling from level 1. Begins strong and raring to go. Swaps between Personas at the drop of a hat.

Shouts out one last bad thing: the Space boss. Put it on a 30 minute time limit. Throws four enemies at you. Requires you to defeat them all at once. Runs away and repeats the phase if you mess it up. Adds to this disaster by buffing the defense of only one of the enemies.

Failed the time limit twice. (Bailed on the second attempt after seeing how poorly it was going.) Went on a fusing spree and a bit of reequipping. Beat it with 8 minutes to spare. Still felt bad.


3. Everything Else.
  • Confidants: A huge boon to the game. Enjoyed these small stories. Held interest when the main story went into a lull. Appreciated the beneficial effects too.
  • Social stats: Enjoyed trying to balance leveling confidants and increasing social stats.
  • Transitions: An odd highlight to the game. Identifies this as one of the little things done so well. Steps on a subway. Shows silhouettes of people walking by instead of a black loading screen with tips. Awards you experience at the end of battle. Runs off to the side as you return to the overworld. Feels so smooth.
  • Music: Never grew tired of it, despite all of the time in the game. Really liked "Life Will Change" too.
  • The city: Bombards you with small, weekly events. Get special bread on Friday. Watch the shopping channel on Sunday. Get extra Maid Cafe points on Saturday. Visit the Jazz Club on this date for a bigger boost. Cannot visit the Fortune Teller on rainy days. Rewards you extra for working at the 777 on days with a 7 in them. Loves these little things.
  • Classroom questions: "Which famous ukiyo-e artist of the Edo period is said to have moved residence over 100 times? Utamaro Kitagawa, Hokusai Katsushika, or Ichiryusai Madarame?" ...What? Realizes the villain to be one of the names (and incorrect). Localization doko?

Rates the game at 8 out of 10. Recommends it. Might have been a 9 out of 10 if the Palaces had been cut in half. Fought so many battles without a scratch that did nothing to advance the story.

Game stats
Play time: 116 hours, 19 minutes. (Yes, for just the main story.)
Persona Compendium: 88%
Achievements: 62% (approximately)
Confidants: Maxed all. Chose friendship for every romantic interest. (Sweated on maxing everyone. Only had ~3 days to spare out of a year's worth of days.)
Social stats: Maxed all.
 
Last edited:
24,633
Posts
3
Years
  • Age 35
  • Seen today
Fire Emblem: Engage

Looked forward to this game. Enjoys the franchise more than Pokemon. Wound up a little delayed in beating it because of the prior game being a 100+ hour behemoth. (Generally prefers to stick to one game at a time.) Chose Hard/Classic difficulty. Trusted in the time rewind to allow Classic. Finished it today.

Made some interesting changes between games. Created two new mechanics (besides the Engage gimmick):
  1. Armor Breaks. Disarms a unit when hit by a weapon advantageous against their own. Cannot counter on the next attack. Does not affect "Armored" unit types.
  2. Chain Attacks. Triggers if a unit attacks with a second, "Backup" unit within attack range of the target. Adds an attack that hits for 10% of the target's health with an 80% hit chance, regardless of Defense/Resistance/Avoidance.

Worried about this pushing the game in a Player Phase direction. Generally prefers a slow, Enemy Phase approach. Assuaged that fear pretty quickly. Might be the strongest Armor units have ever been. Gave them ridiculous levels of Defense. Ended the game with Louis at 48 Defense before modifiers. Compare that to next closest 35 (Alfred) and 28 (Alear). Sent Louis off to solo things regularly, moreso early with fewer mages lurking then. Still proved valuable at the end.

Also buffed daggers to a really good point. Deals solid damage after some forging.

Enjoyed the gameplay. Did a good job of making enemies threatening. Panicked a few times, especially on Chapter 17. Needed to pop Engages to survive sometimes, rather than the usual "hold onto this nuclear device, but never use it until the last turn" tactic. (Pulled that plenty of times too.)

Turned gold into a tight resource (without DLC, anyways). Dumped most cash into forging. Also allows you to engrave weapons with emblems. Impacts the weapon (and unit's performance) drastically. Creates a new layer of planning of who to give what.

Missed a few notes, however. Points to skills being a sticking point. Messed up on almost all of them.
  • Personal Skills: Tended to be insignificant. Example: +50% HP for recovery items for units within 2 spaces. Alternatively, +2 damage with a male and female ally within two spaces. Another: +2 damage if getting Chain Attack support. Appreciated a few, like Yunaka's +15 Critical on terrain with an Avoid bonus.
  • Class Skills: Dull. Swap, Pivot, Reposition. +1 Attack for each adjacent ally with a tome equipped when initating combat. +40 hit if you did not move. Reserved all the good class skills for royals (Sol, Luna, Ignis...). Only allows you to have one class skill active too.
  • Inherited Skills: The good stuff: stats, immunities, move after acting, Vantage, and so on. Costs SP to learn. Acquires it by defeating enemies. Earns the full SP amount with an Engage ring, but only half with a Bond Ring. Made lots of good skills too expensive to buy (or very late to get). What good is Speedtaker (3000 SP?) if you get it on the last map? Failed to even get 2000 SP on Louis (the cost of Chain Attack immunity) before the last map. Costs 1000 just for Magic +2. Leads to picking the same skills because of price (Canter, +Speed, sometimes +Avoid, sometimes +Hit).

Cannot say many positive things about the story. Divine Dragon versus Fell Dragon. Ventures very little beyond that. Defeated the Four Hounds like, three times? Four? Come on. Stab them harder.

Found the supports kind of flat. Typically became a question of which person's quirk dominated the support, more so than usual. Pushed tea even harder than in Three Houses, somehow. Sprinkled a few decent supports in there too, like Alfred + Celine.

Rates the voices as "eh". Heard too many squeaky voices. Liked Yunaka's and Fogado's voices. Added Fogado to the team purely on voice. Read the lines with actual tone and emotion. Cannot say the same for Alear and multiple others.

Throws another castle at you to waste time in. Ignored the time-consuming bits easier than Three Houses. Fishing? Just a few Bond Fragments and fish. The minigames with a huge input delay? Basically just a free tonic for Alear. On-rails shooter? Decently interesting, but a weak reward. Sped through Arenas, recreations, cooking, and a few ground items pretty quickly. Describes it as a little slower than Fates's base, but not by tons (unless you want to).

Who decided to name the stats "Avoid" and "Dodge"? Labeled them so poorly. Uses the former for lowering enemy hit chances and the latter for lowering enemy critical chance, for the record.

Views the game as overall positive. Allowed plenty of planning and thinking of how to allocate your resources. Plans to replay it sometime in the future.

And last, but not least: stats!
Spoiler: Stats and unit thoughts

Difficulty: Hard/Classic
Clear time: 58:54

Achievements completed: 327
Ally: 46
Battle: 128
Somniel: 87
Shop: 20
System: 46

MVPs
- Boucheron: 12
- Alear: 8
- Alfred: 6
- Yunaka: 4
- Lapis: 3
- Alcryst: 3
- Fogado: 2
- Louis: 2
- Vander: 1
- Etie: 1

Battles/Kills
Boucheron: 258/174
Alcryst: 188/138
Alear: 201/132
Alfred: 206/126
Lapis: 171/117
Yunaka: 170/116
Chloe: 209/115
Fogado: 159/103
Louis: 178/85
Celine: 138/78
Jean: 81/55
Ivy: 80/52
Clanne: 64/40
Diamant: 38/21
Etie: 22/12
Veyle: 15/8
Vander: 16/7
Merrin: 7/6
Framme: 5/4
Timerra: 4/2
Citrinne: 4/1
Goldmary: 3/1
Panette: 2/1
Bunet: 2/1
Amber: 2/1
Rosado: 2/1
Saphir: 1/1
Mauvier: 1/0
Jade: 0/0
Zelkov: 0/0
Kagetsu: 0/0
Hortensia: 0/0
Pandreo: 0/0
Anna: 0/0
Seadall: 0/0
Lindon: 0/0

Individual unit thoughts (final team)
  • Boucheron: Became an all-around beast at some point. Hit hard and took damage well with 76 hitpoints. Calculated Boucheron's average stats. Came out near average, except for the +7.8 on Strength (and kind of +4.2 on Hitpoints). Only inherited Hit +20, by the way.
  • Alcryst: When did all these kills happen? Felt like second-fiddle next to Fogado + Lyn (who came ~7 chapters later). Delivered good damage with Luna criticals, though.
  • Alear: Was deadweight for the middle of the game. Stuck Marth's refine on an Armorslayer. Did not get Marth's skills until very late either. Roared back to life late game with proper skills and a better weapon.
  • Alfred: Considered benching Alfred. Dealt pathetic damage. Took too much. Turned things around with an engraved Killer Lance and Sigurd. Relied hard on criticals. Managed enough Speed to not get doubled.
  • Lapis: Pure favoritism. Liked Lapis's look over everyone else. Managed to pull together a dodge tank build. Improved a lot with Corrin's health buff (and later inheriting some Avoid/Speed skills)
  • Yunaka: A solid all-around tank. Was also the most interesting. Gave Yunaka the Bond Ring.
  • Chloe: Somehow managed a lot of kills, despite...18 Strength at the end? Pulled out a Flame Lance (with an equal amount of Magic). Mainly dodged stuff.
  • Fogado: A good showing for a relatively late entrance. Swapped between a Longbow and Radiant Bow quite often. Bought Lunar Brace (3000 SP) for power near the end.
  • Louis: Calls shenanigans on that kill count. Fully expected Louis to be top 3. Did so much for the team. Zero regrets. Would bring along again.
  • Celine: The best of the mages, in terms of kills. Had such terrible stats. Split them evenly between Strength and Magic. Bumps up Ignis...but who cares when your Magic is that trash? Lacked great Speed too. Helped as a healer and Byleth Engage dancer in the second half of the game.
  • Jean: Underwhelming. May have squandered Jean's potential. Was hard to put in with such low health and middling Speed. Never really needed to mage-duel either.
  • Ivy: Not impressed. Capped Dexterity. Earned 2 higher Speed than average. Was still as slow as molasses at 25 base Speed. Probably could have patched that up with +Speed instead of Draconic Hex. Mostly healed, like the other mages, with some Chain Attack support via Lucina.
  • Veyle: Basically Ivy with 2/3s the hitpoints and not flying. More of a liability with iffy hit rates on Nova. Is surprised at even 7 kills.
  • Seadall: Danger city. Was unprepared for 2 extra unit deployments at the end. (12 Emblems, 12 units, surely!) Entered the lategame with enemies double Seadall's level. Never entered combat by design. Would have died to just about anything.

Additional sidenote: Scored very few mage kills for a reason.
1. Poor Emblem options for mages. Liked Byleth on Celine for Thyrsus on Elsurge (a normally one range spell). Besides that, Celica and...who? Lyn?
2. Gave nearly all the engravings to everyone else. Wanted super criticals on a Killing Edge. Favored Avoid on someone constantly dodging. Already had bad Speed on the mages, so skip the heavy engravings for strong damage. Put one of those on Thunder, which does not matter.
 
24,633
Posts
3
Years
  • Age 35
  • Seen today
Chained Echoes​
Received this as a gift. Never heard of it before then. Entered into this with few expectations.

Starts off with Glenn (the main protagonist) assaulting an enemy base on a suicide mission. Reaches the objective: a fist-sized crystal. Smashes it to pieces. Triggers, to Glenn's surprise, what amounts to a nuclear explosion (with the people immediately nearby safe). Effectively ends a decades-long war. Leaves Glenn to grapple with the guilt of killing so many.

Cannot drop such long-held aggression so easily, however. Picks back up one year later as leaders desire war again. Follows Glenn's quest to stop the nuclear explosion crystal from being used again.

Was not very impressed by the story. Painted Tarwyn's leader as unquestionably evil. Plays the victim card to be extra annoying too. Whines about having to do all the evil work. Also never actually resolves something kind of important. Talked about the "Harbinger" threatening to destroy the world. Met some people trying to resurrect that. Never dealt with those people or the Harbinger.

Clearly put effort into worldbuilding. Felt a bit much here and there. Talked about the other six(?) continents briefly in one book. Mentioned seven massively powerful beasts that are somehow not more of a threat. Appreciated some of the talk about ether (see: life + magic) and the differences in plants, monsters, and humans. Generally finds the magic system the most interesting in a given setting.

Drew some very nice pixel art. Compares it to Golden Sun. Might be better than that, actually. Remembered to grab one screenshot with the Sky Armors in a cutscene.
Chained Echoes Worm King.png

Nitpicks on one point: major character sprites. Completely lacks any kind of emotional expression. Displays the same portrait and the same sprite. Gave Golden Sun characters small expression boxes (like sad, angry, and happy), at least. Depicted one character crying once. Waited until the credits to see any more emotion than that (and several different character, at that). Where were these sprites earlier?

Sort of on the subject: tons of cats and dogs to pet. Might all have unique sprites. Petted all the cats (and dogs), as per the journal signature gif. Took half the game to find a cat that does not hiss at you.

Moves on to the next important part of the game: combat. Was not a fan. Would not call it bad, for the record. Needs to break this down into several parts.

  1. The Overdrive Bar. Looks like this:
    Overdrive Bar.png
    Affects the battle, based on where you are at on it.

    Yellow: Normal
    Green: Deals 125% damage. Receives 85% damage. Halves TP costs for skills.
    Red: Receives 125% damage.

    Pushes your marker to the right for every enemy action and for most of your attacks. Moves from the middle of yellow to green in about four actions. Indicates precisely how far you move very clearly for any given action, also.

    Moves slightly to the left if you defend. Also selects a random skill type (Debuff, Buff, Physical Attack, Magical Attack, or Utility). Highlights the skill text. Sends your marker significantly left (a hair more than the length of the red bar) for using one of those skills. Changes the action after you do it or after 4 turns.

    Makes battles against large groups much more difficult than lone enemies. Describes it as a "lose more" mechanic, in a sense. Takes more damage by being in red. Stands a higher chance of someone going unconscious. Leaves you with even less control over the bar. May force you to choose between resurrecting your ally (and staying in the red) or constantly choose less optimal moves to return to the green.
  2. Questionable skills. Had several moments of "Is that worth it?". One such skill: make all enemies "Dry" (see: weak to Water). Synergizes great with the character who has a Water skill that hits all enemies, right? Well...is it? Doubles the damage dealt. Loses the Dry status after being hit by Water. Used two moves to hit once for double damage. Likens it to Oranguru's Instruct. Was that attacker's turn significantly stronger than the debuffer's? Shrugs. And, if so, why not just use another attacker and pick a different move on the debuffer?

    Another skill: a party-wide +12% Attack buff for 5 turns. (Improves mildly at higher skill levels.) Is that small overall damage increase worth more than additional damage (and potentially removing an enemy) sooner?
  3. A terrible difficulty curve. Feared a random group of 4 enemies early more than the final story boss. No joke or exaggeration. Took more damage, percentage-wise, from one of their attacks than the final story boss's. Hit for about the same numbers, actually.

    Also got gear checked by an optional boss about four hours in. Lost three times. Returned after gaining a level and forging weapons/armor. Crushed it. Feels bad that early.

    One more nasty enemy early: Saliva (a plant creature). Always appears alone. Occasionally counters your attacks by setting your whole party's health to 1. Hopes your healer is next up. Will knock someone out otherwise. Places you in a precarious situation.

    Blames some of the later difficulty drop on the sheer power of stacking Agility buffs. (Well, that and all status effects working against all enemies.) Regularly took 2-4 turns for the enemy's 1. Becomes even stronger alongside a heal over time. Heals the character when their turn comes up. Popped back to full much faster than a straight heal would have.
  4. Fully healing after every fight. Sounds good on paper. Allows you to go all-out in every fight. Designs around that, however. Likens all encounters to minibosses, in terms of length. Gets annoying if you need to refight that encounter. (Sees them on the overworld, generally. Cannot skirt around most. Flew over old ones after getting Sky Armors, as a plus.)

Gripes about some poorly explained mechanics. Stuck a tutorial in your menu. Explains things like Dry and the Overdrive Bar. Great. Overlooked explaining what your basic stats do, namely Agility and Mind. Found out about Mind from an NPC (better magical defense and healing). Never stated what Agility does. (Gives you more turns. Does not seem to affect dodge chance or critical chance.)

Similarly, what does "healing potency 0.4" mean? Never figured that out. (Probably something like Mind * 0.4?) Also never discovered what makes Toxic and Poison different. Doubts a Toxic mechanic like Pokemon's.

Ends on one good and bad point: customization. Chooses between an active skill, a passive skill, and permanent stat gains for every level-up. Unlocks a new set of choices after about 7-9 picks. Liked choosing what to get next, to a degree. Eventually stopped caring about the current set. Limits how many active and passive skills you can run at once. Like, do you really want +35% damage against Dragons when you can just get +30% Magic?

Implemented a really wonky gem system too. Takes too long to describe in detail. Became really tedious at the end, though. Forces you to unslot and reslot every gem when you get a new weapon or armor piece. Did that for all 12 characters. (Fields 8 in a fight, with 4 in active combat and 4 able to tag in. Ought to at least do 8 of them.)

Final opinion: Not recommended. An okay game, but not more than that. Bothered to beat the superboss, if that tells you anything. (Only took 1-2 hours more for postgame stuff. Wanted to "finish" the game fully.)
 
24,633
Posts
3
Years
  • Age 35
  • Seen today
Mario + Rabbids: Sparks of Hope

Played through the first game of this tactical shooter series earlier. Felt okay, but with some flaws. Mixed up a few things this time.

One major change: switching from a tile-based movement system to a distance-based one. Draws a circle around your character. Allows you to walk anywhere within that during your turn. Means you can jog up to an enemy, dash into it for damage, then run a long way back for cover. (Locks you in place if you use your primary attack, however.) Works really well, especially when trying to figure out line of sight and attack angles.

Added Sparks, a Rabbid / Luma fusion, as a new feature. Equips up to two per character. Costs 1 of your 2 action points to activate. Finds one of each element (Burn, Shock, Splash, and so on) for weapon attacks and dash attacks. Powers up that attack type with additional effects and damage until your next turn. Proves very powerful when you get multiple dashes or multiple attacks.

Created a few other Spark options also: area effect damage around you, summon an ally, damage reduction, healing, and invisibility. Made the invisibility ridiculously strong. Lasts for two turns on a three turn cooldown. Never targets that character while invisible. Renders that character near-invincible. Helps a dash-focused character immensely to stride forward with near impunity. Also proves to be a massive boon on Survive X turns maps.

Mentions one positive on the subject of maps: many different goals. A list from memory: destroy all, destroy X [monster], defeat boss, reach area, destroy all Darkmess eyes, survive, protect structure, and destroy structures. Remembers at least two maps of each. Wishes for this kind of variety in Fire Emblem. Snapped a screenshot of one nice-looking map. Had to destroy all the Darkmess eyes on Wiggler. Moved up and down alongside the train (kind of randomly, annoyingly).
Wiggler Sparks of Hope.png

Next up: skills. Describes the skill tree with the same good and bad feelings as before. Chose between upgrades like more movement, better overwatch, and more range. Made some skills stupidly strong, however, overshadowing the rest. Some examples:
  • Luigi's Overwatch skill tree. Ignores line of sight. Goes up to three separate attacks on a 2 turn cooldown. Pairs with Sparks too. Gains 100% critical chance at a higher elevation too, albeit in a separate tree.
  • Rabbid Rosalina's Ennui skill tree. Fares pretty well at baseline, considering how short maps are, generally. Prevents enemies near Rabbid Rosalina from acting until hit. Lasts up to 2 turns on a 4 turn cooldown with upgrades.
  • Mario's Overwatch skill tree. Not as strong as Luigi's, but still good. Upgrades to 2 charges (fire two shots as one charge). Gains another charge by killing something. No cooldown. Captured a video of one really good instance.

    (Only caught 30 seconds of it. Suffices.) Cleared overworld encounter maps in one turn between things like this and Luigi's overwatch.

Hates the puzzles once again. No longer tied skill orbs to them. Blocks progression with them instead. Generally reuses the same compact design over and over. Imagine six islands with some gates and toggleable bridges between them. Places two keys on two of the islands. Stick both keys in their keyholes. Involves going back and forth between islands without much option of deviating.

Improved the overall game. Cannot help but feel like something was missing, however. Thinks of an X-Com game here. Cared about your soldiers, civilians, taking aliens alive, and salvaging alien parts in that game. Possibly found new weapons or items to research.

Earns experience in Sparks of Hope, plus coins and star bits (for leveling your Sparks). Won some of the tiny battles before the enemy even acted (on Normal difficulty). Felt more like a speedbump than something good. Technically earned Planet Coins for completing side missions too. Cashed them in for weapon skins, memories (flavor text on something), and a key for a Spark puzzle. Placed very little value in these.

Recommends the game overall, particularly if you enjoyed the first game. Delivered a better game than last time. Still found it a little wanting at points.
 
24,633
Posts
3
Years
  • Age 35
  • Seen today
Triangle Strategy

Spoilers ahead.

Completed the demo of this game over a year ago. Seemed promising. Enjoyed reading through all the dialogue and little bits of worldbuilding. Appeared to have some unit customization too.

Finally came back around to play the full game. Thought about starting from the beginning. Skimmed a Let's Play instead. Sufficed.

Story: Pretty good. Was reminded of Fire Emblem: Path of Radiance, but with more choices. Became the leader of a group of people shortly into the game. Compared Benedict to Soren, the fleeing royalty Elincia to Roland, and the Holy State of Hyzante (with the Roselle slaves) to the theocracy of the Bengion Empire (with laguz slaves, albeit less openly). Does not fit perfectly, of course, but not terribly either.

Offered good choices throughout the game. Mattered...kinda. Influenced when you would get some (mostly) optional party members (if at all). Changed what map you would fight on, although typically little repercussions past that. Stuck one decision at the end that altered the ending drastically, on a positive note.

Will go through all the Scales of Conviction choices. Should be all the main ones.

  1. Visit Aesfrost / Visit Hyzante.
    Followed Frederica on this. Wanted to know more about the Roselle. Recalls no reason to head to Aesfrost, especially given Frederica just left there.
  2. Protect Roland / Surrender Roland.
    Is not about to sacrifice a friend. Trusted in Wolffort's secret traps. Replaces houses, but not lives. Doubted Aesfrost to stop after giving up Roland, also. (Blew up two houses with the traps. Spared houses as able.)
  3. Accept Silvio's Proposal / Reject Silvio's Proposal.
    Needed allies. Preferred to gamble on that than take on Aesfrost with depleted supplies. Goes badly in the latter case anyways.
  4. Smuggle Salt / Report Sorsley.
    Gains favor with someone by doing this, surely. Wants to do good things too. (Reset to eventually convict Sorsley, by the way. Did not like the information gathering phase for that.)
  5. Defend Roselle / Deliver Roselle to Hyzante.
    Easiest choice of the game. Refuses to consider them acceptable losses.
  6. Destroy the bridge / Infiltrate the castle / Destroy the dam.
    The toughest choice of the game. Wanted to infiltrate the castle, actually. Carried risks, certainly. Could wind up trapped in a bad position. Offered a good payout of low citizen casualties and the bad guys not getting away for a change, however. Viewed blowing up the bridge as a waiting game in Aesfrost's favor. Might blow up more than the bridge too. Worried about the dam break killing lots of citizens now (flooding) and later (loss of drinking water and irrigation). Accepted the second best option.
  7. Return to Symon / Expose Royalist corruption / Investigate bandits at Rosellan village.
    Deals with pressing matters. Talks with Symon in due time. Ought to be able to expose the Royalists without a military force. Leaves the Rosellan village.
  8. Frederica and the Roselle / Roland and Hyzante / Benedict and Aesfrost.
    Foresaw Aesfrost or Hyzante smashing Glenbrook after the other fell. Viewed an alliance with either as a death warrant. Preferred not to deal with either and let them fight each other. Forced the issue, however. Why not free the Roselle as a bonus? Questions why Wolffort citizens did not tag along, but oh well.

Disliked the ending a little, though. Seemed cheap to kill off Serenoa. Why would Idore blow himself up? Why was Idore alive, given that map's objective was to kill Idore? Stab harder during combat. Was displeased with Avlora, Silvio, and Rufus surviving their defeats (with Rufus dying in maps twice). Goes both ways, in fairness. Lost units plenty of times.

Would have liked to know the final conviction values. Reveals your total conviction values...if you play to Chapter 5 in New Game+. Pass. Gauges it somewhat, however, based on optional characters.

In party:
Archibald (400 Morality + 500 Utility)
Ezana (400 Utility + 500 Liberty)
Medina (500 Morality + 400 Liberty)
Flannagan (1050 Morality + 750 Utility)

Missing:
Maxwell (750 Morality + 1050 Liberty)
Groma (1050 Utility + 750 Liberty)
Decimal (1600 Morality)
Quahaug (1600 Utility)
Giovanna (1600 Liberty)

Had at least 1050 Morality, 750 Utility, and 500 Liberty. Scored under 1050 Liberty and 1600 Morality for sure. Accumulated less than 1050 Utility and/or 750 Liberty.

Combat: Played on Normal. Felt pretty difficult. Hit about as hard (if not harder) than your characters. Fielded more units than you. Fought with weaker tactics than you, though.

Stuck with the beginning characters most of the way: Serenoa, Benedict, Frederica, Roland, Anna, Erador, Hughette, and Geela. Added Julio (a handy TP source) and Corentin (ice mage) for the other slots. Called in Trish to replace Benedict after going with Frederica's path.

Mentions something odd about levels and experience. Entered every map below the recommended amount...by design. Earns tons of experience for any non-move action (including attacking a tree) for any unit below the recommended level. Dries up fast when you hit that recommended level. Helps you level up new units quickly, on the plus side. (Went from level ~11 to 23 in one map on one character. Ended the game at level 32ish on most characters, for context.)

Was not super satisfied on unit customization. Goes about it three ways:
  • Equipped accessories. Tended to be +stat or +resistance items. Put in some others too, like getting a buff for killing something or reduced damage from back attacks. Eh.
  • Promoting them. Typically picked up one promotion item per map. Who do you spend that on? Gains a few stats and new level-up abilities. Promoted every main unit once by the end. Upgraded ~6 of 10 to the final tier.
  • Weapon upgrades. Selects from 5 choices for each of the first two tiers. Drops to 3 choices in the final tier. May pick more than one option. Costs quite a bit more per ability in that tier, however. Found mostly +1 stat in Tier 1, +2 stat or TP reduction in Tier 2, and a unique ability in Tier 3. Offered the best means to customize a unit to your playstyle, but not drastically, for the most part.

Adds an extra note about weapon upgrades. Occasionally placed "weapon potency +5" and "magic attack +1" in the same tier. Accomplishes the exact same thing, except with one being strictly worse. Never tells you weapon potency affects your spells, either.

Spotted some interesting customization in terms of party makeup. Noticed bonuses on an archer for being in a tempest. Combos well with a character that changes the weather to a tempest (and benefits from it too).

Did not innovate with map design much. Wound up being routs (effectively or otherwise) most of the time. Disarmed mission-ending bombs (on top of defeat all) on one map with minecarts, at least.

Highlights one gripe: reinforcements. Spawns in without warning. Moves before getting a chance to react sometimes. Hated it in the final map. Planned around dealing with 9 units and the boss. Became a lot more awful plan with an extra 6 units within attacking range. Designed this game to be about strategy. Undermines that by popping in units for no reason.

Describes the combat as okay overall. Improved as more abilities came into play, particularly for mages hungry for TP to cast spells. Lacked a certain satisfaction, however. Rarely felt strong. Won because the AI came in pairs and trios.

Grabbed two screenshots worth showing, also.

1. Tried to toss poison down on someone. Failed to because of line of sight. How hard is this?
Triangle Strategy Line of Sight.png
2. Dropped bombs throughout the battle. Rushed to get some (with plenty of time to spare). Plopped this one down very close.
Triangle Strategy Bomb Drop.png


Overall: Recommends it. Enjoyed following the story and making decisions as well as able. May wind up playing another route (the best path, most likely) sometime.
 
24,633
Posts
3
Years
  • Age 35
  • Seen today
UMoria

Unearthed a game from childhood: Moria. Was among the first few Roguelike games. Played this and Angband (a derivative of Moria) from time to time. Definitely never came close to beating either.

May be wondering why the title is "UMoria" rather than "Moria". Originally named the game Moria. Supposedly updated the game later on to port it to the Unix operating system. Stuck in some improvements too. (Source: some Reddit comment.)

Uses some familiar Dungeons & Dragons mechanics: same six stats, weapons with damage like 1d8, and Armor Class. Creates a character with mostly standard fantasy races (Human, Elf, Dwarf, Gnome...), with Half-Troll being the more unique option. Offers six standard classes as well.

Chose an Elven Mage. Randomly picked female. (Sidenote: Gives female characters less weight than male character. Affects carrying capacity and bashing stuff like doors. Counterbalances this by starting female characters out with more money.) Allows you to roll your stats as many times as you want. Shot for a strong Intelligence and decent Constitution and Dexterity.

Behold the high-definition ASCII graphics. Did not resize this screenshot either. Breaks all the text when you resize the game window. (Might be able to reload the screen? Did not try that.)

Umoria Town.png
Remembers the opening town relatively well. Consists of six stores. Sells things you would expect, from weapons to armor to scrolls. Includes food and light sources also, which you do not want to run out of.

Bought a bunch of armor and a little extra food. (Seems to allow wizards to wear whatever armor.) Chose Magic Missile as a known spell, since Detect Monsters, Phase Door, and Light Area do not inflict damage. Notes a 21% failure chance on Magic Missile for some awful reason.

Stepped down the stairs (>)...and immediately died to the first monster, a Giant House Fly. Took the Magic Missiles no sweat. Good start.

Might have tried a second wizard. Killed a few things. Regains mana really slowly. Like, maybe 1 mana per 40 steps? Had a maximum mana of 2. (Costs 1 mana per Magic Missile.) Feels wildly underpowered. Might have been harassed by some invisible monster too.

Swapped to a Dwarf Warrior. Should be safer while learning. Proved correct. Gained a level or two. Encountered some Novice Priest and then insta-died from...full health? Should have been good on health. Sees no player character priest spells that even do damage before level 9. Shrugs.

Dealt with a strange problem around this point. Randomly moved the cursor onto other spaces. Seemed to be interpreting movement (with the Number Pad) as commands of some kind. Fixed it somehow. Suspects some issue with Paint and being able to move the cursor with arrow keys...or something. Remains a small mystery.

Anyways, next character: back to Figh--and dead to something in town. Did not even equip stuff yet. (Kinda contributed to the whole dying part, but still.)

Finally got off the ground on the seventh attempt with another Warrior. Made an unfortunate error with them. Starts even Warriors off with a pathetic 1d4 damage dagger. Costs a fortune for anything better in town. Stumbled across a "Thrusting Sword (Bilbo)" that does 1d6 damage. Sounded special. Must be Sting, Bilbo Baggin's weapon, right? Well, no. Happens to be a type of sword. And cursed, in this case. Was the only actual cursed item found in the run (not counting things like Scroll of Summon Monster).

Tried to return to town for a Scroll of Remove Curse. Segues into another quirk of Moria: saving absolutely nothing. Generates a new floor every time you go down or up stairs. Means scouring every floor for the (seemingly only) up staircase and fighting the whole way back. Has the nerve to charge ~325 gold, before haggling, per Word of Recall scroll. Cannot reasonably afford that. Made way less than that exploring too.

Reached town successfully. Lacked any kind of curse removal. Also offered garbage prices. 3 gold for unidentified potions and scrolls? Maybe 30 gold for a Wand of Magic Missiles (with unknown charges)? Charges 120 gold for a single scroll of Identify. Used that to identify another scroll, which was a Summon Monster scroll they refused to buy. Accomplished basically nothing in town, in short.

Three other highlights:
  • Lice (l). Burned this particular monster into memory. Is a weak monster individually. Creates other lice, however, and very quickly. Made sure to get a screenshot of this trainwreck.

    Umoria Louse Problem.png
    Saw one at the far end of the room. Already split into three before moving to the center of the room. Went exponential in growth. Opted to bail on that room before getting trapped by a wall of lice. Takes the game a moment to process all the lice on screen, also. Processes them all sequentially.

  • Traps. Do not attempt to disarm them, at least as a Warrior. Hit one trap that drained Strength (on an earlier playthrough). Triggered the trap by attempting to disarm it, losing more Strength. Continued out of stubbornness and curiosity. Failed to disarm (and retriggered the trap) a good ten times before going off to die, essentially. Probably costs a small fortune to restore your stats too.

  • Equipment damage. Starts wrecking your equipment around floor...7? Happens on some fire or acid hits. Drops the armor class of an equipped item by 1. Usually lost 1 point if a monster had an attack like this.

    Feels incredibly punishing. Forces you to rely on equipment you find. Will not find enough Identify scrolls to check stuff before you equip it. (Bought one scroll. Found a second later, which appeared as an unknown scroll, for some silly reason.) Means rolling the dice and getting cursed stuff regularly.

Eventually perished, to no surprise. Lost more and more armor class as time went on. Never unglued the cursed sword either. Had a nice 2d6 axe too.

Umoria Best Attempt.png
Was a decent spot to end, though. Started feeling all those key presses. Adds up over time. Helped to find to "Run" command, which sent you in a direction until something happens, but only so much.
 
24,633
Posts
3
Years
  • Age 35
  • Seen today
Fire Emblem Engage (Second playthrough)

Completed a second playthrough of Fire Emblem Engage. Stuck with Hard difficulty (on Casual this time).

Chose all different characters this time. Worked with a low roster of permanent characters at the start due to multiple late recruits. Filled the gaps with Louis and Vander. Dealt with the opposite problem in the midgame. Trained 14 characters. Deployed 12 characters until the last few maps. Usually dropped two of the same four characters.

Did not buy the DLC. Took advantage of the Ancient Well this time, though. Made such a positive difference on SP gain. Solves one of the original complaints about the game. Probably earned over 10,000 SP over the course of the game from the Ancient Well. Afforded tons of skills previously out of reach. Actually ran out of Bond Fragments before SP.

Clocked in at 44:58, just shy of 14 hours less than the first run. Credits most of that to puttering around the Somniel less. Probably saved an hour on skipping later cutscenes. Planned more out-of-game too, rather than staring at the Inherit Skill screen.

Retains a good overall opinion of the gameplay. Still wants to play it another time. Considers that a good indicator. Will probably enforce unique skills and maybe randomizing classes. Gravitates towards Canter on too many units, even with the massive amount of SP. May be too tough to scrounge up the Second Seals for randomizing classes. Accesses unlimited Second Seals around...Chapter 17 or so. Very late.

Speaking of which: Views Chapter 17 (6 on 6 Emblem battle) as the hardest map. Almost never Engages outside of the final turn boss dogpile. Feels much more necessary there.

Individual unit usage thoughts:
Spoiler:


And some stats:
Spoiler:
 
24,633
Posts
3
Years
  • Age 35
  • Seen today
Link's Awakening DX (GBC)

Owned this game as a child. Recognizes the egg in the introduction. Never really played it. Ended up being a sibling's thing, more or less. (Apparently remembers the game better.) Means no nostalgia attached.

Tells as much story as expected. Wrecks the ship in the middle of a storm. Winds up on Koholint Island. Play the eight instruments to get off the island.

Enjoyed the old graphics and music. Looked at the Switch version after finishing. Prefers the old style. Presents a clearer view. Never grew tired of the music (not including one annoying, but temporary, ghost sound effect).

Views the gameplay less favorably. Describes it as a lot of little annoyances. Example: Pushed up against a liftable rock. Pops up a text box saying there may be some way to lift it. Seemed to stop doing that a while after getting the Power Bracelet (but definitely not immediately). Never stopped giving it for blocks you break with Pegasus Boots (or the short time with the Magic Rod).

Another little annoyance: this dungeon entrance.
Link's Awakening Key Walk Around.png

Unlocks the door on the bottom. Cannot enter from that side, however. Why does the game force you to walk all the way around (6+ screens?) to get into the dungeon?

Suffered from hardware limitations at times. Gives you an inventory of 12 items. Assigns them to either A or B. Sounds fine. Includes your sword, shield, Pegasus Boots, and Power Bracelet. Means switching your items around constantly to navigate the world and dungeons. Did not need to put the flippers in an inventory slot, thankfully.

Another hardware limitation: the memory of a goldfish. Typically remembers...six rooms or so? Respawns enemies in after that. Includes minibosses in the final dungeon. Was also extra infuriating with the Signpost Maze. Opened up the staircase. Accidentally walked over a screen (still in the maze) because of falling in a pit hidden under a bush for some reason. Returned back to discover the staircase gone. Had to redo the puzzle. Lacked the 300 rupees to afford the song reward as well. (Recently bought the 970 rupee Bow.) Meant doing the Signpost Maze a third time.

One more hardware(?) issue: the map and staircases. Hooked up some rooms through staircases. Does not display this on the map. Might see an unexplored room somewhere on the map. Leaves no clue on how to reach it. Could be via a staircase on the other side of the dungeon.

Holds design complaints beyond hardware, however.

1. Sticks in mechanics once sometimes, only to never use again. Comes with multiple examples.
  • Keep your shield out to push the Gordo (spike ball enemy). Never needs to push spiky things again. Does not tell you to do this either. Infers it by the lack of other options and routes.
  • Throw a pot at a locked, non-key door to open it. Only works on certain locked, non-key doors that are indistinguishable from the other locked, non-key doors. Used it once early on (zero warning), maybe one more time, and several times in a later dungeon.
  • Throw a pot at a chest you cannot access to open it. Credits the game for telling you this via a hint statue right next to it. Tried potting a chest open later. Nope. Must only work on that single chest in the entire game.
  • Link's Awakening Gold Leaf Crow.png
    See this crow? Must throw a rock at/near it. Cannot attack it until it begins flying. Acts differently than all other crows, which attack when you get close. Drops an item necessary to progress, by the way.
  • Damages one of the final boss forms with sword spins only.

2. Eagle Tower. All of it. Retread so much of that place. Requires taking an iron ball around to smash four pillars. Falls in pits really easy because of how many there are and bouncing off of stuff (such as a sword hit against one of the pillars in a room full of enemies).

Solved one puzzle. Cannot figure out if it was intended or not. Involved a chest. Appears by hitting three enemies to make their card suit match. Despawns the chest by leaving the room (or maybe going downstairs?). Could not access these enemies from the top entrance, which you needed to enter from to get the chest. Solved it by waiting for the enemies to come close, and then swat at them from across a block. Tried pushing one block down and the other right to make room. Did not work.

But also, the boss. Is not a difficult boss, per se. Blows you off the tower to the screen below, though. Resets the boss's health to full (but not yours, of course). Took a while to figure out for sure. Cannot see the boss's health bar or anything.

Made this boss's wind attack difficult to deal with, also. Tried the Mirror Shield, which came from this dungeon. Did not affect the pushback. Pegasus Boots? Nope, feathers (and still being blown back from the run-up). Discovered the problem was charging up the sword. Caused enough delay between that and reaction time that getting blown off was a near certainty. Watched this boss in the Switch version, after the fact. Stays even with the wind by holding the correct direction, unlike the GBC version.

3. Turtle Rock. Required you to notice an arrow on the ground (covered by bombable blocks) pointing at a wall to blow up with no cracks in it in order to progress.

Added one pointlessly annoying thing to this dungeon too: a peg switch. Controls whether they are up or down. Finds only one set of blocks in the entire dungeon, pretty deep in. Becomes a 50/50 if you had the pegs the right way when you stumble upon them. Placed a teleporter in the room, on the plus side. Cut down on the backtracking time. Still took a minute or two for no good reason.

4. Failing for bad reasons, specifically on bosses. Brought up the Eagle Tower boss. Mentions two other bosses.

Color Dungeon boss: One of those shell enemies, but big. Has a colored shell. Says two things:
Start of fight said:
Blue is safe. Yellow is caution. Red is danger.
Orange Shell said:
Yellow is caution. Red in danger, Take your time.

Changes the shell color by hitting it. Starts blue. Turns green, yellow, orange, and then red. Slowly returns to blue over time.

Expected some kind of pacing this fight. Spawned enemies at the orange shell message as reinforcement. Ideally stays in yellow, right?

...No. Hit it as fast as possible. Indicates health with color. Nothing else. Try to get trapped up against a wall to negate the sizeable knockback from hitting. Ends the boss in seconds if you manage that.

Face Shrine boss: Poked four holes in the walls. Peeks out of them from time to time. Also swishes its tail around the center of the room through a fifth hole.

Picked up the Hookshot this dungeon. Seems straightforward. Problem: Cannot use the Hookshot from the edge of the room. Tinks off, even if you time it right. Must be in the center of the room to pull the boss in.

Edit: Forgot about one positive: the in-game hint system. Placed several hint houses throughout the world. (Probably more of those than fast-travel points.) Told you roughly where to go and some hint about it. Was not perfect. Still felt ahead of its time.

Overall verdict: Unpleasant. Might be better in the Switch version. Suffers from too many irritating flaws to like in this form.
 
Last edited:
24,633
Posts
3
Years
  • Age 35
  • Seen today
Commander Keen 2: The Earth Explodes​

Played the first game a year and a half ago. Operates on the same engine and graphics as that game.

Serves up a simple story: stop the Vorticons from blowing up Earth. Wins upon shutting down all eight. Looks like this:
Commander Keen 2 Lasers.png
Disables the machine by shooting the glass dome. (Note: Do not press the lever. Fires the laser, exploding Earth. Results in an instant game over, regardless of your lives.) Conveniently labels the levels with an icon, unlike the first game. Knows which levels contain the laser and which do not.

Starts you off with the pogo stick this time. Carries the same laser pistol as before too. Notes very few enemies to use this on, though. Contains five different "enemies":
  • Vorticon: Same as the last game, but in a yellow suit. Moves and jumps. Dies in one hit.
  • Vorticon Warrior: The dangerous one. Moves, jumps, and shoots. Dies in four hits. Cannot duck in this game, by the way.
  • Guardian Robot: Patrols an area. Fires lasers periodically. Cannot die.
  • Young Vorticon: Runs very fast and jumps very high. Deals no damage, but stuns you. Dies in one hit. (Felt like a waste of ammo. Usually zoomed offscreen.)
  • Scrub: Not really an enemy. Walks up and down walls. Requires you to ride them up in some levels. Dies in one hit.

Adds one unofficial enemy to the list: moving platforms. Sits a pixel above block height, preventing you from walking onto one. Means jumping onto it. Always felt a little scary because of how sticky your shoes feel, if that makes sense. Also sets up these platforms in positions like this:
Commander Keen 2 Bad Elevators.png
Bonks your head on the platform if you time it wrong. Perished to the shock trap shown once from that. Encountered a different platform that pushes you into acid too.

Noticed one common design early on: bait. Places high point items (helpful for more lives) next to risky areas. Screenshotted one easy spot:
Commander Keen 2 Bait.png
Went for (most of) this one. Earned two lives and extra ammo. Was not super dangerous either, unlike most of the others.

Stuck in one more additonal mechanic this game: light and dark. Stumbled upon a few light switches. Turns the room dark, but still bright enough to see most objects. Notably disables the Vorticons' ability to jump. Used that to solve a puzzle, as well as avoid fights by letting Vorticons run into pits. Only killed one Vorticon Warrior (maybe two), despite seeing at least 20. Worked reasonably well.

Beat the game in about an hour and a half (maybe a few minutes longer). Only game overed once (from firing the laser into Earth). Scored 440,000 points, for anyone curious. Was okay, but nothing amazing. Designed this game to actually be beatable by children. Stands in contrast to many games of the day being intentionally hard to compensate for the amount of content. Would not describe it as a pushover, though. Died more than a few times.

Ends on one interesting tidbit. Read the preview. Hyped up the other games in the trilogy ($15 per game or $30 for all three). Also contained a teaser:
Commander Keen 2 said:
As our follow-up to the Commander Keen trilogy, id Software is working on "The Fight for Justice": a completely new approach to fantasy gaming. You start not as a weakling with no food -- you start as Quake, the strongest, most dangerous person on the continent. You start off with a Hammer of Thunderbolts, a Ring of Regeneration, and a Trans-Dimensional Artifact. Here the fun begins. You fight for Justice, a secret organization devoted to vanquishing evil from the land! This is role-playing excitement.

And you don't chunk around the screen. "The Fight for Justice" contains fully animated scrolling backgrounds. All the people you meet have their own lives, personalities, and objectives. A 256-color VGA version will be available (smooth scrolling 256-color screens -- fancy that)!

And the depth of play will be intense. No more "Whack whack here's some gold." There will be interesting puzzles and decisions won't be "Yes/No" but complex correlations of people and events.

"The Fight for Justice" will be the finest PC game yet.

Might recognize a name in there. Details an early vision of Quake, from the makers of Commander Keen and Doom. Wrote this quite a ways before the actual release date. Released Commander Keen 2 in December 1990 and Quake in 1996. Supposedly worked on Quake right after Commander Keen 1-3. Abandoned the idea because of the technology available at the time. (Source: Forum posts from 2000.)
 
24,633
Posts
3
Years
  • Age 35
  • Seen today
Warcraft 2​

Chose an old game for this month's game-along. Delved into the storage containers for this one. Found the CD without much effort. Was only underneath Civilization 4 and Monkey Island 4. Figured out how to run it in DOSBox. Requires the CD for the main campaign, for some silly reason.

Played this game many, many years ago. Set up a Local Area Network to play this (or Age of Empires 2?) with a sibling. Probably never played it tons, but enough to remember music, menus, and such.

Snapped a quick screenshot of just starting out in a custom scenario.
Warcraft 2 Basics.png
Grew accustomed to Age of Empires 2. Noticed something missing quickly: population limit. Displays the number by clicking on a farm instead.

Describes playing this game as a lot of little, unpleasant discoveries like that. Cannot do any of the following:
  • Assign a number to a group (with Control) to reselect those units.
  • Create units or buildings in a queue.
  • Use a unit ability without going on that specific unit. (Example: Group of 9 Paladins. Must click on a Paladin, select the Healing spell, then select another unit who is injured. Does not display other units' health bars when doing so, by the way. Cannot heal itself either.)
  • See what an ability does in-game before using it. Want Fire Shield? Okay. What does it do? No idea. Probably stuck the explanation in the manual.
  • Control units quickly, most notably on ranged units. Locks Ballistas in place after attacking for like...3 seconds? Feels really long.

Reports other problems on the unit control front too. Said "Where are you going?" a few times every map. Struggles just to keep everyone engaged. Tells a group to attack something. Expects one-third to stop and do nothing after that unit dies. Tried using Patrol. Watched a mage in a group run past a lone enemy.

Screenshotted the end result of another patrol gone awry.
Warcraft 2 Patrol Issues.png
Directed the three selected Grunts. Selected Patrol. Clicked a Peasant to their left. Successfully killed it with the Grunt in the center of the screenshot. Watched the other two move up as the command was given (before the Peasant died) and begin attacking the lumber mill.

Another instance: Controls a group of 5 boats. Commands them to attack a tower. Might only convince one to attack while the other four run into the first and just give up, despite having plenty of space.

Also somehow acts incredibly aggressive at times. Winds up with several units pursuing enemies across their whole town. Makes approaching towers difficult. Alerts some defenders by attacking a tower with a Ballista. Fine. Orders the Ballistas to retreat (after waiting several seconds). Quickly sends up infantry to defend. Writes them off as dead immediately. Will absolutely charge the towers and kill themselves.

Completed both the Human and Orc campaigns. Mixed up the mission objectives a bit. Saved units on some maps. Destroyed specific buildings on others. Wiped the map clean on most, however. Demanded it absolutely spotless in those, down to the last Farm, unit, and even (invisible) submarine. Regularly killed 60-70 buildings in the later maps. Wasted a good 5-10 minutes at the end of every map.

Did an okay job on the campaign missions. Generally relied on similar strategies (heavy on Knights/Ogres, or Battleships/Juggernauts for water maps). Credits the maps for forcing a few tactics changes. Added air units to the navy to spot underwater boats. Invested more in anti-air (Destroyers and Guard Towers) when enemy flying units started to get annoying.

Levels some complaints at them too. Mentioned the 5-10 map clean-up already. Contained too many water maps. Separated some bodies of water to make things worse, forcing you to build multiple docks. Over-fortified everything too. Absolutely littered every base and coastline with them (see below screenshot). Likens the Cannon Towers to Age of Empires 2's Bombard Towers, for those that have played that (albeit it with fewer hitpoints). One-shots archers (and footmen/grunts?), potentially multiple at a time.
Warcraft 2 Towers.png

Verdict: Not great by today's standards. Enjoyed the nostalgia. Wore thin halfway through the first campaign. Might be more fun to ignore the campaigns and stick to custom scenarios, though.
 
24,633
Posts
3
Years
  • Age 35
  • Seen today
Tears of the Kingdom

(Spoilers ahead)

Played several Zelda games when younger. Was never a huge fan. Grew more distant with these games over time. Started with Link to the Past. Considered Wind Waker and Link Between Worlds okay. Did not care for Twilight Princess or Skyward Sword, for whatever reason. Wondered what Breath of the Wild was like, but never played it. Heard amazing things about Tears of the Kingdom especially. Borrowed this one to play.

Split thoughts on the game into a few major categories:
  • The world: The main selling point of the game. Offers a huge world full of puzzle shrines, caves, sky islands, and underground areas. Dotted the landscape with several points of interest, such as shrines, fires, Skyview Towers, towns, stables, and colosseums. Assists the player's exploration with the Purah Pad to spot, zoom in on, and mark locations. Puts Pokemon Scarlet/Violet's draw distance to shame too (well, more shame). Works very well.

    Goes one step further. Suggests places for you to visit. For example: Talked to a traveler on the road. Mentioned Misko's Treasures (three different armor pieces). Marked them on the map. Heard about things like Great Faerie Fountains, the Lucky Clover Gazette, and a gem turn-in quest like this too. Typically never gives exact locations, just directions. Encourages the player to look around.

    Lists one more point of praise on this: not much of a "copy/paste" feel. Certainly did that at times. Designed most stables the same. Saw a lot of similar-looking sky islands too, in particular. Felt like every cave and shrine was unique, though.

    Squanders a lot of that potential, unfortunately. Struggled against enemies. (More on that later.) Decided to explore for upgrades. Found very few. Actually might have become weaker as a result, at least for early exploring. Cites three reasons. Puts two here, with the third in the next section.
    1. Few good upgrades out there, not including main quest stuff. Bought Hylian Armor at Lookout Landing, with 3 defense for each piece. Went on a series of quests later for the Armor of Awakening. Solved these quests for...the same defense. Gains a set bonus, but only after upgrading it with hard-to-find items. Requires finding the upgrade place too.
    2. The world leveling system. Implemented a hidden experience system. Awards experience for beating enemies, with a cap per enemy. Covered a lot of ground and saw plenty of enemies. Triggered higher difficulty enemies, and thus, more problems.

    Did not like the shrines either. Describes at least half of them as tutorials. Was not too enamored with the ones that were not. Came up with a few interesting ones (such as a Jenga one or sending a ball down rails). Considers them the minority, though.

  • Combat: Enjoyed bow combat. Rewarded you for hitting headshots with both damage and knocking the opponent down. Felt good to hit long-distance shots. Comes with the downside of depleting both arrows and the bow itself.

    Says far less kind things about melee combat. Triggers a Flurry Rush by dodging. Inflicts a lot of damage with it, incentivizing you to do it. Problem: Felt entirely random when it would trigger. Happened on super early dodges and incredibly late ones, but never with consistency. Pulled off some good-looking dodges with no Flurry Rush to show for it.

    Hated the weapon durability system. Cost several weapons to take down a boss. Usually rewarded you with materials and sometimes money, which did not feel like a worthwhile exchange.

    Rants about one more thing: enemy damage. Hits for stupid amounts of damage. Would have been regularly one-shot, if not for the Sturdy-like mechanic. Always survives with a quarter heart when hit from full.

    Ties into the negative exploring incentive (reason #3). Gained more hearts through shrines. Made no difference for a long, long time (20 hours? More?). Triggered Sturdy constantly. Lost more and more hearts as the heart containers piled up and monsters grew stronger. Expended more resources on cooking. Risked dying from a random, strong monster in a pack of weaklings even at ~15 hearts because of going below half in a single hit. Essentially turned player health into a noob trap. Felt really terrible.

    Compares this game's combat to Paper Mario: Sticker Star. Avoided fights in Sticker Star because of just getting coins. Wasted time without benefit. Started doing the same (when able) in this game. Technically gained some monster parts (used for upgrading armor) through combat. Still never upgraded that high because of drop chances. Decided to just beat the game instead.

    Also scaled the world kind of poorly. Ignored the main quest bosses in favor of exploration. Eventually challenged them about 70% of the way into the game's playtime. Hit weaker than the random enemies. Might have been, no joke, the lowest damage enemy in their dungeon. Neglected to scale them at all.

  • Story: Alright. Better than any previous Zelda story in memory, probably. Did not see the Zelda dragon transformation coming. Expected Zelda to reverse it herself, though. (Foreshadowed it in the memory of Zelda using Rewind. Gained incredible power. Could not end the game with Zelda as a dragon.)

    Complains about one minor thing. Completed the geoglyphs for memories first, before getting any sages. Learned about Zelda's transformation. Saw the fake in the memory. Knew exactly what was going on. Baffled all the other NPCs and Link. Kept searching for clues about Zelda's whereabouts.

  • Puzzle-solving: Credits the game for being flexible on solutions. Points to the Fire Temple as a good example. Saw a gong to hit in a room behind bars. Intended you to fall from the top. Pulled out a Hydrant instead, created a bridge of cooled lava underneath the structure, and Ascended into it.

    Same dungeon. Intended you to take minecarts and hit some switches with arrows...or something. Attached rockets to the minecarts instead and glided around.

    Often felt like the "right" solution was something else quite a bit, as a small complaint. Could not scale a cliff near the start of the game becuase of ice. Created a four log ladder to climb. Worked. Discovered, upon daybreak and returning to the area later, a convenient narrow line up it without ice. (Well, and a spot for Ascend. Did not have that at the time, though.) Probably indicates the "correct" solutions are tedious or something not obvious. Accepts some blame for choosing the more roundabout solution on that particular puzzle, in fairness.

    One quick "is this the solution?" screenshot. Welded 6-7 pieces of wood together. Planted one of the construction stockpiles right nearby, and yet...
    Over the Pallisades.png

Verdict: 4/10. Feels generous giving it that. Laid great foundations. Saw how amazing an open world could be. Does not want you to actually explore it, though. Stick to the main path. Do not wander. Do not fight. Hurts you to do otherwise.

Other notable bits
  • Acquired the Master Sword before getting any sages by sheer luck. Grabbed all the tears. Hoped to get the Master Sword then. Nope. Sighs. Fine.

    Headed to the nearby Skyview Tower to check out Tarrey Town. Crossed paths with Zelda. Shot a dragon for a statue quest not long before. Why not shoot Zelda for monster parts? Got nothing from it. Not too surprising.

    Glided closer. Made the real-life Perception Check and noticed the Master Sword in the dragon's forehead. Landed on it. Yanked out the sword with just enough stamina, thanks to focusing on that instead of health. Skipped several quests in the process. (Eventually stumbled upon the Deku Tree by chance and cleansed the gloom just before fighting Ganondorf.)
  • Found a Korok at the top of a cliff. Wanted to meet its friend at the bottom. Welded the Korok to a sled and pushed it off. Careened wildly down the bumpy cliff before crashing quickly. Describes watching that as quite possibly the most pleasing moment of the game.
  • Final stats: 25 hearts, 2 stamina circles, 5 batteries. Finished with one Blessing of Light on-hand. Finished 81 shrines and found 55 lightroots. Grabbed 93 Korok Seeds. Ended with 3458 rupees.
  • Final armor: Midna's Helmet (the best non-main quest item found), 2* Snowquill Armor, 3* Snowquill Pants. Owned a 2* Snowquill Headband and full 2* of the Goron Firebreaker armor, of note. Did not want to fight a bunch of Frox to upgrade the Depths set to 2*.
  • Path of the Hero. Thoroughly enjoys something like this. Spoilered them for size.
    Spoiler:
 
24,633
Posts
3
Years
  • Age 35
  • Seen today
Link to the Past + Slay the Spire Multiworld

Seems to constantly write about Zelda games here. Strange.

Saw videos of multiworlds before. Wanted to try one eventually. Decided to pull all the pieces together recently.

Might be wondering what a multiworld is. Start by imagining a randomizer. Shuffles most of the items in a game and places them in a way to make it beatable. Could get something like the Surf HM and the Soul Badge from pre-Brock trainers, as a more familiar example. Grants you access to Cinnabar Island (among other locations) far earlier than normal. May not find the Boulder Badge until Silph Co, though.

Now imagine mashing together the items for two (or more) games and placing them in each other's game. Results in things like the Strength HM dropping from the penguin race star in Super Mario 64. Finds progression items for both your own game and someone else's. Potentially waits on someone to discover your Poke Flute.

Combined Link to the Past (an action-adventure SNES game) and Slay the Spire (a deckbuilding game for the PC), in this case. Rearranged chest contents, shops, and a few other drops in Link to the Past. Adjusted the placement of relics and card draws in Slay the Spire. Must defeat Ganon and the Act 3 boss to win. Set Ganon on a random number of required crystals to defeat, also. Set it up to do it completely single-player too.

Took a while to figure out how to connect everything. Barely even messed with modding before, much less connecting games like this. Works a little differently for every game. Eventually fixed all the problems, thanks to the guides on the site.

Started in Link to the Past. Has not played this game in a couple years (and only vanilla). Watched enough videos of randomizers to be familiar with locations and how it works. Describes the first thirty minutes as "awkward". Swapped around the controls twice while playing. Died in some silly ways, although partially to overestimating hitboxes too. Found some decent items early, namely the Power Gloves, Moon Pearl, and Hammer, although no sword yet.

Tried pulling off some speedrun techniques from memory. Successfully managed a Fake Flipper glitch on the first try. Enabled the ability to swim temporarily. Earned the Pegasus Boots early with that trick. Also navigated two rooms that were completely dark (the Old Man cave in Light World Death Mountain and the escape sequence chest in Hyrule Castle) without a map, albeit slowly.

Swapped over to Slay the Spire instead of going into incompletable dungeons or the Dark World. Chose the Ironclad. Used them enough to feel comfortable. Set the Ascension level (see: difficulty) to Random-Low. Ended up on Ascension Level 1, a very easy difficulty.

Tore through Slay the Spire. Only started with maybe two relics and a card draw from Link to the Past. Notes Feed (+maximum hitpoints if you kill an enemy with it) and a +8 damage to your first attack relic among them. Picked up speed very quickly. Grabbed Limit Break (double current Strength), Whirlwind (a very strong multi-target card), and the Sozu relic (+1 energy, but no potions). Picked up some strength cards later to really make the build sing. Cleared the Act 3 boss on the first climb without ever resting.

Returned back to Link to the Past. Felt a little more confident with a sword from Slay the Spire. Remembered, at this point, that shops were also randomized (with randomized prices). (Prepared the settings the night before. Spaced between that and all the setup.) Found so many good items in shops over the course of the playthrough: two sword upgrades, a mail upgrade, Ice Rod, half magic, a glove upgrade, the Lamp, and two bottles. Cost no more than 5 rupees per item. (Standard amount for potions, though.)

Cleared Tower of Hera, Thieves Town, and Skull Woods for the first three crystals. Climbed Ganon's Tower next (2 crystal requirement). Found the Bow in the big chest there. Opened up (and cleared) Palace of Darkness with that.

Only needed one more crystal. Knew it was possible to beat Ganon without Silver Arrows. Declined to try that on the very first randomizer of this game. Cashed in some hints. Indicated the progressive bow in the laser eye bridge room in Turtle Rock (near the back). Hid both bows in very late locations.

Hinted for a few more things: Bombos for entry into Turtle Rock (Purple Chest) and the last sword (Mire Shed). Redeemed a hint for the Magic Mirror too. Stuck that at the Master Sword Pedestal. Did not need it, fortunately. Narrowly avoided doing Eastern Palace, Desert Palace, and Ice Palace for that.

Claimed the final required crystal at Turtle Rock. Battled Ganon after that and won. Win screen for that:
First LTTP Multiworld End Screen.png
(Not an entirely accurate time for Link to the Past. Spent a while sorting out connection issues. Still not shabby for the first randomizer.)

Enjoyed doing it, overall. Likely sets up multiple Slay the Spire characters (or at least a Heart run) next time. Finds way more items in Link to the Past than Slay the Spire (243 versus 29). Could throw Terraria into the mix too. Waits to introduce Pokemon Red. Prefers to build up more Pokemon enthusiasm first. (Just finished a Scarlet playthrough with the Indigo Disk DLC on the horizon. Edit: Or maybe not on the horizon? May have confused it with the new DLC bundle date.)
 
Last edited:
24,633
Posts
3
Years
  • Age 35
  • Seen today
Earthbound (Again)​

Last played this about two years ago (and many more times before that). Returns for another playthrough for this month's Game-Along.

Considered playing this off-and-on since the previous time. Struggled to think of new, good restrictions. Helps the game feel a little fresher. Disliked most of the ideas out there. Passed on the grindfest that is the 1/128 run (getting all the rare drops). Skips too much of the game with a speedrun, not to mention the annoying manipulation involved. Sounded boring to do all auto fights, no PSI, or minimal battles.

Settled on character-by-character restrictions once again.

  • Ness: Cannot use Lifeup or Healing in battle. May only equip Yoyos, Slingshots, and the Casey Bat for weapons (upon being first available).

    Repurposed a No Lifeup PSI suggestion. Kept it available out-of-battle, due to how rough solo Ness areas can be. Allowed only inaccurate weapons for Ness for variety. Never uses them because of their 18.75% miss chance (75% for Casey Bat), on top of any other miss chances.

    Proved to be quite effective restrictions. Missed an infuriating number of times. Gobbled down a lot of Hamburgers early game to keep Ness afloat. Lost the battle against Captain Strong several times, even with PSI Yoyo (Ness's favorite thing) available. Crossed that finish line with the help of a 1/128 Bomb from an Attack Slug.

    Stabilized after the Onett area. Only died maybe once after that section. Continued to cause problems for the rest of the party, though. Relied on items to save party members in battle for the bulk of the game.

  • Paula: Wears at most 2 equipment to cast PSI Fire, 1 for PSI Thunder, and 0 for PSI Freeze. Must also have an active Teddy Bear/Super Plush Bear to cast PSI Freeze.

    Plays like a standard wizard. Ought to make armor tradeoffs like a wizard, right?

    Added the Teddy Bear part to Freeze to stop it from being just "No Equipment". Rarely uses Teddy Bears, so why not? Kept Freeze down more than expected. Could not count on a normal Teddy Bear to last more than two fights. Aggros enemies hard. Used Freeze maybe 10 times during the whole playthrough. Usually stayed at 1 equipment, typically the Other slot (for more defense).

  • Jeff: May only carry items that have no sell price, including equipment. (Exception: Solo Winters section and Monkey Caves.)

    Forces more focus on gadgets. Also removes all Bombs and Bottle Rockets for Jeff. Felt a little similar to "No Equipment", but kind of different. Holds all those key items for the party, as a bonus.

    Underestimated how harsh this restriction was. Thought all repaired items would be usable. Nope. Could only hold onto:
    • Key items (and Monkey's Love)
    • 4 of Jeff's 14 guns.
    • Cherub Band, a bracelet at the final Sanctuary location
    • Good, but late gadgets: Neutralizer, Shield Killer, Heavy Bazooka, and Hungry HP-Sucker

    Repaired the Heavy Bazooka before the seventh Sanctuary. Only really contributed iffy basic attack damage before that. Could not equip a weapon upon joining the party either. Fell just short of the required IQ to repair the first unsellable weapon.

  • Poo: May only use offensive PSI if at least one enemy has a status ailment (crying, poison, feeling strange...) at the start of the turn.

    Wrote this for Paula originally. Liked it enough to hand it to Poo. Hated to do too much bad stuff here. Views Poo as a weaker version of Paula and Ness. Shines a little more this way. Also encourages others to use things like Flash.

    Never used offensive PSI too much. Not because of this restriction, mind you. Conserved PP for healing. Spent any spare time with normal attacks.

    Wound up kind of being like a standard Ness. Hit for good damage (and accurately) with the Sword of Kings in hand. Healed the party a lot. Describes it as a pretty good playthrough for Poo.

Felt happy with this set of restrictions, overall. Provided some good challenge. Only felt too difficult right at the beginning. (Unsurprising. Knew that part was difficult. Thought the first inaccurate weapon was in Twoson. Sells them in Onett too, unfortunately.)

Some other notes on the playthrough itself:
  • Average luck on the Sword of Kings. Spent...an hour and a half on it? Maybe two. Secured auto-wins on lone Starmen with the Casey Bat on Ness and giving Ness's yoyo to Paula. Never went to 2 equipment any other time. (Should have for Gigyas too. Brought the Night Pendant. Forgot to equip it.)
  • One of the easiest Kraken and Clumsy Robot (second attempt) battles in memory. Took zero damage on the Kraken. Died horribly to several Bottle Rockets on the first Clumsy Robot attempt (and the only full party death past Onett?). Only took one hit on attempt #2.
  • On a similar note as above: zero attacks from the Starman Junior in Buzz Buzz's fight. Quite unusual. Usually tries a PSI Fire or two.
  • Fared pretty well against Sanctuary bosses. Thanks Paralysis and Flash for some of those. No insta-kills, though.
  • Became Homesick only once...in Deep Darkness. Describes this as wildly abnormal. Suffers from homesickness just outside Saturn Village like clockwork. Somehow avoided it for so long.
  • Landed the final blow on Starman DX with Paula's 1 damage basic attack. Has 1400 hitpoints, for the record.
 
Back
Top