• Our software update is now concluded. You will need to reset your password to log in. In order to do this, you will have to click "Log in" in the top right corner and then "Forgot your password?".
  • Welcome to PokéCommunity! Register now and join one of the best fan communities on the 'net to talk Pokémon and more! We are not affiliated with The Pokémon Company or Nintendo.

Pokemon Dungeon Escape

  • 47,039
    Posts
    3
    Years

    Pokemon Dungeon Escape - Act 1 - Chapter 13


    The voting results are as follows:

    1-1) Barboach is at 1/32 HP and currently Poisoned. Do we heal up and/or cure the Poison?
    A) Yes, eat a Pecha Berry to cure the poison.
    B) Yes, eat a Lum Berry to cure the poison.
    C) Yes, drink a Berry Juice. Heals up to 50 HP and also heals any status conditions.
    D) Yes, Eat an Oran Berry. Heals up to 100 HP.
    E) Yes, Eat a Sitrus Berry. Heals up to 250 HP.
    F) Yes, eat a Pecha Berry to cure the poison and an Oran Berry to heal. - 1 vote
    G) Yes, eat a Lum Berry to cure the poison and a Oran Berry to heal.
    H) Yes, eat a Percha Berry to cure the poison and a Sitrus Berry to heal.
    I) Yes, eat a Lum Berry to cure the poison and a Sitrus Berry to heal.
    J) No, neither heal up nor cure the poison. - 1 vote

    Tied. I'll join F so we can fight the lone Wooper.

    1-2) Barboach is out of Mud-Slap PP and has 10 Water Gun PP left. Do we eat a Leppa Berry?
    A) Yes, eat a Leppa Berry to restore Water Gun's PP.
    B) Yes, eat a Leppa Berry to restore Mud-Slap's PP. - 1 vote
    C) No, don't eat a Leppa Berry now. - 1 vote

    Tied. hmm... If the Wooper doesn't have Water Absorb it's a waste, but I'd rather be safe so I'll join B.

    2-1) A Trip Trap forcefully unequipped Barboach's Soft Sand. Should Barboach equip a hold item?
    A) Yes, equip the Mystic Water.
    B) Yes, equip the Soft Sand. - 2 votes
    C) Yes, equip equip the Black Glasses.
    D) Yes, equip an Oran Berry.
    E) Yes, equip a Lum Berry.
    F) No, don't equip a hold item now.

    2-2) Should Mouflon hold an item?
    A) Yes, equip the Mystic Water.
    B) Yes, equip the Soft Sand.
    C) Yes, equip equip the Black Glasses.
    D) Yes, equip an Oran Berry.
    E) Yes, equip a Lum Berry.
    F) No, don't equip a hold item now. - 2 votes

    3) Barboach is in the lead. Do we want to swap our lead for this room?
    A) No, keep Barboach in the lead. - 2 votes
    B) Yes, switch to Mouflon.

    4-1) Do we attack the lone Paldean Wooper directly South of us (first) ?
    A) Yes, attack the lone Paldean Wooper. - 1 vote
    B) No, don't attack the lone Paldean Wooper until the others are alerted. - 1 vote

    Tied. I'll join A to whittle down their numbers a bit.

    4-2) How do we fight the enemies in this room?
    A) Offensively; nothing but attacking moves and prioritizes super-effective attacks if possible. - 2 votes
    B) Balanced; Uses both Attacking moves as well as non-attacking moves. Prioritizes super-effective attacks if possible. Uses attacking moves 66% of the time on average.
    C) Defensively. Only attacks once every 3 turns. Uses the other two turns for non-attacking moves.

    5) If we fight all the Wooper due to our exit choice or item pickup choice, we can heal after defeating 3 Wooper. Do we heal?
    A) Yes, drink a Berry Juice. Heals up to 50 HP and also heals any status conditions.
    B) Yes, Eat an Oran Berry. Heals up to 100 HP. - 1 vote
    C) Yes, Eat a Sitrus Berry. Heals up to 250 HP.
    D) No, don't heal up. - 1 vote

    Tied. If we only fight the one Paldean Wooper I see no need to heal again. I'll join D.

    6-1) Do we use the Blowback Orb in this room?
    A) Yes, use the Blowback Orb on Paldean Wooper #1.
    B) Yes, use the Blowback Orb on Paldean Wooper #2.
    C) Yes, use the Blowback Orb on Paldean Wooper #3.
    D) Yes, use the Blowback Orb on Paldean Wooper #4.
    E) Yes, use the Blowback Orb on Paldean Wooper #5.
    F) No, don't use it now. - 2 votes

    6-2) Do we use the Brushoff Orb in this room?
    A) Yes, use the Brushoff Orb on Paldean Wooper #1.
    B) Yes, use the Brushoff Orb on Paldean Wooper #2.
    C) Yes, use the Brushoff Orb on Paldean Wooper #3.
    D) Yes, use the Brushoff Orb on Paldean Wooper #4.
    E) Yes, use the Brushoff Orb on Paldean Wooper #5.
    F) No, don't use it now. - 2 votes

    7) What do we do with the items in this room?
    A) Pick up all items.
    B) Pick up only the Oran Berry and the Green Shard. - 2 votes
    C) Pick up only the berries and Berry Juice.
    D) Pick up only the Berry Juice.
    E) Pick up only the berries.
    F) Pick up only the shards.
    G) Pick up only the Berry Juice and the shards.

    8-1) Which exit do we take?
    A) Take the Southern exit.
    B) Take the Western exit. - 1 vote
    C) Go back to the previous room and take the upper-Western exit.
    D) Go back to the previous room and take the left-Northern exit.
    E) Go back to the previous room and take the right-Northern exit.
    F) Go back to the previous room and take the upper-Eastern exit.
    G) Go back to the previous room and take the lower-Eastern exit.
    H) Go back to the previous room and take the right-southern exit.
    I) Go back to the previous room and take the lower-Western exit and go back West all the way into the watery Large Room. - 1 vote

    Tied. hmm... I'd be down for both, but I) would be the safer pick due to potential Water Absorb Woopers. I'll join I).

    8-2) Before we take an exit, but after navigating the room, we can head back to the hot spring to heal. Should we go heal at the hot spring?
    A) Yes, go heal at the hot spring. - 2 votes
    B) No, don't go heal at the hot spring.

    Spoiler:


    Barboach eats a Pecha Berry to cure the poison and an Oran Berry to heal up and a Leppa Berry to restore Mud-Slap's PP. Barboach equips the Soft Sand and Mouflon doesn't equip any items for now. We keep Barboach in the lead and attack the lone Paldean Wooper to our South. We fight the enemies in this room offensively. We don't heal up after defeating 3 Wooper if we fight all the Paldean Woopers.
    We use neither the Blowback Orb nor the Brushoff Orb in this room. We pick up only the Oran Berry and the Green Shard. We go back to the previous room and take the lower-Western exit and go back West all the way into the watery Large Room. We go heal at the hot spring while on the way.


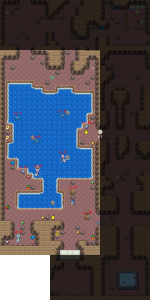
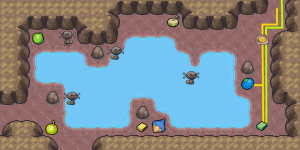
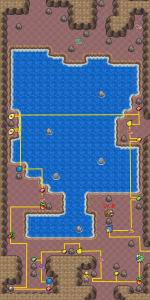
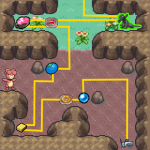
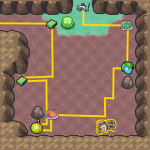
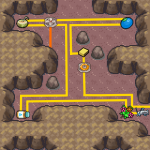
    The path we take is as follows:

    Pokemon Dungeon Escape


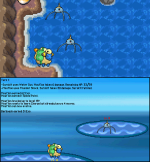
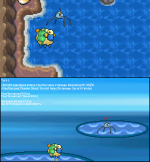
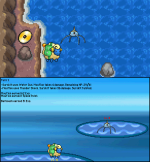
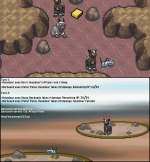
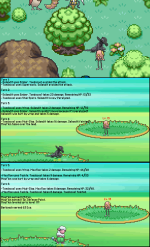
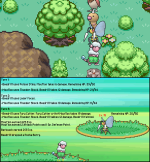
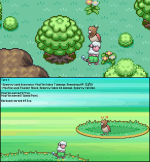
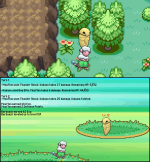
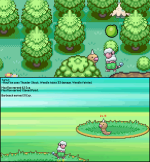
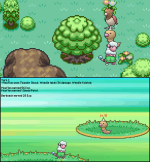
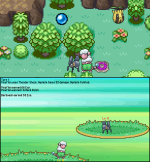
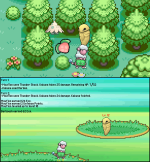
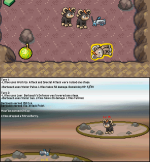
    Stepped on a Spin Trap. Barboach is now Confused.

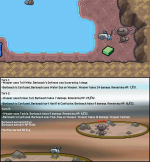
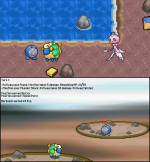
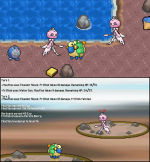
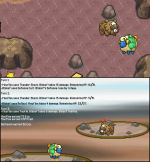
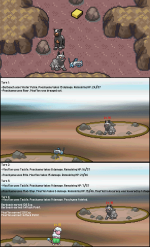
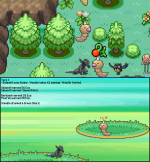
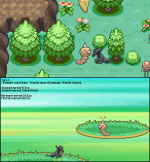
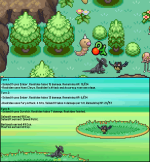
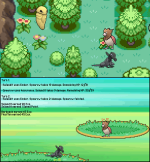
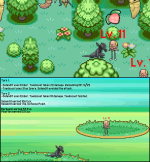
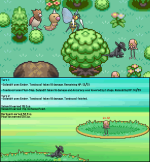
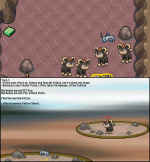
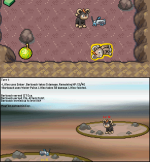
    The fight against the Paldean Wooper:
    Spoiler:


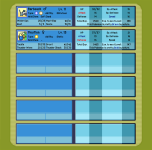
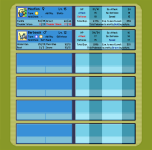
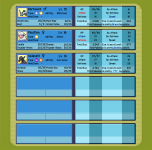
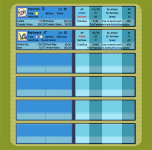
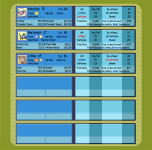
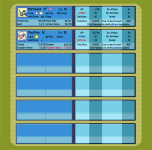
    Team Roundabout:
    Spoiler:


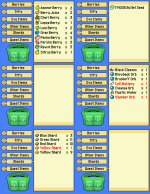
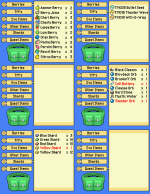
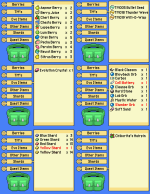
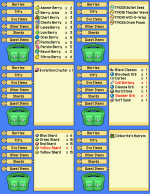
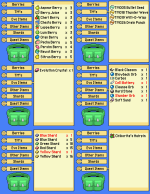
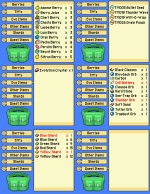
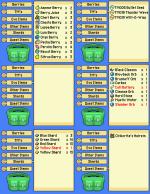
    Inventory:
    Spoiler:


    Quests:
    Spoiler:

    Reputation:
    Spoiler:

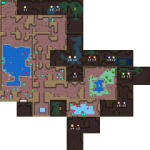
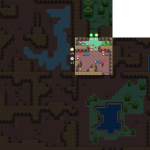
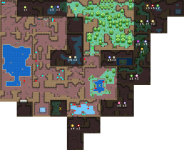
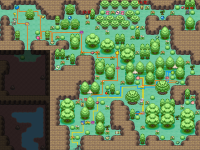
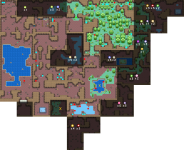
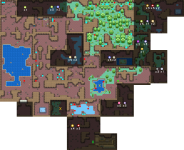
    I've indicated the rooms we haven't entered yet on the map and indicated what type the enemy Pokemon in them are, if known.
    Might be helpful to be able to see at a glance which of the rooms we haven't entered yet.


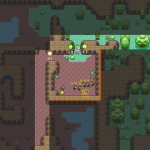
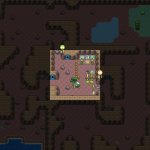
    Dungeon Map:
    Spoiler:


    Pokemon Dungeon Escape - Act 1 - Chapter 14

    We arrive in the watery Large Room on the Western edge of the map. The Southern Room is blocked by some kind of door. We can ask the nearby Abra about it. The upper Eastern exit still has the Bidoof we skipped fighting earlier on.

    Pokemon Dungeon Escape


    1) Barboach is in the lead. Do we want to swap our lead for this room?
    A) No, keep Barboach in the lead.
    B) Yes, switch to Mouflon.

    2) How do we fight the enemies in this room?
    A) Offensively; nothing but attacking moves and prioritizes super-effective attacks if possible.
    B) Balanced; Uses both Attacking moves as well as non-attacking moves. Prioritizes super-effective attacks if possible. Uses attacking moves 66% of the time on average.
    C) Defensively. Only attacks once every 3 turns. Uses the other two turns for non-attacking moves.

    We will need to fight the nearby Bidoof to get past it. The other Bidoof will ignore us as long as we don't get close to it.
    The poliwag and female Frillish will come to attack us. The male Frillish will only come to attack us if we get near it or defeat both female Frillish.
    The Surskit will only come to attack us if we go onto the water.

    3-1) Do we attack the level 8 Bidoof?
    A) Yes, attack the Bidoof.
    B) No, don't attack the Bidoof.

    3-2) Do we go onto the water and attack the Surskit and/or try and avoid them?
    A) Yes, go onto the water and attack the Surskit.
    B) Yes go onto the water, but try and take a path to avoid them.
    C) No, don't go onto the water. (Can be overwritten by the results of the item and exit votes.)

    4-1) We can heal after defeating 3 opponents in this room Do we heal?
    A) Yes, drink a Berry Juice. Heals up to 50 HP and also heals any status conditions.
    B) Yes, Eat an Oran Berry. Heals up to 100 HP.
    C) Yes, Eat a Sitrus Berry. Heals up to 250 HP.
    D) No, don't heal up.

    4-2) We can heal after defeating 6 opponents in this room Do we heal?
    A) Yes, drink a Berry Juice. Heals up to 50 HP and also heals any status conditions.
    B) Yes, Eat an Oran Berry. Heals up to 100 HP.
    C) Yes, Eat a Sitrus Berry. Heals up to 250 HP.
    D) No, don't heal up.

    4-3) We can heal after defeating 9 opponents in this room Do we heal?
    A) Yes, drink a Berry Juice. Heals up to 50 HP and also heals any status conditions.
    B) Yes, Eat an Oran Berry. Heals up to 100 HP.
    C) Yes, Eat a Sitrus Berry. Heals up to 250 HP.
    D) No, don't heal up.

    5-1) Do we use the Blowback Orb in this room?
    A) Yes, use the Blowback Orb on the level 10 Bidoof.
    B) Yes, use the Blowback Orb on the level 8 Bidoof.
    C) Yes, use the Blowback Orb on the male Frillish.
    D) Yes, use the Blowback Orb on the level 10 female Frillish.
    E) Yes, use the Blowback Orbon the level 9 female Frillish.
    F) Yes, use the Blowback Orb on the left Poliwag.
    G) Yes, use the Blowback Orb on the right Poliwag.
    H) Yes, use the Blowback Orb on the left level 8 Surskit.
    I) Yes, use the Blowback Orb on the right level 8 Surskit.
    J) Yes, use the Blowback Orb on the level 7 Surskit.
    K) No, don't use it now.

    5-2) Do we use the Brushoff Orb in this room?
    A) Yes, use the Blowback Orb on the level 10 Bidoof.
    B) Yes, use the Blowback Orb on the level 8 Bidoof.
    C) Yes, use the Blowback Orb on the male Frillish.
    D) Yes, use the Blowback Orb on the level 10 female Frillish.
    E) Yes, use the Blowback Orbon the level 9 female Frillish.
    F) Yes, use the Blowback Orb on the left Poliwag.
    G) Yes, use the Blowback Orb on the right Poliwag.
    H) Yes, use the Blowback Orb on the left level 8 Surskit.
    I) Yes, use the Blowback Orb on the right level 8 Surskit.
    J) Yes, use the Blowback Orb on the level 7 Surskit.
    K) No, don't use it now.

    6) Do we talk to the Abra (about the door)?
    A) Yes, talk to the Abra to unlock it as a teleport point and talk to it about the door.
    B) Talk to the Abra to unlock it as a teleport point, but don't bring up the door.
    C) No, don't talk to the Abra.

    The Electric type TM is TM018: Thunder Wave and the Fire type TM is TM019: Will-O-Wisp.

    7) What do we do with the items in this room?
    A) Pick up all items.
    B) Pick up only the shards.
    C) Pick up only the berries.
    D) Pick up only the TM's.
    E) Pick up only the Hard Stone.
    F) Pick up all the items that don't require crossing the water.
    G) Pick up all the shards that don't require crossing the water.
    H) Pick up all the berries that don't require crossing the water.
    I) Pick up only the TM's and Hard Stone.
    J) Pick up the shards and berries that don't require crossing the water.
    K) Pick up the Hard Stone and all the berries that don't require crossing the water.
    L) Pick up the Hard Stone and all the shards that don't require crossing the water.

    8) Which exit do we take?
    A) Take the right Northern exit and go to the merchant stand to drop off the Smoliv and buy some items.
    B) Take the right Northern exit and go North to the room with the 1 hostile Bug type Pokemon.
    C) Take the upper Eastern exit to go deal with the Bidoof in that room and the Kantonian Meowth in the room South of it.
    D) Go back to the room with Roserade in it and take the upper Western exit.
    E) Go back to the room with Roserade in it and take the left-Northern exit.
    F) Go back to the room with Roserade in it and take the right-Northern exit.
    G) Go back to the room with Roserade in it and take the upper-Eastern exit.
    H) Go back to the room with Roserade in it and take the lower-Eastern exit.
    I) Go back to the room with Roserade in it and take the right-southern exit.
    J) Go back to the room with Roserade in it and take the left-southern exit to go deal with the Paldean Wooper.


    Attachments

    • Pokemon Dungeon Escape
      DungeonEscapeFight11.png
      387.7 KB · Views: 35
    • Pokemon Dungeon Escape
      DungeonEscapeAct1-13.png
      209.9 KB · Views: 38
    • Pokemon Dungeon Escape
      DungeonEscapeMove13.png
      21.1 KB · Views: 45
    • Pokemon Dungeon Escape
      inventory13.png
      119.7 KB · Views: 34
    • Pokemon Dungeon Escape
      partypokemon12.png
      168 KB · Views: 35
    • Pokemon Dungeon Escape
      Map9.png
      122.6 KB · Views: 34
    Last edited:
  • 24,980
    Posts
    3
    Years
    • Any pronoun
    • Online now
    1) B) Yes, switch to Mouflon. Electric type for the Water room.

    2) A) Offensively; nothing but attacking moves and prioritizes super-effective attacks if possible. Lowers the odds of getting poisoned from Frillish. Doubts a return on investment for status moves. Probably two-shots all the Water types.

    3-1) B) No, don't attack the Bidoof. Fights enough things for one update.

    3-2) A) Yes, go onto the water and attack the Surskit. Easy experience.

    4-1) D) No, don't heal up. Hopefully unnecessary?

    4-2) B) Yes, Eat an Oran Berry. Heals up to 100 HP. But probably by six enemies, yes.

    4-3) D) No, don't heal up. Should be over after nine opponents. Heals more intelligently after seeing the results.

    5-1) K) No, don't use it now. Saves orbs for a better time.

    5-2) K) No, don't use it now. See above.

    6) A) Yes, talk to the Abra to unlock it as a teleport point and talk to it about the door. Ooh, teleport point. And right next to the Hot Springs.

    7) A) Pick up all items. Unfortunate TMs. Oh well.

    8) D) Go back to the room with Roserade in it and take the upper Western exit. Scouting for the ribbon. Does not overly need any items in town. Might benefit from See-Trap Orbs for bigger rooms, but not much beyond that.
     
  • 47,039
    Posts
    3
    Years

    Pokemon Dungeon Escape - Act 1 - Chapter 14


    The voting results are as follows:

    1) Barboach is in the lead. Do we want to swap our lead for this room?
    A) No, keep Barboach in the lead.
    B) Yes, switch to Mouflon. - 2 votes

    2) How do we fight the enemies in this room?
    A) Offensively; nothing but attacking moves and prioritizes super-effective attacks if possible. - 2 votes
    B) Balanced; Uses both Attacking moves as well as non-attacking moves. Prioritizes super-effective attacks if possible. Uses attacking moves 66% of the time on average.
    C) Defensively. Only attacks once every 3 turns. Uses the other two turns for non-attacking moves.

    3-1) Do we attack the level 8 Bidoof?
    A) Yes, attack the Bidoof.
    B) No, don't attack the Bidoof. - 2 votes

    3-2) Do we go onto the water and attack the Surskit and/or try and avoid them?
    A) Yes, go onto the water and attack the Surskit. - 1 vote
    B) Yes go onto the water, but try and take a path to avoid them.
    C) No, don't go onto the water. (Can be overwritten by the results of the item and exit votes.) - 1 vote

    Tied. Doesn't look like a level 8 Surskit can do much to us tbh. Mouflon resists it's best attack. I'll join A).

    4-1) We can heal after defeating 3 opponents in this room Do we heal?
    A) Yes, drink a Berry Juice. Heals up to 50 HP and also heals any status conditions.
    B) Yes, Eat an Oran Berry. Heals up to 100 HP.
    C) Yes, Eat a Sitrus Berry. Heals up to 250 HP.
    D) No, don't heal up. - 2 votes

    4-2) We can heal after defeating 6 opponents in this room Do we heal?
    A) Yes, drink a Berry Juice. Heals up to 50 HP and also heals any status conditions.
    B) Yes, Eat an Oran Berry. Heals up to 100 HP. - 2 votes
    C) Yes, Eat a Sitrus Berry. Heals up to 250 HP.
    D) No, don't heal up.

    4-3) We can heal after defeating 9 opponents in this room Do we heal?
    A) Yes, drink a Berry Juice. Heals up to 50 HP and also heals any status conditions.
    B) Yes, Eat an Oran Berry. Heals up to 100 HP. - 1 vote
    C) Yes, Eat a Sitrus Berry. Heals up to 250 HP.
    D) No, don't heal up. - 1 vote

    Tied. No real preference here tbh. We're not short on Oran berries and there's 2 in this room, so might as well heal, I guess?
    I'll join B).


    5-1) Do we use the Blowback Orb in this room?
    A) Yes, use the Blowback Orb on the level 10 Bidoof.
    B) Yes, use the Blowback Orb on the level 8 Bidoof.
    C) Yes, use the Blowback Orb on the male Frillish.
    D) Yes, use the Blowback Orb on the level 10 female Frillish.
    E) Yes, use the Blowback Orbon the level 9 female Frillish.
    F) Yes, use the Blowback Orb on the left Poliwag.
    G) Yes, use the Blowback Orb on the right Poliwag.
    H) Yes, use the Blowback Orb on the left level 8 Surskit.
    I) Yes, use the Blowback Orb on the right level 8 Surskit.
    J) Yes, use the Blowback Orb on the level 7 Surskit.
    K) No, don't use it now. - 2 votes

    5-2) Do we use the Brushoff Orb in this room?
    A) Yes, use the Blowback Orb on the level 10 Bidoof.
    B) Yes, use the Blowback Orb on the level 8 Bidoof.
    C) Yes, use the Blowback Orb on the male Frillish.
    D) Yes, use the Blowback Orb on the level 10 female Frillish.
    E) Yes, use the Blowback Orbon the level 9 female Frillish.
    F) Yes, use the Blowback Orb on the left Poliwag.
    G) Yes, use the Blowback Orb on the right Poliwag.
    H) Yes, use the Blowback Orb on the left level 8 Surskit.
    I) Yes, use the Blowback Orb on the right level 8 Surskit.
    J) Yes, use the Blowback Orb on the level 7 Surskit.
    K) No, don't use it now. - 2 votes

    6) Do we talk to the Abra (about the door)?
    A) Yes, talk to the Abra to unlock it as a teleport point and talk to it about the door. - 2 votes
    B) Talk to the Abra to unlock it as a teleport point, but don't bring up the door.
    C) No, don't talk to the Abra.

    7) What do we do with the items in this room?
    A) Pick up all items. - 1 vote
    B) Pick up only the shards.
    C) Pick up only the berries.
    D) Pick up only the TM's.
    E) Pick up only the Hard Stone.
    F) Pick up all the items that don't require crossing the water. - 1 vote
    G) Pick up all the shards that don't require crossing the water.
    H) Pick up all the berries that don't require crossing the water.
    I) Pick up only the TM's and Hard Stone.
    J) Pick up the shards and berries that don't require crossing the water.
    K) Pick up the Hard Stone and all the berries that don't require crossing the water.
    L) Pick up the Hard Stone and all the shards that don't require crossing the water.

    Tied. Already joined in on fight the Surskit. Might as well grab everything then. I'll join A).

    8) Which exit do we take?
    A) Take the right Northern exit and go to the merchant stand to drop off the Smoliv and buy some items.
    B) Take the right Northern exit and go North to the room with the 1 hostile Bug type Pokemon.
    C) Take the upper Eastern exit to go deal with the Bidoof in that room and the Kantonian Meowth in the room South of it.
    D) Go back to the room with Roserade in it and take the upper Western exit. - 2 votes
    E) Go back to the room with Roserade in it and take the left-Northern exit.
    F) Go back to the room with Roserade in it and take the right-Northern exit.
    G) Go back to the room with Roserade in it and take the upper-Eastern exit.
    H) Go back to the room with Roserade in it and take the lower-Eastern exit.
    I) Go back to the room with Roserade in it and take the right-southern exit.
    J) Go back to the room with Roserade in it and take the left-southern exit to go deal with the Paldean Wooper.

    Spoiler:


    We switch to Mouflon as the party lead. We fight the enemies in this room offensively. We do not attack the level 8 Bidoof and we go onto the water and do attack the Surskit.
    We do not heal after defeating 3 opponents in this room, but do heal by eating an Oran Berry after defeating 6 opponents. We also eat an Oran Berry to heal after defeating 9 opponents.
    We do not use the Blowback Orb or the Brushoff Orb in this room. We talk to the Abra to unlock it as a teleport point and talk to it about the door.
    We pick up all items and go back to the room with Roserade in it to take the upper Western exit.

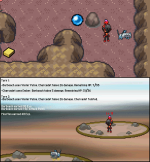
    The path we take is as follows:

    Pokemon Dungeon Escape


    Stepped on a PP Leech Trap. Mouflon lost all Thunder Wave PP.
    Stepped on a Grimy Trap. A Cheri Berry went bad and was tossed out.
    Stepped on a Trip Trap... but Mouflon isn't holding an item.
    Stepped on a Seal Trap. Mouflon's Thunder Shock was sealed.
    Stepped on a Blast Trap. Mouflon took 25% of it's Max HP in damage. Mouflon took 10 damage.

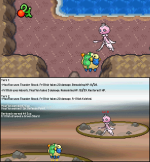
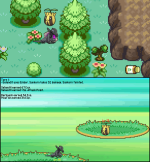
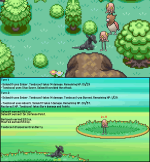
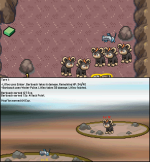
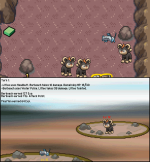
    The fights:
    Spoiler:


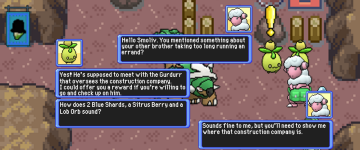
    The dialogue with the Abra:
    Spoiler:


    Team Roundabout:
    Spoiler:


    Inventory:
    Spoiler:


    Quests:
    Spoiler:

    Reputation:
    Spoiler:

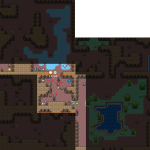
    Dungeon Map:
    Spoiler:


    Pokemon Dungeon Escape - Act 1 - Chapter 15

    We arrive in the room that's in the upper Western area from the Roserade room. The Houndour and Poochyena are all eager to fight and will come at us to get one.
    The Northern exit leads to a room with 5 Ground types and 2 Normal types.

    Pokemon Dungeon Escape


    1) Mouflon is at 31/41 HP. Do we heal?
    A) Yes, drink a Berry Juice. Heals up to 50 HP and also heals any status conditions.
    B) Yes, Eat an Oran Berry. Heals up to 100 HP.
    C) Yes, Eat a Sitrus Berry. Heals up to 250 HP.
    D) No, don't heal up.

    2-1) Mouflon has reached level 15 and wants to learn Charge, but already knows 4 moves. Forget a move to learn Charge?
    A) Yes, forget Tackle.
    B) Yes, forget Growl.
    C) Yes, forget Thunder Wave.
    D) Yes, forget Thunder Shock.
    E) No, don't learn Charge.

    2-2) Barboach has reached level 12 and wants to learn Water Pulse, but already knows 4 moves. Forget a move to learn Water Pulse?
    A) Yes, forget Water Gun.
    B) Yes, forget Mud-Slap
    C) Yes, forget Rest.
    D) Yes, forget Snore.
    E) No, don't learn Water Pulse.

    2-3) Mouflon has reached level 15 and can evolve. Evolve Mouflon into a Flaaffy?
    A) Yes, evolve Mouflon.
    B) No, hold off on evolving Mouflon.

    3) We've picked up a Hard Stone. Should someone equip the Hard Stone?
    A) Yes, have Mouflon hold it.
    B) Yes, swap Barboach's Soft Sand for the Hard Stone.
    C) No, don't equip the Hard Stone now.

    Notice: Poochyena and Houndour both know Roar. If they use it this will switch our active Pokemon during the current battle, but the Lead Pokemon will be back in the lead once the battle ends regardless.

    4-1) Mouflon is in the lead. Do we want to swap our lead for this room?
    A) No, keep Mouflon in the lead.
    B) Yes, switch to Barboach.

    4-2) How do we fight the enemies in this room?
    A) Offensively; nothing but attacking moves and prioritizes super-effective attacks if possible.
    B) Balanced; Uses both Attacking moves as well as non-attacking moves. Prioritizes super-effective attacks if possible. Uses attacking moves 66% of the time on average.
    C) Defensively. Only attacks once every 3 turns. Uses the other two turns for non-attacking moves.

    5-1) Do we use the Blowback Orb in this room?
    A) Yes, use the Blowback Orb on the level 13 Houndour.
    B) Yes, use the Blowback Orb on the level 14 Houndour.
    C) Yes, use the Blowback Orb on the Poochyena.
    D) No, don't use it now.

    5-2) Do we use the Brushoff Orb in this room?
    A) Yes, use the Blowback Orb on the level 13 Houndour.
    B) Yes, use the Blowback Orb on the level 14 Houndour.
    C) Yes, use the Blowback Orb on the Poochyena.
    D) No, don't use it now.

    6) We can heal after defeating two opponents in this room. Do we heal?
    A) Yes, drink a Berry Juice. Heals up to 50 HP and also heals any status conditions.
    B) Yes, Eat an Oran Berry. Heals up to 100 HP.
    C) Yes, Eat a Sitrus Berry. Heals up to 250 HP.
    D) No, don't heal up.

    7) What do we do with the items in this room?
    A) Pick up all items.
    B) Pick up only Chikorita's hairpin.
    C) Pick up only the Yellow Shard.
    D) Pick up only the Oran Berry and the Berry Juice.
    E) Pick up only the Carbos.
    F) Pick up the Yellow Shard and Chikorita's hairpin.
    G) Pick up the Yellow Shard, the Berry Juice and the Oran Berry.
    H) Pick up the Yellow Shard and the Carbos
    I) Pick up the Carbos and Chikorita's hairpin.
    J) Pick up the Carbos and the Berry Juice and the Oran Berry.
    K) Pick up Chikorita's hairpin and the Berry Juice and the Oran Berry.
    L) Pick up Chikorita's hairpin, the Berry Juice and the Oran Berry and the Carbos.
    M) Pick up Chikorita's hairpin, the Berry Juice and the Oran Berry and the Yellow Shard
    N) Pick up the Yellow Shard, the Berry Juice and Oran Berry and the Carbos.
    O) Pick up the Yellow Shard, Chikorita's Hairpin and the Carbos.

    8) Which exit do we take?
    A) Take the Northern exit.
    B) Go back to the room with Roserade in it and take the left-Northern exit.
    C) Go back to the room with Roserade in it and take the right-Northern exit.
    D) Go back to the room with Roserade in it and take the upper-Eastern exit.
    E) Go back to the room with Roserade in it and take the lower-Eastern exit.
    F) Go back to the room with Roserade in it and take the right-southern exit.
    G) Go back to the room with Roserade in it and take the left-southern exit to go deal with the Paldean Wooper.


    Attachments

    • Pokemon Dungeon Escape
      2abramareepdialogue1.png
      206.3 KB · Views: 30
    • Pokemon Dungeon Escape
      2abramareepdialogue2.png
      208.7 KB · Views: 30
    • Pokemon Dungeon Escape
      DungeonEscapeAct1-14.png
      185.4 KB · Views: 33
    • Pokemon Dungeon Escape
      DungeonEscapeMove14.png
      72.6 KB · Views: 32
    • Pokemon Dungeon Escape
      inventory14.png
      122.8 KB · Views: 29
    • Pokemon Dungeon Escape
      Map10.png
      121.2 KB · Views: 30
    • Pokemon Dungeon Escape
      partypokemon13.png
      171.3 KB · Views: 30
    • Pokemon Dungeon Escape
      DungeonEscapeFight12-3.png
      415.4 KB · Views: 31
    • Pokemon Dungeon Escape
      DungeonEscapeFight12-2.png
      452.7 KB · Views: 31
    • Pokemon Dungeon Escape
      DungeonEscapeFight12-1.png
      424.1 KB · Views: 31
    • Pokemon Dungeon Escape
      DungeonEscapeFight12-4.png
      444.3 KB · Views: 31
    • Pokemon Dungeon Escape
      DungeonEscapeFight12-5.png
      480.5 KB · Views: 31
    • Pokemon Dungeon Escape
      DungeonEscapeFight12-6.png
      417.3 KB · Views: 29
    • Pokemon Dungeon Escape
      DungeonEscapeFight12-7.png
      342.3 KB · Views: 30
    • Pokemon Dungeon Escape
      DungeonEscapeFight12-8.png
      342.6 KB · Views: 30
    • Pokemon Dungeon Escape
      DungeonEscapeFight12-9.png
      338.9 KB · Views: 31
    Last edited:
  • 24,980
    Posts
    3
    Years
    • Any pronoun
    • Online now
    Got a little close on those battles. Hit surprisingly hard with Water Gun. Thank goodness for Thunder Shock getting sealed later on.

    1) D) No, don't heal up. Good enough on hitpoints.

    2-1) B) Yes, forget Growl. Feels more worthwhile than Growl. Keeps debuffs between battles. Could bank up Special Defense buffs, by the same logic. Wonders what the Warden battle is like, though. Technically might want Growl then. Even so...

    2-2) D) Yes, forget Snore. Might be sleeping on Rest + Snore, no pun intended. Could lower healing demands. Will probably not pick Snore when it counts, though.

    2-3) A) Yes, evolve Mouflon. Sees no reason to not.

    3) C) No, don't equip the Hard Stone now. No Rock moves.

    4-1) B) Yes, switch to Barboach. Needs some experience. Fares well against Houndour. Dislikes their level advantage, though.

    4-2) A) Offensively; nothing but attacking moves and prioritizes super-effective attacks if possible.

    5-1) D) No, don't use it now. No need for orbs.

    5-2) D) No, don't use it now. See above.

    6) D) No, don't heal up.

    7) A) Pick up all items. Oh hey, a quest item. Hoped for a different important item, but whatever.

    8) C) Go back to the room with Roserade in it and take the right-Northern exit. Skips a room (going clockwise). Spots a trap right in front of that room, though.
     
  • 47,039
    Posts
    3
    Years

    Pokemon Dungeon Escape - Act 1 - Chapter 15


    The voting results are as follows:

    1) Mouflon is at 31/41 HP. Do we heal?
    A) Yes, drink a Berry Juice. Heals up to 50 HP and also heals any status conditions.
    B) Yes, Eat an Oran Berry. Heals up to 100 HP.
    C) Yes, Eat a Sitrus Berry. Heals up to 250 HP.
    D) No, don't heal up. - 2 votes

    2-1) Mouflon has reached level 15 and wants to learn Charge, but already knows 4 moves. Forget a move to learn Charge?
    A) Yes, forget Tackle.
    B) Yes, forget Growl. - 1 vote
    C) Yes, forget Thunder Wave.
    D) Yes, forget Thunder Shock.
    E) No, don't learn Charge. - 1 vote

    Tied. Charge could be beneficial if we play a room Balanced or Defensively. I'll join B).

    2-2) Barboach has reached level 12 and wants to learn Water Pulse, but already knows 4 moves. Forget a move to learn Water Pulse?
    A) Yes, forget Water Gun.
    B) Yes, forget Mud-Slap
    C) Yes, forget Rest.
    D) Yes, forget Snore. - 2 votes
    E) No, don't learn Water Pulse.

    2-3) Mouflon has reached level 15 and can evolve. Evolve Mouflon into a Flaaffy?
    A) Yes, evolve Mouflon. - 2 votes
    B) No, hold off on evolving Mouflon.

    3) We've picked up a Hard Stone. Should someone equip the Hard Stone?
    A) Yes, have Mouflon hold it.
    B) Yes, swap Barboach's Soft Sand for the Hard Stone.
    C) No, don't equip the Hard Stone now. - 2 votes

    4-1) Mouflon is in the lead. Do we want to swap our lead for this room?
    A) No, keep Mouflon in the lead.
    B) Yes, switch to Barboach. - 2 votes

    4-2) How do we fight the enemies in this room?
    A) Offensively; nothing but attacking moves and prioritizes super-effective attacks if possible. - 2 vote
    B) Balanced; Uses both Attacking moves as well as non-attacking moves. Prioritizes super-effective attacks if possible. Uses attacking moves 66% of the time on average.
    C) Defensively. Only attacks once every 3 turns. Uses the other two turns for non-attacking moves.

    5-1) Do we use the Blowback Orb in this room?
    A) Yes, use the Blowback Orb on the level 13 Houndour.
    B) Yes, use the Blowback Orb on the level 14 Houndour.
    C) Yes, use the Blowback Orb on the Poochyena.
    D) No, don't use it now. - 2 votes

    5-2) Do we use the Brushoff Orb in this room?
    A) Yes, use the Brushoff Orb on the level 13 Houndour.
    B) Yes, use the Brushoff Orb on the level 14 Houndour.
    C) Yes, use the Brushoff Orb on the Poochyena.
    D) No, don't use it now. - 2 votes

    6) We can heal after defeating two opponents in this room. Do we heal?
    A) Yes, drink a Berry Juice. Heals up to 50 HP and also heals any status conditions.
    B) Yes, Eat an Oran Berry. Heals up to 100 HP. - 1 vote
    C) Yes, Eat a Sitrus Berry. Heals up to 250 HP.
    D) No, don't heal up. - 1 vote

    Tied. With Barboach in the lead we're out-leveled by all three opponents. Healing might be a good idea if they attack a lot. I'll join B).

    7) What do we do with the items in this room?
    A) Pick up all items. - 2 votes
    B) Pick up only Chikorita's hairpin.
    C) Pick up only the Yellow Shard.
    D) Pick up only the Oran Berry and the Berry Juice.
    E) Pick up only the Carbos.
    F) Pick up the Yellow Shard and Chikorita's hairpin.
    G) Pick up the Yellow Shard, the Berry Juice and the Oran Berry.
    H) Pick up the Yellow Shard and the Carbos
    I) Pick up the Carbos and Chikorita's hairpin.
    J) Pick up the Carbos and the Berry Juice and the Oran Berry.
    K) Pick up Chikorita's hairpin and the Berry Juice and the Oran Berry.
    L) Pick up Chikorita's hairpin, the Berry Juice and the Oran Berry and the Carbos.
    M) Pick up Chikorita's hairpin, the Berry Juice and the Oran Berry and the Yellow Shard
    N) Pick up the Yellow Shard, the Berry Juice and Oran Berry and the Carbos.
    O) Pick up the Yellow Shard, Chikorita's Hairpin and the Carbos.

    8) Which exit do we take?
    A) Take the Northern exit.
    B) Go back to the room with Roserade in it and take the left-Northern exit. - 1 vote
    C) Go back to the room with Roserade in it and take the right-Northern exit. - 1 vote
    D) Go back to the room with Roserade in it and take the upper-Eastern exit.
    E) Go back to the room with Roserade in it and take the lower-Eastern exit.
    F) Go back to the room with Roserade in it and take the right-southern exit.
    G) Go back to the room with Roserade in it and take the left-southern exit to go deal with the Paldean Wooper.

    Tied. with Mouflon currently unable to use Thunder Shock, it's probably better to take our chances with the Fire types instead of the Water type enemies. I'll join B).

    Spoiler:


    Bit of a PSA, I guess: I'm treating traps as single use; they go off only once. Fully revealed traps have already gone off.

    This is mainly to prevent potential problems in specific situations with a couple traps that will enter the rollable traps list in Act 2. Seemed better to me to just make them all single use and up the minimum and maximum amount of traps I can roll.


    We don't heal up Mouflon and let Mouflon forget Growl to learn Charge.
    We let Barboach forget Snore to learn Water Pulse. We let Mouflon evolve and don't equip the Hard Stone now.
    We switch to Barboach as the lead Pokemon and fight the enemies in this room offensively. We use neither the Blowback Orb nor the Brushoff Orb in this room.
    We eat an Oran Berry to heal up after defeating two opponents in this room.
    We pick up all items and go back to the room with Roserade in it and take the left-Northern exit.

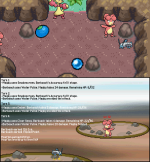
    The path we take is as follows:

    Pokemon Dungeon Escape


    Stepped on a Gust Trap. Barboach was flung into a wall and took 5 damage.
    Stepped on a Mud Trap. Barboach's Defense was lowered by 2 stages.


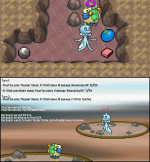
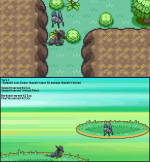
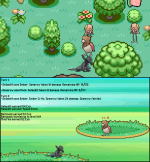
    The fights:
    Spoiler:


    Team Roundabout:
    Spoiler:


    Inventory:
    Spoiler:


    Quests:
    Spoiler:

    Reputation:
    Spoiler:

    Dungeon Map:
    Spoiler:


    Pokemon Dungeon Escape - Act 1 - Chapter 16

    We arrive in the left room North of the room with Roserade. The Charcadet and Magby won't attack unless we come close to them. We have to pass close by the Charcadet and one of the Magby if we want to grab any items at all or recruit the Salandit. The Mienfoo will challenge anyone who tries to pass it to a fight, so if we want to recruit Salandit now or grab the Evolution Crystal we'll need to either fight it or use the Brushoff Orb. The Salandit's recruitment requirement has already been met (Team Reputation of 25 or higher).

    The Northern room has 2 hostile Grass types and 1 hostile Bug type. The Western room has 5 hostile Ground types and 2 hostile Normal types.

    Pokemon Dungeon Escape


    1-1) Barboach is at 1/36 HP and currently poisoned. Do we heal and/or cure the Poison?
    A) Yes, drink a Berry Juice. Heals up to 50 HP and also heals any status conditions.
    B) Yes, Eat an Oran Berry. Heals up to 100 HP.
    C) Yes, Eat a Sitrus Berry. Heals up to 250 HP.
    D) Yes, Eat a Pecha Berry to cure the poison.
    E) Yes, Eat a Pecha Berry to cure the poison and an Oran Berry to heal up.
    F) Yes, Eat a Pecha Berry to cure the poison and a Sitrus Berry to heal up.
    G) Yes, Eat a Lum Berry to cure the poison.
    H) Yes, Eat a Lum Berry to cure the poison and an Oran Berry to heal up.
    I) Yes, Eat a Lum Berry to cure the poison and a Sitrus Berry to heal up.
    J) No, don't heal up.

    1-2) Mouflon is at 15/46 HP. Do we heal?
    A) Yes, drink a Berry Juice. Heals up to 50 HP and also heals any status conditions.
    B) Yes, Eat an Oran Berry. Heals up to 100 HP.
    C) Yes, Eat a Sitrus Berry. Heals up to 250 HP.
    D) No, don't heal up.

    2) We've picked up a Carbos. Should someone drink the Carbos?
    A) Yes, have Mouflon drink it.
    B) Yes, have Barboach drink it.
    C) No, don't drink it now.

    Note: There is an NPC that will let us freely respec any EV's our Pokemon have earned and redistribute them as we wish, for a fee. We'll need to find the NPC first though.

    3-1) Barboach is in the lead. Do we want to swap our lead for this room?
    A) No, keep Barboach in the lead.
    B) Yes, switch to Mouflon.

    3-2) How do we fight the enemies in this room?
    A) Offensively; nothing but attacking moves and prioritizes super-effective attacks if possible.
    B) Balanced; Uses both Attacking moves as well as non-attacking moves. Prioritizes super-effective attacks if possible. Uses attacking moves 66% of the time on average.
    C) Defensively. Only attacks once every 3 turns. Uses the other two turns for non-attacking moves.

    3-3) Unless we take the Western exit, fighting the left Magby is completely optional. Do we attack the left Magby?
    A) Yes, fight the left Magby.
    B) No, don't fight the left Magby.

    4-1) Do we use the Blowback Orb in this room?
    A) Yes, use the Blowback Orb on the right Magby.
    B) Yes, use the Blowback Orb on the left Magby.
    C) Yes, use the Blowback Orb on the Charcadet.
    D) Yes, use the Blowback Orb on the Mienfoo.
    E) No, don't use it now.

    We can use the Brushoff Orb to avoid a fight at this time with the Mienfoo or any of the other hostile Pokemon.

    4-2) Do we use the Brushoff Orb in this room?
    A) Yes, use the Brushoff Orb on the right Magby.
    B) Yes, use the Brushoff Orb on the left Magby.
    C) Yes, use the Brushoff Orb on the Charcadet.
    D) Yes, use the Brushoff Orb on the Mienfoo.
    E) No, don't use it now.

    5) We can heal after defeating three opponents in this room. Do we heal?
    A) Yes, drink a Berry Juice. Heals up to 50 HP and also heals any status conditions.
    B) Yes, Eat an Oran Berry. Heals up to 100 HP.
    C) Yes, Eat a Sitrus Berry. Heals up to 250 HP.
    D) No, don't heal up.

    6) The recruitment requirement for the Salandit has already been met, however we can come back later to recruit it if we don't want to recruit it now. Do we go talk to and/or recruit the Salandit?
    A) Talk to and recruit the Salandit.
    B) Talk to the Salandit, but don't recruit it now.
    C) Neither recruit the Salandit nor talk to it.

    7) What do we do with the items in this room?
    A) Pick up all items.
    B) Pick up only the Lob Orb
    C) Pick up only the Oran Berry.
    D) Pick up only the Yellow Shard.
    E) Pick up only the Evolution Crystal.
    F) Pick up the Yellow Shard and the Lob Orb.
    G) Pick up the Yellow Shard and the Oran Berry.
    H) Pick up the Yellow Shard and the Evolution Crystal.
    I) Pick up the Oran Berry and the Lob Orb.
    J) Pick up the Oran Berry and the Evolution Crystal.
    K) Pick up the Evolution Crystal and Lob Orb.
    L) Pick up the Evolution Crystal, Oran Berry and Lob Orb.
    M) Pick up the Evolution Crystal, Oran Berry and Yellow Shard
    N) Pick up the Yellow Shard, Oran Berry and Lob Orb.
    O) Pick up the Yellow Shard, Evolution Crystal and Lob Orb
    P) Pick up the Lob Orb, Evolution Crystal and Yellow Shard.

    Note: The Evolution Crystal is an item that will let us evolve Pokemon with special evolution methods, such as for example Happiness/Friendship evolutions like Alolan Meowth.

    8-1) Which exit do we take?
    A) Take the Northern exit.
    B) Take the Western exit.
    C) Go back to the room with Roserade in it and take the right-Northern exit.
    D) Go back to the room with Roserade in it and take the upper-Eastern exit.
    E) Go back to the room with Roserade in it and take the lower-Eastern exit.
    F) Go back to the room with Roserade in it and take the right-southern exit.
    G) Go back to the room with Roserade in it and take the left-southern exit to go deal with the Paldean Wooper.

    8-2) After navigating the current room, but before heading to the next one, we can go heal at the Hot Spring. Should we heal?
    A) Yes, go heal at the Hot Spring.
    B) No, don't heal at the Hot Spring.


    Attachments

    • Pokemon Dungeon Escape
      DungeonEscapeAct1-15.png
      188.4 KB · Views: 25
    • Pokemon Dungeon Escape
      DungeonEscapeFight13-1.png
      460.4 KB · Views: 22
    • Pokemon Dungeon Escape
      DungeonEscapeFight13-2.png
      759 KB · Views: 22
    • Pokemon Dungeon Escape
      DungeonEscapeFight13-3.png
      437.3 KB · Views: 22
    • Pokemon Dungeon Escape
      DungeonEscapeMove15.png
      12.9 KB · Views: 30
    • Pokemon Dungeon Escape
      inventory15.png
      126.4 KB · Views: 23
    • Pokemon Dungeon Escape
      partypokemon14.png
      201.5 KB · Views: 23
    • Pokemon Dungeon Escape
      Map11.png
      126.7 KB · Views: 22
    Last edited:
  • 24,980
    Posts
    3
    Years
    • Any pronoun
    • Online now
    1-1) A) Yes, drink a Berry Juice. Heals up to 50 HP and also heals any status conditions. No better time than now.

    1-2) D) No, don't heal up. Will hopefully be fine with Barboach.

    2) C) No, don't drink it now. Saves it for someone that wants Speed more (like maybe Salandit). Prefers not to pay for the respec.

    3-1) A) No, keep Barboach in the lead.

    3-2) A) Offensively; nothing but attacking moves and prioritizes super-effective attacks if possible.

    3-3) B) No, don't fight the left Magby. Might be overly cautious here. Do not take Magby lightly, though. Actually has decent stats for a baby Pokemon (365 base stat total). Compare that to Barboach's 288. Also has surprisingly good Speed (base 83, same as the later Magmortar). Will probably take three hits from one Magby. And on top of all the other damage? Pass.

    4-1) E) No, don't use it now. Waits for a scarier battle for orbs.

    4-2) E) No, don't use it now.

    5) D) No, don't heal up. Heals at the Hot Spring after this, so no.

    6) A) Talk to and recruit the Salandit. Never turn down a party member. Struggles hard against those Paldean Woopers. Pairs well with Barboach, though, for the Grass resistance. Should be strong in the northern room. Deals with Cut trees too.

    7) A) Pick up all items.

    8-1) A) Take the Northern exit. Grass and Bugs for the new Salandit.

    8-2) A) Yes, go heal at the Hot Spring. Duh.
     
  • 47,039
    Posts
    3
    Years

    Pokemon Dungeon Escape - Act 1 - Chapter 16


    The voting results are as follows:

    1-1) Barboach is at 1/36 HP and currently poisoned. Do we heal and/or cure the Poison?
    A) Yes, drink a Berry Juice. Heals up to 50 HP and also heals any status conditions. - 2 votes
    B) Yes, Eat an Oran Berry. Heals up to 100 HP.
    C) Yes, Eat a Sitrus Berry. Heals up to 250 HP.
    D) Yes, Eat a Pecha Berry to cure the poison.
    E) Yes, Eat a Pecha Berry to cure the poison and an Oran Berry to heal up.
    F) Yes, Eat a Pecha Berry to cure the poison and a Sitrus Berry to heal up.
    G) Yes, Eat a Lum Berry to cure the poison.
    H) Yes, Eat a Lum Berry to cure the poison and an Oran Berry to heal up.
    I) Yes, Eat a Lum Berry to cure the poison and a Sitrus Berry to heal up.
    J) No, don't heal up.

    1-2) Mouflon is at 15/46 HP. Do we heal?
    A) Yes, drink a Berry Juice. Heals up to 50 HP and also heals any status conditions.
    B) Yes, Eat an Oran Berry. Heals up to 100 HP.
    C) Yes, Eat a Sitrus Berry. Heals up to 250 HP.
    D) No, don't heal up. - 2 votes

    2) We've picked up a Carbos. Should someone drink the Carbos?
    A) Yes, have Mouflon drink it.
    B) Yes, have Barboach drink it.
    C) No, don't drink it now. - 2 votes

    3-1) Barboach is in the lead. Do we want to swap our lead for this room?
    A) No, keep Barboach in the lead. - 2 votes
    B) Yes, switch to Mouflon.

    3-2) How do we fight the enemies in this room?
    A) Offensively; nothing but attacking moves and prioritizes super-effective attacks if possible. - 2 votes
    B) Balanced; Uses both Attacking moves as well as non-attacking moves. Prioritizes super-effective attacks if possible. Uses attacking moves 66% of the time on average.
    C) Defensively. Only attacks once every 3 turns. Uses the other two turns for non-attacking moves.

    3-3) Unless we take the Western exit, fighting the left Magby is completely optional. Do we attack the left Magby?
    A) Yes, fight the left Magby.
    B) No, don't fight the left Magby. - 2 votes

    4-1) Do we use the Blowback Orb in this room?
    A) Yes, use the Blowback Orb on the right Magby.
    B) Yes, use the Blowback Orb on the left Magby.
    C) Yes, use the Blowback Orb on the Charcadet.
    D) Yes, use the Blowback Orb on the Mienfoo.
    E) No, don't use it now. - 2 votes

    4-2) Do we use the Brushoff Orb in this room?
    A) Yes, use the Brushoff Orb on the right Magby.
    B) Yes, use the Brushoff Orb on the left Magby.
    C) Yes, use the Brushoff Orb on the Charcadet.
    D) Yes, use the Brushoff Orb on the Mienfoo. - 1 vote
    E) No, don't use it now. - 1 vote

    Tied. Mienfoo is faster than us, has pretty good Attack for a first stage, and has Fake Out as well.... and Barboach is at -2 Defense.
    I'm skeptical Barboach will survive that fight tbh. I'll join in on D).


    5) We can heal after defeating three opponents in this room. Do we heal?
    A) Yes, drink a Berry Juice. Heals up to 50 HP and also heals any status conditions.
    B) Yes, Eat an Oran Berry. Heals up to 100 HP. - 1 vote
    C) Yes, Eat a Sitrus Berry. Heals up to 250 HP.
    D) No, don't heal up. - 1 vote

    Tied. We voted to not fight the left Magby and by using the Brushoff Orb on Mienfoo we won't even reach 3 opponents. I'll just join D), though it doesn't matter with those outcomes.

    6) The recruitment requirement for the Salandit has already been met, however we can come back later to recruit it if we don't want to recruit it now. Do we go talk to and/or recruit the Salandit?
    A) Talk to and recruit the Salandit. - 2 votes
    B) Talk to the Salandit, but don't recruit it now.
    C) Neither recruit the Salandit nor talk to it.

    7) What do we do with the items in this room?
    A) Pick up all items. - 2 votes
    B) Pick up only the Lob Orb
    C) Pick up only the Oran Berry.
    D) Pick up only the Yellow Shard.
    E) Pick up only the Evolution Crystal.
    F) Pick up the Yellow Shard and the Lob Orb.
    G) Pick up the Yellow Shard and the Oran Berry.
    H) Pick up the Yellow Shard and the Evolution Crystal.
    I) Pick up the Oran Berry and the Lob Orb.
    J) Pick up the Oran Berry and the Evolution Crystal.
    K) Pick up the Evolution Crystal and Lob Orb.
    L) Pick up the Evolution Crystal, Oran Berry and Lob Orb.
    M) Pick up the Evolution Crystal, Oran Berry and Yellow Shard
    N) Pick up the Yellow Shard, Oran Berry and Lob Orb.
    O) Pick up the Yellow Shard, Evolution Crystal and Lob Orb
    P) Pick up the Lob Orb, Evolution Crystal and Yellow Shard.

    8-1) Which exit do we take?
    A) Take the Northern exit. - 2 votes
    B) Take the Western exit.
    C) Go back to the room with Roserade in it and take the right-Northern exit.
    D) Go back to the room with Roserade in it and take the upper-Eastern exit.
    E) Go back to the room with Roserade in it and take the lower-Eastern exit.
    F) Go back to the room with Roserade in it and take the right-southern exit.
    G) Go back to the room with Roserade in it and take the left-southern exit to go deal with the Paldean Wooper.

    8-2) After navigating the current room, but before heading to the next one, we can go heal at the Hot Spring. Should we heal?
    A) Yes, go heal at the Hot Spring. - 2 votes
    B) No, don't heal at the Hot Spring.

    Spoiler:


    We drink a Berry Juice to heal up and cure Barboach's Poison. We don't heal Mouflon or drink the Carbos now.
    We keep Barboach in the lead and fight the enemies in the room offensively. We do not fight the leftmost Magby.
    We do not use the Blowback Orb in this room, but do use the Brushoff Orb on the Mienfoo and it disappears. We don't heal up after defeating 3 opponents.
    We talk to and recruit the Salandit. We pick up all items and take the Northern exit after healing up at the Hot Spring.


    The path we take is as follows:

    Pokemon Dungeon Escape


    Stepped on a Mud Trap. Barboach's Special Attack was lowered by 2 stages.
    Stepped on a Trip trap. Barboach tripped and dropped it's Soft Sand. Barboach got back up and put the Soft Sand back in the bag.

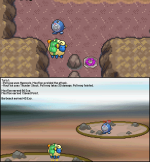
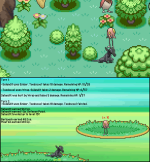
    The fights:
    Spoiler:


    Mouflon has leveled up once from the fights.


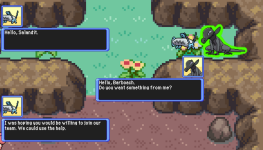
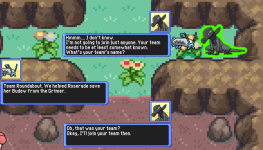
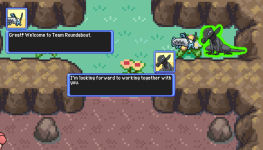
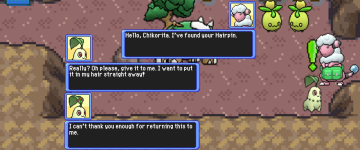
    The dialogue with Salandit:
    Spoiler:


    Team Roundabout:
    Spoiler:


    Inventory:
    Spoiler:


    Quests:
    Spoiler:

    Reputation:
    Spoiler:

    Dungeon Map:
    Spoiler:


    Pokemon Dungeon Escape - Act 1 - Chapter 17

    We arrive in the Northern room. This is a Large Room, with a forest theme. This is a pretty busy area and is crawling with enemies;
    -The Sunkern won't attack unless attacked, but will have to be fought in order to pass by them if they block the path.
    -The Nymble and the Beedrill will go on the attack if we get within 5 tiles of them.
    -The Kakuna can't move and we will need to seek them out to attack them.
    -The Weedle, Spearow and Rookidee will come seek us out to attack us.
    -The Toedscool have chased the Breloom's little Shroomish into hiding. They will ignore us unless we attack them or try to pass by them.

    The Eastern exits and a couple items would've been blocked off by cut trees if we didn't have a Poison or a Fire type. There are still a couple items behind trees that require a Ghost type in order to access them though. The left Western exit leads to a room with 3 hostile Bug types and 2 hostile Water types. The Western Exit just South of the other Western exit has no Pokemon that are initially hostile to us. The upper Eastern exit has 3 hostile Rock types, 3 hostile Fighting types and 2 hostile Grass types. The middle Eastern exit has 3 hostile Bug types, 1 hostile Ghost type and 2 hostile Ground types. The lower Eastern exit has 3 hostile Poison types, 3 hostile Flying types and 1 hostile Rock type.

    Pokemon Dungeon Escape


    A smaller image with just this room:
    Spoiler:


    Salandit's stats are currently according to a neutral nature pending what nature we vote for it.
    1-1) Which of the following natures does our freshly recruited Salandit have?
    A) Sassy (+Sp. Defense, -Speed)
    B) Calm (+Sp. Defense, -Attack)
    C) Timid (+Speed, -Attack)
    D) Adamant (+Attack, -Sp. Attack)

    1-2) Barboach's Soft Sand was forcibly unequipped by a Trip trap. Should Barboach equip an item?
    A) Yes, equip the Black Glasses.
    B) Yes, equip the Hard Stone.
    C) Yes, equip the Mystic Water.
    D) Yes, re-equip the Soft Sand.
    E) No, don't equip an item now.

    2-1) Barboach is in the lead. Do we want to swap our lead for this room?
    A) No, keep Barboach in the lead.
    B) Yes, switch to Mouflon.
    C) Yes, switch to Salandit.

    2-2) How do we fight the enemies in this room?
    A) Offensively; nothing but attacking moves and prioritizes super-effective attacks if possible.
    B) Balanced; Uses both Attacking moves as well as non-attacking moves. Prioritizes super-effective attacks if possible. Uses attacking moves 66% of the time on average.
    C) Defensively. Only attacks once every 3 turns. Uses the other two turns for non-attacking moves.

    3-1) The Kakuna can't move at all and won't attack unless attacked or we try to pass by them. Do we attack the Kakuna?
    A) Yes, fight the Kakuna.
    B) Only fight the left Kakuna.
    C) Only fight the right Kakuna.
    D) No, don't fight the Kakuna

    3-2) The Sunkern won't attack unless attacked. Do we attack the Sunkern that aren't on the path we end up taking?
    A) Yes, fight all the Sunkern.
    B) No, only fight the Sunkern that are on the path we take through the room.

    3-3) The Nymble in the upper right corner can't come to use due to a Cut tree blocking it's path. However, if the cut tree is removed it will come to us. Do we attack the level 16 Nymble?
    A) Yes, fight the level 16 Nymble.
    B) No, don't fight it unless it attacks us.

    4-1) Do we use the Blowback Orb in this room?
    A) Yes, use the Blowback Orb on the level 12 Spearow.
    B) Yes, use the Blowback Orb on the level 13 Spearow.
    C) Yes, use the BlowbackOrb on the level 14 Spearow.
    D) Yes, use the Blowback Orb on the Rookidee.
    E) Yes, use the Blowback Orb on the Beedrill.
    F) Yes, use the Blowback Orb on the level 10 Toedscool.
    G) Yes, use the Blowback Orb on the left level 11 Toedscool.
    H) Yes, use the Blowback Orb on the right level 11 Toedscool.
    I) Yes, use the Blowback Orb on the level 12 Toedscool.
    J) Yes, use the Blowback Orb on the level 13 Toedscool.
    K) No, don't use it now.

    The Lob Orb: Inflicts 25% of the targeted foe's total HP in damage.

    4-2) Do we use the Lob Orb in this room?
    A) Yes, use the Lob Orb on the level 12 Spearow.
    B) Yes, use the Lob Orb on the level 13 Spearow.
    C) Yes, use the Lob Orb on the level 14 Spearow.
    D) Yes, use the Lob Orb on the Rookidee.
    E) Yes, use the Lob Orb on the Beedrill.
    F) Yes, use the Lob Orb on the level 10 Toedscool.
    G) Yes, use the Lob Orb on the left level 11 Toedscool.
    H) Yes, use the Lob Orb on the right level 11 Toedscool.
    I) Yes, use the Lob Orb on the level 12 Toedscool.
    J) Yes, use the Lob Orb on the level 13 Toedscool.
    K) No, don't use it now.

    5-1) We can heal after defeating four opponents in this room. Do we heal?
    A) Yes, drink a Berry Juice. Heals up to 50 HP and also heals any status conditions.
    B) Yes, Eat an Oran Berry. Heals up to 100 HP.
    C) Yes, Eat a Sitrus Berry. Heals up to 250 HP.
    D) No, don't heal up.

    5-2) We can heal after defeating eight opponents in this room. Do we heal?
    A) Yes, drink a Berry Juice. Heals up to 50 HP and also heals any status conditions.
    B) Yes, Eat an Oran Berry. Heals up to 100 HP.
    C) Yes, Eat a Sitrus Berry. Heals up to 250 HP.
    D) No, don't heal up.

    5-3) We can heal after defeating twelve opponents in this room. Do we heal?
    A) Yes, drink a Berry Juice. Heals up to 50 HP and also heals any status conditions.
    B) Yes, Eat an Oran Berry. Heals up to 100 HP.
    C) Yes, Eat a Sitrus Berry. Heals up to 250 HP.
    D) No, don't heal up.

    5-4) We can heal after defeating sixteen opponents in this room. Do we heal?
    A) Yes, drink a Berry Juice. Heals up to 50 HP and also heals any status conditions.
    B) Yes, Eat an Oran Berry. Heals up to 100 HP.
    C) Yes, Eat a Sitrus Berry. Heals up to 250 HP.
    D) No, don't heal up.

    5-5) We can heal after defeating twenty opponents in this room. Do we heal?
    A) Yes, drink a Berry Juice. Heals up to 50 HP and also heals any status conditions.
    B) Yes, Eat an Oran Berry. Heals up to 100 HP.
    C) Yes, Eat a Sitrus Berry. Heals up to 250 HP.
    D) No, don't heal up.

    The Breloom can't see us yet, but is looking for his 3 Shroomish. The Toedscool scared off his children and chased them, but lost sight of them. If we defeat all 5 Toedscool the Shroomish will come out of hiding. We can then guide them back to Breloom. If we help the Breloom find his Shroomish and bring them to him, he'll be willing to hear us out about Torterra's guard request. Breloom will give us 3 Blue Shards and a Drain Punch TM if we help him out. We'll also earn 20 Team Reputation for helping Breloom.

    6-1) Do we talk to the Breloom and do we help him by defeating the Toedscool and guiding his Shroomish back to him?
    A) Talk to Breloom, defeat the Toedscool, but don't guide the Shroomish back to Breloom.
    B) Talk to Breloom, defeat the Toedscool and guide the Shroomish back to Breloom.
    C) Don't talk to Breloom, defeat the Toedscool, but don't guide the Shroomish back to Breloom.
    D) Don't talk to Breloom, avoid the Toedscool if possible and help Breloom some other time.

    6-2) If we helped Breloom by defeating the Toedscool and guiding the Shroomish back to him: Do we talk to Breloom about the open guard position at the merchant stand?
    A) Accept the reward for helping find the Shroomish and don't mention the merchant stand Guard position at all (If chosen we can't pick Breloom as a guard anymore later on).
    B) Accept the reward for helping find the Shroomish and mention that Torterra is looking for a Guard for the merchant stand, but that you haven't decided yet who it will be (Keeps Breloom as a guard candidate).
    C) Accept the reward for helping find the Shroomish and mention that Torterra is looking for a Guard for the merchant stand and tell Breloom to head for the merchant stand (Choose Breloom as the guard and forfeit the bonus quest rewards for talking to all 3 candidates before choosing one).

    7) What do we do with the items in this room?
    A) Pick up all items.
    B) Pick up only the items that are within 5 tiles along the path we take throughout the room.
    C) Pick up only the berries and Berry Juice.
    D) Pick up only the shards.
    E) Pick up only the orbs.
    F) Pick up only the Iron.
    G) Pick up only the TM025: Leech Life.
    H) Pick up the TM and the Iron.
    I) Pick up the TM, Iron and the orbs.
    J) Pick up the TM, Iron and the shards.
    K) Pick up the TM, Iron and the berries and Berry Juice.
    L) Pick up the TM and the orbs.
    M) Pick up the TM and the shards.
    N) Pick up the TM and the berries and Berry Juice.
    O) Pick up the TM, orbs and the shards.
    P) Pick up the TM, orbs and the berries and Berry Juice.
    Q) Pick up the TM, shards and the berries and Berry Juice.
    R) Pick up the berries and Berry Juice and the shards.
    S) Pick up the berries and Berry Juice and the orbs.
    T) Pick up the berries and Berry Juice and the iron.
    U) Pick up the shards and the orbs.
    V) Pick up the shards and the Iron.
    W) Pick up the Iron and the orbs.

    The orbs are a Cleanse Orb (left orb) and a Trapbust Orb (right orb).

    8) Which exit do we take?
    A) Take the upper left Western exit.
    B) Take the lower left Western exit.
    C) Take the upper Eastern exit.
    D) Take the middle Eastern exit.
    E) Take the lower Eastern exit.
    F) Go back to the room with Roserade in it and take the right-Northern exit.
    G) Go back to the room with Roserade in it and take the upper-Eastern exit.
    H) Go back to the room with Roserade in it and take the lower-Eastern exit.
    I) Go back to the room with Roserade in it and take the right-southern exit.
    J) Go back to the room with Roserade in it and take the left-southern exit to go deal with the Paldean Wooper.


    Attachments

    • Pokemon Dungeon Escape
      DungeonEscapeAct1-16.png
      388.4 KB · Views: 20
    • Pokemon Dungeon Escape
      DungeonEscapeAct1-16-2.png
      155.1 KB · Views: 18
    • Pokemon Dungeon Escape
      DungeonEscapeFight14-1.png
      438.7 KB · Views: 16
    • Pokemon Dungeon Escape
      DungeonEscapeFight14-2.png
      453 KB · Views: 17
    • Pokemon Dungeon Escape
      inventory16.png
      128.8 KB · Views: 17
    • Pokemon Dungeon Escape
      partypokemon15.png
      228.4 KB · Views: 18
    • Pokemon Dungeon Escape
      Map12.png
      176.4 KB · Views: 18
    • Pokemon Dungeon Escape
      DungeonEscapeMove16.png
      15.7 KB · Views: 24
    • Pokemon Dungeon Escape
      salanditdialogue1.png
      146.6 KB · Views: 18
    • Pokemon Dungeon Escape
      salanditdialogue2.png
      155.2 KB · Views: 18
    • Pokemon Dungeon Escape
      salanditdialogue3.png
      132.8 KB · Views: 18
    Last edited:
  • 34,991
    Posts
    7
    Years
    • Seen today
    1-1: C
    1-2: C
    2-1: C
    2-2: A
    3-1: D
    3-2: B
    3-3: B
    4-1: K
    4-2: E
    5-1: D
    5-2: B
    5-3: B
    5-4: B
    5-5: C
    6-1: B
    6-2: B
    7: B
    8: B
     
  • 24,980
    Posts
    3
    Years
    • Any pronoun
    • Online now
    1-1) B) Calm (+Sp. Defense, -Attack) Already moves pretty fast now (base 77 Speed) and later (base 117 Speed). Leans towards Special Defense instead. Also kind of hates to drop Attack right now because of Poison Fang at level 15. Will not get a special Poison move by level-up until 35 (37 as Salazzle). But what can you do?

    1-2) C) Yes, equip the Mystic Water. Helps more than Soft Sand at the moment.

    2-1) C) Yes, switch to Salandit.

    2-2) A) Offensively; nothing but attacking moves and prioritizes super-effective attacks if possible.

    3-1) A) Yes, fight the Kakuna. Free experience. Only learns Harden in BDSP. Hopefully never leveled up from being a Weedle.

    3-2) A) Yes, fight all the Sunkern. Too good of a match-up to ignore.

    3-3) B) No, don't fight it unless it attacks us. Might Screech. Already fights enough things today.

    4-1) K) No, don't use it now. Sees nothing particularly scary. Only Laser Focus, Fury Cutter, Harden, and String Shot on Beedrill. Would not be super opposed to it, though, given 90 base Attack.

    4-2) K) No, don't use it now. See above.

    5-1) D) No, don't heal up. Should be okay from Nymble, Sunkerns, and Kakuna.

    5-2) B) Yes, Eat an Oran Berry. Heals up to 100 HP. Likely battled several Toedscools.

    5-3) B) Yes, Eat an Oran Berry. Heals up to 100 HP. In preparation for probably Beedrill.

    5-4) B) Yes, Eat an Oran Berry. Heals up to 100 HP. Possibly still necessary.

    5-5) D) No, don't heal up. Should not fight that many things.

    6-1) B) Talk to Breloom, defeat the Toedscool and guide the Shroomish back to Breloom. Good TM, but completely useless at the moment. Admits to not being fond of fighting Toedscools either. Aims to complete the quest anyways.

    6-2) B) Accept the reward for helping find the Shroomish and mention that Torterra is looking for a Guard for the merchant stand, but that you haven't decided yet who it will be (Keeps Breloom as a guard candidate). Will return back to the other candidate eventually. Probably.

    7) B) Pick up only the items that are within 5 tiles along the path we take throughout the room. Sounds reasonable.

    8) B) Take the lower left Western exit. A small, unexplored room. Could use a breather after this room.
     
  • 47,039
    Posts
    3
    Years

    Pokemon Dungeon Escape - Act 1 - Chapter 17


    The voting results are as follows:

    1-1) Which of the following natures does our freshly recruited Salandit have?
    A) Sassy (+Sp. Defense, -Speed)
    B) Calm (+Sp. Defense, -Attack) - 1 vote
    C) Timid (+Speed, -Attack) - 1 vote
    D) Adamant (+Attack, -Sp. Attack)

    Tied. Hmm... more Speed or more Sp. defense. I think in this game's setting the extra bit of survivability from the Sp. Defense might be more beneficial? Then again the extra speed on an already fast mon will mean less enemies will outspeed us and we can get a hit in before they can...
    I've sat here for 15 minutes and I honestly can't decide as both can be beneficial lol. I'll just flip a coin; Heads. Calm nature it is, I'll join B).


    1-2) Barboach's Soft Sand was forcibly unequipped by a Trip trap. Should Barboach equip an item?
    A) Yes, equip the Black Glasses.
    B) Yes, equip the Hard Stone.
    C) Yes, equip the Mystic Water. - 2 votes
    D) Yes, re-equip the Soft Sand.
    E) No, don't equip an item now.

    2-1) Barboach is in the lead. Do we want to swap our lead for this room?
    A) No, keep Barboach in the lead.
    B) Yes, switch to Mouflon.
    C) Yes, switch to Salandit. - 2 votes

    2-2) How do we fight the enemies in this room?
    A) Offensively; nothing but attacking moves and prioritizes super-effective attacks if possible. - 2 votes
    B) Balanced; Uses both Attacking moves as well as non-attacking moves. Prioritizes super-effective attacks if possible. Uses attacking moves 66% of the time on average.
    C) Defensively. Only attacks once every 3 turns. Uses the other two turns for non-attacking moves.

    3-1) The Kakuna can't move at all and won't attack unless attacked or we try to pass by them. Do we attack the Kakuna?
    A) Yes, fight the Kakuna. - 1 vote
    B) Only fight the left Kakuna.
    C) Only fight the right Kakuna.
    D) No, don't fight the Kakuna - 1 vote

    Tied. The Kakuna shouldn't give us any trouble. I'll join A).

    3-2) The Sunkern won't attack unless attacked. Do we attack the Sunkern that aren't on the path we end up taking?
    A) Yes, fight all the Sunkern. - 1 vote
    B) No, only fight the Sunkern that are on the path we take through the room. - 1 vote

    Tied. Hmmm... 'within 5 tiles' from the item vote includes the 5th tile as well I think. Actually wondering this now as I'll need to know when I start processing the vote results lol. Like when a food container says consume within 3 days after opening you actually have 3 days to consume it right, not just 1 or 2. If we fight all the Sunkern the Orb blocked off by the cut tree will be exactly 5 tiles away from us, which would result in freeing the level 16 Nymble. So I think I'll join B) to prevent that from happening.

    3-3) The Nymble in the upper right corner can't come to use due to a Cut tree blocking it's path. However, if the cut tree is removed it will come to us. Do we attack the level 16 Nymble?
    A) Yes, fight the level 16 Nymble.
    B) No, don't fight it unless it attacks us. - 2 votes

    4-1) Do we use the Blowback Orb in this room?
    A) Yes, use the Blowback Orb on the level 12 Spearow.
    B) Yes, use the Blowback Orb on the level 13 Spearow.
    C) Yes, use the BlowbackOrb on the level 14 Spearow.
    D) Yes, use the Blowback Orb on the Rookidee.
    E) Yes, use the Blowback Orb on the Beedrill.
    F) Yes, use the Blowback Orb on the level 10 Toedscool.
    G) Yes, use the Blowback Orb on the left level 11 Toedscool.
    H) Yes, use the Blowback Orb on the right level 11 Toedscool.
    I) Yes, use the Blowback Orb on the level 12 Toedscool.
    J) Yes, use the Blowback Orb on the level 13 Toedscool.
    K) No, don't use it now. - 2 votes

    4-2) Do we use the Lob Orb in this room?
    A) Yes, use the Lob Orb on the level 12 Spearow.
    B) Yes, use the Lob Orb on the level 13 Spearow.
    C) Yes, use the Lob Orb on the level 14 Spearow.
    D) Yes, use the Lob Orb on the Rookidee.
    E) Yes, use the Lob Orb on the Beedrill. - 1 vote
    F) Yes, use the Lob Orb on the level 10 Toedscool.
    G) Yes, use the Lob Orb on the left level 11 Toedscool.
    H) Yes, use the Lob Orb on the right level 11 Toedscool.
    I) Yes, use the Lob Orb on the level 12 Toedscool.
    J) Yes, use the Lob Orb on the level 13 Toedscool.
    K) No, don't use it now. - 1 vote

    Tied. I'll join E). We fight a lot in this large room. The extra damage from the orb on the Beedrill could come in handy.

    5-1) We can heal after defeating four opponents in this room. Do we heal?
    A) Yes, drink a Berry Juice. Heals up to 50 HP and also heals any status conditions.
    B) Yes, Eat an Oran Berry. Heals up to 100 HP.
    C) Yes, Eat a Sitrus Berry. Heals up to 250 HP.
    D) No, don't heal up. - 2 votes

    5-2) We can heal after defeating eight opponents in this room. Do we heal?
    A) Yes, drink a Berry Juice. Heals up to 50 HP and also heals any status conditions.
    B) Yes, Eat an Oran Berry. Heals up to 100 HP. - 2 votes
    C) Yes, Eat a Sitrus Berry. Heals up to 250 HP.
    D) No, don't heal up.

    5-3) We can heal after defeating twelve opponents in this room. Do we heal?
    A) Yes, drink a Berry Juice. Heals up to 50 HP and also heals any status conditions.
    B) Yes, Eat an Oran Berry. Heals up to 100 HP. - 2 votes
    C) Yes, Eat a Sitrus Berry. Heals up to 250 HP.
    D) No, don't heal up.

    5-4) We can heal after defeating sixteen opponents in this room. Do we heal?
    A) Yes, drink a Berry Juice. Heals up to 50 HP and also heals any status conditions.
    B) Yes, Eat an Oran Berry. Heals up to 100 HP. - 2 votes
    C) Yes, Eat a Sitrus Berry. Heals up to 250 HP.
    D) No, don't heal up.

    5-5) We can heal after defeating twenty opponents in this room. Do we heal?
    A) Yes, drink a Berry Juice. Heals up to 50 HP and also heals any status conditions.
    B) Yes, Eat an Oran Berry. Heals up to 100 HP.
    C) Yes, Eat a Sitrus Berry. Heals up to 250 HP. - 1 vote
    D) No, don't heal up. - 1 vote

    Tied. We'll be fighting... 19 opponents? I'll join D) then.

    6-1) Do we talk to the Breloom and do we help him by defeating the Toedscool and guiding his Shroomish back to him?
    A) Talk to Breloom, defeat the Toedscool, but don't guide the Shroomish back to Breloom.
    B) Talk to Breloom, defeat the Toedscool and guide the Shroomish back to Breloom. - 2 votes
    C) Don't talk to Breloom, defeat the Toedscool, but don't guide the Shroomish back to Breloom.
    D) Don't talk to Breloom, avoid the Toedscool if possible and help Breloom some other time.

    6-2) If we helped Breloom by defeating the Toedscool and guiding the Shroomish back to him: Do we talk to Breloom about the open guard position at the merchant stand?
    A) Accept the reward for helping find the Shroomish and don't mention the merchant stand Guard position at all (If chosen we can't pick Breloom as a guard anymore later on).
    B) Accept the reward for helping find the Shroomish and mention that Torterra is looking for a Guard for the merchant stand, but that you haven't decided yet who it will be (Keeps Breloom as a guard candidate). - 2 votes
    C) Accept the reward for helping find the Shroomish and mention that Torterra is looking for a Guard for the merchant stand and tell Breloom to head for the merchant stand (Choose Breloom as the guard and forfeit the bonus quest rewards for talking to all 3 candidates before choosing one).

    7) What do we do with the items in this room?
    A) Pick up all items.
    B) Pick up only the items that are within 5 tiles along the path we take throughout the room. - 2 votes
    C) Pick up only the berries and Berry Juice.
    D) Pick up only the shards.
    E) Pick up only the orbs.
    F) Pick up only the Iron.
    G) Pick up only the TM025: Leech Life.
    H) Pick up the TM and the Iron.
    I) Pick up the TM, Iron and the orbs.
    J) Pick up the TM, Iron and the shards.
    K) Pick up the TM, Iron and the berries and Berry Juice.
    L) Pick up the TM and the orbs.
    M) Pick up the TM and the shards.
    N) Pick up the TM and the berries and Berry Juice.
    O) Pick up the TM, orbs and the shards.
    P) Pick up the TM, orbs and the berries and Berry Juice.
    Q) Pick up the TM, shards and the berries and Berry Juice.
    R) Pick up the berries and Berry Juice and the shards.
    S) Pick up the berries and Berry Juice and the orbs.
    T) Pick up the berries and Berry Juice and the iron.
    U) Pick up the shards and the orbs.
    V) Pick up the shards and the Iron.
    W) Pick up the Iron and the orbs.

    8) Which exit do we take?
    A) Take the upper left Western exit.
    B) Take the lower left Western exit. - 2 votes
    C) Take the upper Eastern exit.
    D) Take the middle Eastern exit.
    E) Take the lower Eastern exit.
    F) Go back to the room with Roserade in it and take the right-Northern exit.
    G) Go back to the room with Roserade in it and take the upper-Eastern exit.
    H) Go back to the room with Roserade in it and take the lower-Eastern exit.
    I) Go back to the room with Roserade in it and take the right-southern exit.
    J) Go back to the room with Roserade in it and take the left-southern exit to go deal with the Paldean Wooper.

    Spoiler:


    The freshly recruited Salandit has a Calm Nature. Barboach equips the Mystic Water.
    We switch the lead to Salandit and fight the enemies in this room offensively.
    We fight both the Kakuna and only fight the Sunkern that are on the path we take through the room. We don't fight the level 16 Nymble unless it attacks us.
    We do not use the Blowback Orb in this room, but do use the Lob Orb on the Beedrill.
    We do not heal after defeating four opponents, but do heal by eating an Oran Berry after defeating eight, twelve and sixteen opponents. We don't heal after defeating twenty opponents.

    We talk to Breloom, defeat the Toedscool and guide the Shroomish back to Breloom. We then accept the reward for helping find the Shroomish and mention that Torterra is looking for a Guard for the merchant stand, but that we haven't decided yet who it will be.
    We pick up only the items that are within 5 tiles along the path we take throughout the room and take the lower left Western exit.


    The path we take is as follows:

    Pokemon Dungeon Escape


    Stepped on a Grimy Trap. A Cheri Berry went bad and was tossed out.
    Stepped on a Gust Trap. Mouflon was flung into a wall and took 5 damage.
    Stepped on a PP Leech trap. Mouflon's Tackle lost all PP.
    Stepped on a Trip Trap, Mouflon tripped but isn't holding an item.
    Stepped on a Grimy Trap. A Rawst Berry went bad and was tossed out.
    Stepped on a Spin Trap. Mouflon is now confused.

    The fights:
    Spoiler:


    I'm never making a room with that many enemies ever again.... RIP weekend xD

    Mouflon and Barboach have leveled up twice from the fights.
    Salandit fainted during the fights and has left the team.

    Fainted team members will leave the team, but at the end of each act there will be an opportunity to re-recruit one of them, so if we lose more than 1 team member we'll have to chose which one to return to the team! If we want one back at all that is.


    The dialogue with the Shroomish and Breloom:
    Spoiler:


    Team Roundabout:
    Spoiler:


    Inventory:
    Spoiler:


    Quests:
    Spoiler:

    Reputation:
    Spoiler:

    Dungeon Map:
    Spoiler:


    Pokemon Dungeon Escape - Act 1 - Chapter 18

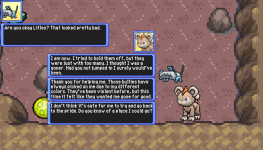
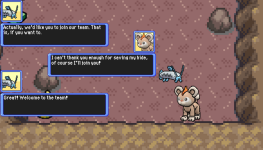
    We arrive in the room where the lower left Western exit takes us. As we enter we can see a badly injured different colored Litleo lying on the floor surrounded by 5 normal colored Litleo. They are attacking the shiny Litleo due to it looking different. The shiny Litleo is close to fainting.

    The Western room still has the hostile Toedscool we skipped when we went through it. The Northern room we just came from still has 3 hostile Sunkern and 1 hostile Nymble remaining in it. We can take either exit without directly running into them.

    Pokemon Dungeon Escape


    1) Mouflon is at 47/53 HP and is currently confused. Do we heal and/or cure the confusion?
    A) Yes, drink a Berry Juice. Heals up to 50 HP and also heals any status conditions.
    B) Yes, Eat an Oran Berry. Heals up to 100 HP.
    C) Yes, Eat a Sitrus Berry. Heals up to 250 HP.
    D) Yes, Eat a Persim Berry to cure the confusion.
    E) Yes, Eat a Persim Berry to cure the confusion and an Oran Berry to heal up.
    F) Yes, Eat a Persim Berry to cure the confusion and a Sitrus Berry to heal up.
    G) Yes, Eat a Lum Berry to cure the confusion.
    H) Yes, Eat a Lum Berry to cure the confusion and an Oran Berry to heal up.
    I) Yes, Eat a Lum Berry to cure the confusion and a Sitrus Berry to heal up.
    J) No, don't heal up.

    2) Mouflon is in the lead. Do we want to swap our lead for this room?
    A) No, keep Mouflon in the lead.
    B) Yes, switch to Barboach.

    The normal Litleo are attacking the shiny Litleo because it's different from them. We can either rush to the shiny Litleo's aid, help the normal Litleo faint the shiny Litleo by dealing the final blow or just ignore the Litleo all together. If we help the shiny Litleo by defeating the normal Litleo and giving it an Oran Berry we can recruit it. If we help the normal Litleo faint it they will each give us a random Berry. If we look the other way the Litleo will keep attacking the shiny Litleo untill it perishes.

    3-1) How do we handle the Litleo?
    A) Look the other way and ignore what's happening.
    B) Deal the final blow to the shiny Litleo and help the normal Litleo.
    C) Deal the final blow to the shiny Litleo and help the normal Litleo, but refuse their reward.
    D) Help the shiny Litleo by defeating the normal Litleo and giving it an Oran Berry, but don't recruit it.
    E) Help the shiny Litleo by defeating the normal Litleo and giving it an Oran Berry and then recruit it.

    3-2) If we fight anyone in this room, how do we fight them?
    A) Offensively; nothing but attacking moves and prioritizes super-effective attacks if possible.
    B) Balanced; Uses both Attacking moves as well as non-attacking moves. Prioritizes super-effective attacks if possible. Uses attacking moves 66% of the time on average.
    C) Defensively. Only attacks once every 3 turns. Uses the other two turns for non-attacking moves.

    4) Do we use the Blowback Orb in this room?
    A) Yes, use the Blowback Orb on the leftmost level 12 Litleo.
    B) Yes, use the Blowback Orb on the level 13 Litleo
    C) Yes, use the BlowbackOrb on the level 12 Litleo right of the level 13 Litleo.
    D) Yes, use the Blowback Orb on the middle level 12 Litleo right of the level 13 Litleo.
    E) Yes, use the Blowback Orb on the rightmost level 12 Litleo.
    F) Yes, use the Blowback Orb on the shiny Litleo.
    G) No, don't use it now.

    5) What do we do with the items in this room?
    A) Pick up all items.
    B) Pick up only the Green Shards.
    C) Pick up only the Aspear Berry.
    D) Pick up only the Rawst Berry.
    E) Pick up the Aspear and the Rawst Berry.
    F) Pick up the Aspear Berry and the Green Shards.
    G) Pick up the Rawst Berry and the Green Shards.

    We are currently without a Fire or Poison type so at the moment we can no longer take the Eastern Exits in the Large Forest room.

    6) Which exit do we take?
    A) Take the Western exit and then go North to the room with 3 hostile Bug and 2 hostile Water types.
    B) Take the Northern exit and then go West to the room with 3 hostile Bug and 2 hostile Water types.
    C) Take the Western exit and then take the Southern exit to the room with 5 hostile Ground types and 2 hostile Normal types.
    D) Take the Western exit and then take the other Eastern exit to the room with 5 hostile Ground types and 2 hostile Normal types.
    E) Take the Western exit and go visit the merchant stand.
    F) Go back to the room with Roserade in it and take the right-Northern exit.
    G) Go back to the room with Roserade in it and take the upper-Eastern exit.
    H) Go back to the room with Roserade in it and take the lower-Eastern exit.
    I) Go back to the room with Roserade in it and take the right-southern exit.
    J) Go back to the room with Roserade in it and take the left-southern exit to go deal with the Paldean Wooper.


    Attachments

    • Pokemon Dungeon Escape
      breloomdialogue1.png
      267.7 KB · Views: 14
    • Pokemon Dungeon Escape
      breloomdialogue2.png
      268.9 KB · Views: 14
    • Pokemon Dungeon Escape
      breloomshroomishfound.png
      491.4 KB · Views: 13
    • Pokemon Dungeon Escape
      DungeonEscapeFight14-3.png
      376.5 KB · Views: 13
    • Pokemon Dungeon Escape
      DungeonEscapeFight14-2.png
      370.4 KB · Views: 14
    • Pokemon Dungeon Escape
      DungeonEscapeAct1-17.png
      124.7 KB · Views: 16
    • Pokemon Dungeon Escape
      DungeonEscapeFight14-1.png
      316.8 KB · Views: 14
    • Pokemon Dungeon Escape
      DungeonEscapeFight14-5.png
      357.5 KB · Views: 14
    • Pokemon Dungeon Escape
      DungeonEscapeFight14-6.png
      359.9 KB · Views: 14
    • Pokemon Dungeon Escape
      DungeonEscapeFight14-7.png
      363.8 KB · Views: 14
    • Pokemon Dungeon Escape
      DungeonEscapeFight14-8.png
      361.2 KB · Views: 14
    • Pokemon Dungeon Escape
      DungeonEscapeFight14-4.png
      381.1 KB · Views: 13
    • Pokemon Dungeon Escape
      DungeonEscapeFight14-9.png
      384.8 KB · Views: 12
    • Pokemon Dungeon Escape
      DungeonEscapeFight14-10.png
      373.7 KB · Views: 13
    • Pokemon Dungeon Escape
      DungeonEscapeFight14-11.png
      382.2 KB · Views: 12
    • Pokemon Dungeon Escape
      DungeonEscapeFight14-12.png
      544.2 KB · Views: 12
    • Pokemon Dungeon Escape
      DungeonEscapeFight14-13.png
      394.5 KB · Views: 12
    • Pokemon Dungeon Escape
      DungeonEscapeFight14-15.png
      338.2 KB · Views: 13
    • Pokemon Dungeon Escape
      DungeonEscapeFight14-18.png
      374.4 KB · Views: 12
    • Pokemon Dungeon Escape
      DungeonEscapeFight14-17.png
      367.1 KB · Views: 13
    • Pokemon Dungeon Escape
      DungeonEscapeFight14-14.png
      361.5 KB · Views: 13
    • Pokemon Dungeon Escape
      DungeonEscapeFight14-19.png
      359.8 KB · Views: 12
    • Pokemon Dungeon Escape
      DungeonEscapeMove17.png
      150.7 KB · Views: 16
    • Pokemon Dungeon Escape
      inventory17.png
      128.4 KB · Views: 13
    • Pokemon Dungeon Escape
      Map13.png
      174.9 KB · Views: 14
    • Pokemon Dungeon Escape
      partypokemon16.png
      198.3 KB · Views: 14
    • Pokemon Dungeon Escape
      DungeonEscapeFight14-16.png
      371.6 KB · Views: 12
    Last edited:
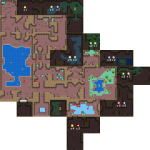
  • 24,980
    Posts
    3
    Years
    • Any pronoun
    • Online now
    Actually got lucky on those fights. Missed some status effects early on. Ate a berry at 1 HP too.

    1) D) Yes, Eat a Persim Berry to cure the confusion. Just in case.

    2) B) Yes, switch to Barboach. Water > Fire...hopefully.

    3-1) E) Help the shiny Litleo by defeating the normal Litleo and giving it an Oran Berry and then recruit it. Wants more friends. Hopes for very few Headbutts.

    3-2) A) Offensively; nothing but attacking moves and prioritizes super-effective attacks if possible. The faster, the better.

    4) G) No, don't use it now. Nah.

    5) A) Pick up all items. Plans to clear the room, so why not?

    6) E) Take the Western exit and go visit the merchant stand. Might as well turn in one quest. Poor Smoliv. Saw some bad things.
     
  • 47,039
    Posts
    3
    Years

    Pokemon Dungeon Escape - Act 1 - Chapter 18


    The voting results are as follows:

    1) Mouflon is at 47/53 HP and is currently confused. Do we heal and/or cure the confusion?
    A) Yes, drink a Berry Juice. Heals up to 50 HP and also heals any status conditions.
    B) Yes, Eat an Oran Berry. Heals up to 100 HP.
    C) Yes, Eat a Sitrus Berry. Heals up to 250 HP.
    D) Yes, Eat a Persim Berry to cure the confusion. - 2 votes
    E) Yes, Eat a Persim Berry to cure the confusion and an Oran Berry to heal up.
    F) Yes, Eat a Persim Berry to cure the confusion and a Sitrus Berry to heal up.
    G) Yes, Eat a Lum Berry to cure the confusion.
    H) Yes, Eat a Lum Berry to cure the confusion and an Oran Berry to heal up.
    I) Yes, Eat a Lum Berry to cure the confusion and a Sitrus Berry to heal up.
    J) No, don't heal up.

    2) Mouflon is in the lead. Do we want to swap our lead for this room?
    A) No, keep Mouflon in the lead.
    B) Yes, switch to Barboach. - 2 votes

    3-1) How do we handle the Litleo?
    A) Look the other way and ignore what's happening.
    B) Deal the final blow to the shiny Litleo and help the normal Litleo.
    C) Deal the final blow to the shiny Litleo and help the normal Litleo, but refuse their reward.
    D) Help the shiny Litleo by defeating the normal Litleo and giving it an Oran Berry, but don't recruit it.
    E) Help the shiny Litleo by defeating the normal Litleo and giving it an Oran Berry and then recruit it. - 2 votes

    3-2) If we fight anyone in this room, how do we fight them?
    A) Offensively; nothing but attacking moves and prioritizes super-effective attacks if possible. - 2 votes
    B) Balanced; Uses both Attacking moves as well as non-attacking moves. Prioritizes super-effective attacks if possible. Uses attacking moves 66% of the time on average.
    C) Defensively. Only attacks once every 3 turns. Uses the other two turns for non-attacking moves.

    4) Do we use the Blowback Orb in this room?
    A) Yes, use the Blowback Orb on the leftmost level 12 Litleo.
    B) Yes, use the Blowback Orb on the level 13 Litleo
    C) Yes, use the BlowbackOrb on the level 12 Litleo right of the level 13 Litleo.
    D) Yes, use the Blowback Orb on the middle level 12 Litleo right of the level 13 Litleo.
    E) Yes, use the Blowback Orb on the rightmost level 12 Litleo.
    F) Yes, use the Blowback Orb on the shiny Litleo.
    G) No, don't use it now. - 2 votes

    5) What do we do with the items in this room?
    A) Pick up all items. - 2 votes
    B) Pick up only the Green Shards.
    C) Pick up only the Aspear Berry.
    D) Pick up only the Rawst Berry.
    E) Pick up the Aspear and the Rawst Berry.
    F) Pick up the Aspear Berry and the Green Shards.
    G) Pick up the Rawst Berry and the Green Shards.

    6) Which exit do we take?
    A) Take the Western exit and then go North to the room with 3 hostile Bug and 2 hostile Water types.
    B) Take the Northern exit and then go West to the room with 3 hostile Bug and 2 hostile Water types.
    C) Take the Western exit and then take the Southern exit to the room with 5 hostile Ground types and 2 hostile Normal types.
    D) Take the Western exit and then take the other Eastern exit to the room with 5 hostile Ground types and 2 hostile Normal types.
    E) Take the Western exit and go visit the merchant stand. - 2 votes
    F) Go back to the room with Roserade in it and take the right-Northern exit.
    G) Go back to the room with Roserade in it and take the upper-Eastern exit.
    H) Go back to the room with Roserade in it and take the lower-Eastern exit.
    I) Go back to the room with Roserade in it and take the right-southern exit.
    J) Go back to the room with Roserade in it and take the left-southern exit to go deal with the Paldean Wooper.


    Spoiler:


    Mouflon eats a Persim Berry to cure it's confusion. We switch the lead to Barboach and fight any enemies offensively. We help the shiny Litleo by defeating the normal Litleo and giving it an Oran Berry, and then recruit it. We do not use the Blowback Orb in this room. We pick up all items and take the Western exit to go visit the merchant stand.

    The path we take is as follows:

    Pokemon Dungeon Escape


    Stepped on a Sticky Trap. A Blue Shard became sticky and can't be used.
    Stepped on a Blast Trap. Barboach takes 25% of Max HP in damage: Took 11 damage.

    The fights:
    Spoiler:


    Barboach leveled up once from the fights.

    The dialogue with the shiny Litleo after saving it:
    Spoiler:


    Team Roundabout:
    Spoiler:


    Inventory:
    Spoiler:


    Quests:
    Spoiler:

    Reputation:
    Spoiler:

    Dungeon Map:
    Spoiler:


    Pokemon Dungeon Escape - Act 1 - Chapter 19

    We arrive back at the merchant stand. As we enter the room the Smoliv we've been escorting dashes forward and the two brothers bump into each other looking quite relieved.

    Pokemon Dungeon Escape


    The Northen exit leads to a room with a single hostile Bug type. The Eastern room still has the hostile Toedscool we skipped when we went through it. We now have a fire type again and can take the Eastern exits in the Large Forest room again.

    Pokemon Dungeon Escape


    1) We've recruited the shiny Litleo. Which of the following will be it's nature?
    A) Quiet (+Sp. Attack, -Speed)
    B) Bold (+Defense, -Attack)
    C) Calm (+Sp. Defense, -Attack)
    D) Impish (+Defense, -Sp. Attack)

    2) Barboach is at 4/42 HP. Do we heal?
    A) Yes, drink a Berry Juice. Heals up to 50 HP and also heals any status conditions.
    B) Yes, Eat an Oran Berry. Heals up to 100 HP.
    C) Yes, Eat a Sitrus Berry. Heals up to 250 HP.
    D) No, don't heal up.

    We've successfully escorted the Smoliv and can turn in the quest 'Left Behind' for the rewards. We've also found Chikorita's hairpin as well and can turn in the quest 'The Lost Hairpin' as well.

    3-1) Do we turn in the 'Left Behind' and/or the 'The Lost Hairpin' quests?
    A) Yes, turn in the 'Left Behind' quest.
    B) Yes, turn in the 'The Lost Hairpin' quest.
    C) Yes, turn in both quests.
    D) No, don't turn either of these quests in now.

    3-2 The experience received depends on the level of the lead Pokemon at the time of turning a quest in. Barboach is in the lead. Do we want to swap our lead for this room?
    A) No, keep Barboach in the lead.
    B) Yes, switch to Mouflon.
    C) Yes, switch to Litleo.

    4) The Smoliv that was already at the merchant stand when we returned with it's brother is worried about it's other brother and would like us to go check up on him. Do we accept this quest?
    A) Talk to the Smoliv and accept it's quest to go check up on the third Smoliv.
    B) Talk to the Smoliv and refuse it's quest.
    C) Don't talk to the Smoliv and leave the quest for later.

    5) Do we use our Cleanse Orb to clean the sticky items in our inventory and be able to use them again?
    A) Yes, clean the sticky items in our inventory with the Cleanse Orb.
    B) No, don't use the Cleanse Orb now.

    The Merchant's inventory:
    Spoiler:


    Note: a faction merchant's inventory will expand as we earn reputation with that faction. The first inventory expansion will be at 50 faction reputation.

    Even without using the Cleanse Orb we have 5 Blue shards to spend.

    6) Do we buy a TM?
    A) Yes, buy TM010 Rest
    B) Yes, buy TM011 Sleep Talk
    C) Yes, buy TM012 Light Screen
    D) Yes, buy TM013 Reflect
    E) No, don't buy a TM now.

    We have 18 Green Shards we can spend.

    7-1) Do we buy any Cheri berries?
    A) Yes, buy 1.
    B) Yes, buy 2.
    C) Yes, buy 3.
    D) Yes, buy 4.
    E) Yes, buy 5.
    F) Yes, buy 6.
    G) Yes, buy 7.
    H) Yes, buy 8.
    I) Yes, buy 9.
    J) Yes, buy 10.
    K) Yes, buy 11.
    L) Yes, buy 12.
    M) Yes, buy 13.
    N) Yes, buy 14.
    O) Yes, buy 15.
    P) Yes, buy 16.
    Q) Yes, buy 17.
    R) Yes, buy 18.
    S) No, don't buy any.

    7-2) Do we buy any Oran berries?
    A) Yes, buy 1.
    B) Yes, buy 2.
    C) Yes, buy 3.
    D) Yes, buy 4.
    E) Yes, buy 5.
    F) Yes, buy 6.
    G) Yes, buy 7.
    H) Yes, buy 8.
    I) Yes, buy 9.
    J) No, don't buy any.

    7-3) Do we buy any Pecha berries?
    A) Yes, buy 1.
    B) Yes, buy 2.
    C) Yes, buy 3.
    D) Yes, buy 4.
    E) Yes, buy 5.
    F) Yes, buy 6.
    G) Yes, buy 7.
    H) Yes, buy 8.
    I) Yes, buy 9.
    J) No, don't buy any.

    7-4) Do we buy any Rawst berries?
    A) Yes, buy 1.
    B) Yes, buy 2.
    C) Yes, buy 3.
    D) Yes, buy 4.
    E) Yes, buy 5.
    F) Yes, buy 6.
    G) Yes, buy 7.
    H) Yes, buy 8.
    I) Yes, buy 9.
    J) Yes, buy 10.
    K) Yes, buy 11.
    L) Yes, buy 12.
    M) Yes, buy 13.
    N) Yes, buy 14.
    O) Yes, buy 15.
    P) Yes, buy 16.
    Q) Yes, buy 17.
    R) Yes, buy 18.
    S) No, don't buy any.

    We have 15 Red shards to spend.

    8-1) Do we buy any Fire Stones?
    A) Yes, buy 1.
    B) Yes, buy 2.
    C) Yes, buy 3.
    D) No, don't buy any.

    8-2) Do we buy any Leaf Stones?
    A) Yes, buy 1.
    B) Yes, buy 2.
    C) Yes, buy 3.
    D) No, don't buy any.

    8-3) Do we buy any Water Stones?
    A) Yes, buy 1.
    B) Yes, buy 2.
    C) Yes, buy 3.
    D) No, don't buy any.

    We have either 16 or 17 Yellow shards to spend depending on whether or not we use our Cleanse Orb.

    9-1) Do we buy any Blowback Orbs?
    A) Yes, buy 1.
    B) Yes, buy 2.
    C) Yes, buy 3.
    D) Yes, buy 4.
    E) Yes, buy 5.
    F) Yes, buy 6.
    G) Yes, buy 7.
    H) Yes, buy 8.
    I) Yes, buy 9.
    J) Yes, buy 10.
    K) Yes, buy 11.
    L) Yes, buy 12.
    M) Yes, buy 13.
    N) Yes, buy 14.
    O) Yes, buy 15.
    P) Yes, buy 16.
    Q) Yes, buy 17.
    R) No, don't buy any.

    9-2) Do we buy any Cleanse Orbs?
    A) Yes, buy 1.
    B) Yes, buy 2.
    C) Yes, buy 3.
    D) Yes, buy 4.
    E) Yes, buy 5.
    F) No, don't buy any.

    9-3) Do we buy any See-Trap Orbs?
    A) Yes, buy 1.
    B) Yes, buy 2.
    C) Yes, buy 3.
    D) Yes, buy 4.
    E) Yes, buy 5.
    F) No, don't buy any.

    9-4) Do we buy any Totter Orbs?
    A) Yes, buy 1.
    B) Yes, buy 2.
    C) Yes, buy 3.
    D) Yes, buy 4.
    E) Yes, buy 5.
    F) Yes, buy 6.
    G) Yes, buy 7.
    H) Yes, buy 8.
    I) No, don't buy any.

    10-1) Which exit do we take?
    A) Take the Northern exit.
    B) Take the Eastern exit and then go North to the room with 3 hostile Bug and 2 hostile Water types..
    C) Take the Eastern exit and go back to the Large Forest room to go clear out the remaining enemies and pick up the remaining items.
    D) Take the Eastern exit and go back to the Large Forest room and take the upper Eastern exit. (we'll have to fight the Nymble on the way)
    E) Take the Eastern exit and go back to the Large Forest room and take the middle Eastern exit.
    F) Take the Eastern exit and go back to the Large Forest room and take the lower Eastern exit.
    G) Take the Eastern exit and then take the Southern exit to the room with 5 hostile Ground types and 2 hostile Normal types.
    H) Take the Eastern exit and then take the lower Eastern exit to the room with 5 hostile Ground types and 2 hostile Normal types.
    I) Go back to the room with Roserade in it and take the right-Northern exit.
    J) Go back to the room with Roserade in it and take the upper-Eastern exit.
    K) Go back to the room with Roserade in it and take the lower-Eastern exit.
    L) Go back to the room with Roserade in it and take the right-southern exit.
    M) Go back to the room with Roserade in it and take the left-southern exit to go deal with the Paldean Wooper.

    10-2) After navigating the current room, but before heading to the next one, we can go heal at the Hot Spring. Should we heal?
    A) Yes, go heal at the Hot Spring.
    B) No, don't heal at the Hot Spring.


    Attachments

    • Pokemon Dungeon Escape
      DungeonEscapeFight15-2.png
      461.7 KB · Views: 41
    • Pokemon Dungeon Escape
      DungeonEscapeFight15-1.png
      473.4 KB · Views: 41
    • Pokemon Dungeon Escape
      DungeonEscapeAct1-18.png
      87.1 KB · Views: 42
    • Pokemon Dungeon Escape
      DungeonEscapeFight15-3.png
      431.4 KB · Views: 40
    • Pokemon Dungeon Escape
      DungeonEscapeFight15-4.png
      447.3 KB · Views: 39
    • Pokemon Dungeon Escape
      DungeonEscapeFight15-5.png
      429.7 KB · Views: 39
    • Pokemon Dungeon Escape
      DungeonEscapeMove18.png
      13.3 KB · Views: 50
    • Pokemon Dungeon Escape
      inventory18.png
      131.3 KB · Views: 39
    • Pokemon Dungeon Escape
      litleorecruitdiag1.png
      126.5 KB · Views: 40
    • Pokemon Dungeon Escape
      litleorecruitdiag2.png
      118.3 KB · Views: 40
    • Pokemon Dungeon Escape
      Map14.png
      177 KB · Views: 39
    • Pokemon Dungeon Escape
      partypokemon17.png
      189.5 KB · Views: 40
    • Pokemon Dungeon Escape
      smolivescortbackdialogue.png
      158 KB · Views: 42
    Last edited:
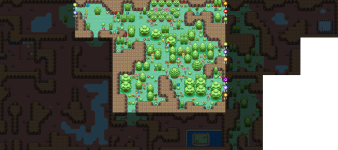
  • 34,991
    Posts
    7
    Years
    • Seen today
    1: C
    2: B
    3-1: C
    3-2: C
    4: A
    5: B
    6: E
    7-1: S
    7-2: C
    7-3: C
    7-4: S
    8-1: D
    8-2: D
    8-3: D
    9-1: R
    9-2: F
    9-3: F
    9-4: I
    10-1: J
    10-2: A
     
  • 24,980
    Posts
    3
    Years
    • Any pronoun
    • Online now
    1) C) Calm (+Sp. Defense, -Attack) Liked none of the options. Hurts Headbutt, the best attack when at neutral, and Fire Fang in the future with a -Attack nature. Gains no good special moves until level 36. Relies on Ember now, though. Waits until level 23 for Fire Fang. Chose to just follow FeraligatrMaster.

    2) D) No, don't heal up. Heads to the Hot Springs before getting into a dangerous place.

    3-1) C) Yes, turn in both quests. Already here, so sure.

    3-2 B) Yes, switch to Mouflon. ...Presumably awards more experience to higher level Pokemon. Or is it like games where you get more experience when underleveled?

    4) A) Talk to the Smoliv and accept it's quest to go check up on the third Smoliv. Why not?

    5) B) No, don't use the Cleanse Orb now.

    6) E) No, don't buy a TM now.

    7-1) S) No, don't buy any. Feels good with 3+ of each status cure berry.
    7-2) D) Yes, buy 4. Cannot have enough Oran Berries, however. Works as a good hold item.
    7-3) J) No, don't buy any.
    7-4) S) No, don't buy any.

    8-1) D) No, don't buy any. Cannot evolve anything with them.
    8-2) D) No, don't buy any.
    8-3) D) No, don't buy any.

    9-1) R) No, don't buy any. Not against some, but not that amazing.
    9-2) F) No, don't buy any.
    9-3) B) Yes, buy 2. Good for big rooms.
    9-4) A) Yes, buy 1. For any more big bad Beedrills.

    10-1) J) Go back to the room with Roserade in it and take the upper-Eastern exit. Consists of Grass and Fairy types. Good for Litleo.

    10-2) A) Yes, go heal at the Hot Spring.
     
  • 47,039
    Posts
    3
    Years

    Pokemon Dungeon Escape - Act 1 - Chapter 19


    The voting results are as follows:

    1) We've recruited the shiny Litleo. Which of the following will be it's nature?
    A) Quiet (+Sp. Attack, -Speed)
    B) Bold (+Defense, -Attack)
    C) Calm (+Sp. Defense, -Attack) - 2 votes.
    D) Impish (+Defense, -Sp. Attack)

    2) Barboach is at 4/42 HP. Do we heal?
    A) Yes, drink a Berry Juice. Heals up to 50 HP and also heals any status conditions.
    B) Yes, Eat an Oran Berry. Heals up to 100 HP. - 1 vote.
    C) Yes, Eat a Sitrus Berry. Heals up to 250 HP.
    D) No, don't heal up. - 1 vote.

    Tied. Well... we'll be switching our lead anyway, so might as well heal via the Hot Spring. I'll join D).

    3-1) Do we turn in the 'Left Behind' and/or the 'The Lost Hairpin' quests?
    A) Yes, turn in the 'Left Behind' quest.
    B) Yes, turn in the 'The Lost Hairpin' quest.
    C) Yes, turn in both quests. - 2 votes.
    D) No, don't turn either of these quests in now.

    3-2 The experience received depends on the level of the lead Pokemon at the time of turning a quest in. Barboach is in the lead. Do we want to swap our lead for this room?
    A) No, keep Barboach in the lead.
    B) Yes, switch to Mouflon. - 1 vote.
    C) Yes, switch to Litleo. - 1 vote.

    Tied. I'll join B) for more Experience.
    Basically, quest Experience is <Quest's fixed base Exp amount> + (<Quest specific Variable> x <Lead Pokemon's Level>)

    4) The Smoliv that was already at the merchant stand when we returned with it's brother is worried about it's other brother and would like us to go check up on him. Do we accept this quest?
    A) Talk to the Smoliv and accept it's quest to go check up on the third Smoliv. - 2 votes.
    B) Talk to the Smoliv and refuse it's quest.
    C) Don't talk to the Smoliv and leave the quest for later.

    5) Do we use our Cleanse Orb to clean the sticky items in our inventory and be able to use them again?
    A) Yes, clean the sticky items in our inventory with the Cleanse Orb.
    B) No, don't use the Cleanse Orb now. - 2 votes.

    6) Do we buy a TM?
    A) Yes, buy TM010 Rest
    B) Yes, buy TM011 Sleep Talk
    C) Yes, buy TM012 Light Screen
    D) Yes, buy TM013 Reflect
    E) No, don't buy a TM now. - 2 votes.

    7-1) Do we buy any Cheri berries?
    A) Yes, buy 1.
    B) Yes, buy 2.
    C) Yes, buy 3.
    D) Yes, buy 4.
    E) Yes, buy 5.
    F) Yes, buy 6.
    G) Yes, buy 7.
    H) Yes, buy 8.
    I) Yes, buy 9.
    J) Yes, buy 10.
    K) Yes, buy 11.
    L) Yes, buy 12.
    M) Yes, buy 13.
    N) Yes, buy 14.
    O) Yes, buy 15.
    P) Yes, buy 16.
    Q) Yes, buy 17.
    R) Yes, buy 18.
    S) No, don't buy any. - 2 votes.

    7-2) Do we buy any Oran berries?
    A) Yes, buy 1.
    B) Yes, buy 2.
    C) Yes, buy 3. - 1 vote.
    D) Yes, buy 4. - 1 vote.
    E) Yes, buy 5.
    F) Yes, buy 6.
    G) Yes, buy 7.
    H) Yes, buy 8.
    I) Yes, buy 9.
    J) No, don't buy any.

    Tied. I'll join D). We burn through healing items fairly fast.

    7-3) Do we buy any Pecha berries?
    A) Yes, buy 1.
    B) Yes, buy 2.
    C) Yes, buy 3. - 1 vote.
    D) Yes, buy 4.
    E) Yes, buy 5.
    F) Yes, buy 6.
    G) Yes, buy 7.
    H) Yes, buy 8.
    I) Yes, buy 9.
    J) No, don't buy any. - 1 vote.

    Tied. I'll join C). Could end up very unlucky with those Poison traps.

    7-4) Do we buy any Rawst berries?
    A) Yes, buy 1.
    B) Yes, buy 2.
    C) Yes, buy 3.
    D) Yes, buy 4.
    E) Yes, buy 5.
    F) Yes, buy 6.
    G) Yes, buy 7.
    H) Yes, buy 8.
    I) Yes, buy 9.
    J) Yes, buy 10.
    K) Yes, buy 11.
    L) Yes, buy 12.
    M) Yes, buy 13.
    N) Yes, buy 14.
    O) Yes, buy 15.
    P) Yes, buy 16.
    Q) Yes, buy 17.
    R) Yes, buy 18.
    S) No, don't buy any. - 2 votes.

    8-1) Do we buy any Fire Stones?
    A) Yes, buy 1.
    B) Yes, buy 2.
    C) Yes, buy 3.
    D) No, don't buy any. - 2 votes.

    8-2) Do we buy any Leaf Stones?
    A) Yes, buy 1.
    B) Yes, buy 2.
    C) Yes, buy 3.
    D) No, don't buy any. - 2 votes.

    8-3) Do we buy any Water Stones?
    A) Yes, buy 1.
    B) Yes, buy 2.
    C) Yes, buy 3.
    D) No, don't buy any. - 2 votes.

    9-1) Do we buy any Blowback Orbs?
    A) Yes, buy 1.
    B) Yes, buy 2.
    C) Yes, buy 3.
    D) Yes, buy 4.
    E) Yes, buy 5.
    F) Yes, buy 6.
    G) Yes, buy 7.
    H) Yes, buy 8.
    I) Yes, buy 9.
    J) Yes, buy 10.
    K) Yes, buy 11.
    L) Yes, buy 12.
    M) Yes, buy 13.
    N) Yes, buy 14.
    O) Yes, buy 15.
    P) Yes, buy 16.
    Q) Yes, buy 17.
    R) No, don't buy any. - 2 votes.

    9-2) Do we buy any Cleanse Orbs?
    A) Yes, buy 1.
    B) Yes, buy 2.
    C) Yes, buy 3.
    D) Yes, buy 4.
    E) Yes, buy 5.
    F) No, don't buy any. - 2 votes.

    9-3) Do we buy any See-Trap Orbs?
    A) Yes, buy 1.
    B) Yes, buy 2. - 1 vote.
    C) Yes, buy 3.
    D) Yes, buy 4.
    E) Yes, buy 5.
    F) No, don't buy any. - 1 vote.

    Tied. I'll join B). Could come in handy.

    9-4) Do we buy any Totter Orbs?
    A) Yes, buy 1. -1 vote.
    B) Yes, buy 2.
    C) Yes, buy 3.
    D) Yes, buy 4.
    E) Yes, buy 5.
    F) Yes, buy 6.
    G) Yes, buy 7.
    H) Yes, buy 8.
    I) No, don't buy any. - 1 vote.

    Tied. hmmm... If our Slumber Orb weren't sticky I'd pass on it. But it is, so a Totter Orb is better than nothing for a troublesome encounter, I guess.
    Guess I'll join A).


    10-1) Which exit do we take?
    A) Take the Northern exit.
    B) Take the Eastern exit and then go North to the room with 3 hostile Bug and 2 hostile Water types..
    C) Take the Eastern exit and go back to the Large Forest room to go clear out the remaining enemies and pick up the remaining items.
    D) Take the Eastern exit and go back to the Large Forest room and take the upper Eastern exit. (we'll have to fight the Nymble on the way)
    E) Take the Eastern exit and go back to the Large Forest room and take the middle Eastern exit.
    F) Take the Eastern exit and go back to the Large Forest room and take the lower Eastern exit.
    G) Take the Eastern exit and then take the Southern exit to the room with 5 hostile Ground types and 2 hostile Normal types.
    H) Take the Eastern exit and then take the lower Eastern exit to the room with 5 hostile Ground types and 2 hostile Normal types.
    I) Go back to the room with Roserade in it and take the right-Northern exit.
    J) Go back to the room with Roserade in it and take the upper-Eastern exit. - 2 votes.
    K) Go back to the room with Roserade in it and take the lower-Eastern exit.
    L) Go back to the room with Roserade in it and take the right-southern exit.
    M) Go back to the room with Roserade in it and take the left-southern exit to go deal with the Paldean Wooper.

    10-2) After navigating the current room, but before heading to the next one, we can go heal at the Hot Spring. Should we heal?
    A) Yes, go heal at the Hot Spring. - 2 votes.
    B) No, don't heal at the Hot Spring.


    Spoiler:


    Litleo has a Calm nature. We don't heal up Barboach and switch our lead for this room to Mouflon.
    We turn in both the 'Left Behind' and the 'The Lost Hairpin' quests. We talk to the Smoliv and accept it's quest to go check up on the third Smoliv. We don't use the Cleanse Orb to clean our sticky items.
    We go back to the room with Roserade in it and take the upper-Eastern exit. We go heal at the Hot Spring before going to the next room.

    Merchant:
    We don't buy a TM now. We don't buy any Cheri berries. We buy 4 Oran berries and 3 Pecha berries. We don't buy any Rawst berries. We do not buy any Fire, Leaf or Water stones. We do not buy any Blowback or Cleanse Orbs. We buy 2 See-Trap Orbs and 1 Totter Orb.

    The path we take is as follows:

    Pokemon Dungeon Escape


    Mouflon and Barboach have leveled up twice and Litleo has leveled up four times from turning in the two side quests:
    -The Lost Hairpin: 660 Experience earned.
    -Left Behind: 1.070 Experience earned

    The dialogue with Chikorita:
    Spoiler:


    The dialogue with the Smoliv we escorted:
    Spoiler:


    The dialogue with the other Smoliv at the merchant stand:
    Spoiler:


    Team Roundabout:
    Spoiler:


    Inventory:
    Spoiler:


    Quests:
    Spoiler:

    Reputation:
    Spoiler:

    Dungeon Map:
    Spoiler:


    Pokemon Dungeon Escape - Act 1 - Chapter 20


    We arrive in the upper Eastern room from the Roserade room. The Toedscool is in attacking range and can't be avoided. The cutiefly will seek us out to attack us. The Bounsweet will only go on the offensive if we get within 4 tiles of them.

    The Northern exit leads to a room with 3 hostile Poison types, 3 hostile Flying types and 1 hostile Rock type Pokemon. The Eastern room leads to a room with 3 hostile Dark types and 1 hostile Steel type.

    Pokemon Dungeon Escape


    1-1) Mouflon wants to learn Take Down, but already knows 4 moves. Forget a move to learn Take Down?
    A) Yes, forget Tackle.
    B) Yes, forget Charge.
    C) Yes, forget Thunder Wave.
    D) Yes, forget Thunder Shock.
    E) No, don't learn Take Down.

    1-2) Barboach wants to learn Amnesia, but already knows 4 moves. Forget a move to learn Amnesia?
    A) Yes, forget Water Gun.
    B) Yes, forget Mud-Slap.
    C) Yes, forget Rest.
    D) Yes, forget Water Pulse.
    E) No, don't learn Amnesia.

    1-3) Litleo wants to learn Noble Roar, but already knows 4 moves. Forget a move to learn Noble Roar?
    A) Yes, forget Leer.
    B) Yes, forget Ember.
    C) Yes, forget Work Up.
    D) Yes, forget Headbutt.
    E) No, don't learn Noble Roar.

    2 Mouflon is in the lead. Do we want to swap our lead for this room?
    A) No, keep Mouflon in the lead.
    B) Yes, switch to Barboach.
    C) Yes, switch to Litleo.

    3) How do we fight any enemies in this room?
    A) Offensively; nothing but attacking moves and prioritizes super-effective attacks if possible.
    B) Balanced; Uses both Attacking moves as well as non-attacking moves. Prioritizes super-effective attacks if possible. Uses attacking moves 66% of the time on average.
    C) Defensively. Only attacks once every 3 turns. Uses the other two turns for non-attacking moves.

    4) We can potentially avoid the Bounsweet depending on our path through the room. Do we attack the Bounsweet or try to avoid them?
    A) Attack the Bounsweet.
    B) Attack the level 15 Bounsweet, but try to avoid the level 17 Bounsweet.
    C) Attack the level 17 Bounsweet, but try to avoid the level 15 Bounsweet.
    D) Try to avoid the Bounsweet.

    5-1) We have 2 Blowback Orbs. Do we use a Blowback Orb in this room?
    A) Yes, use a Blowback Orb on the Toedscool.
    B) Yes, use a Blowback Orb on the level 17 Cutiefly.
    C) Yes, use a Blowback Orb on the level 16 Cutiefly.
    D) Yes, use a Blowback Orb on the level 15 Bounsweet.
    E) Yes, use a Blowback Orb on the level 17 Bounsweet.
    F) Yes, use both Blowback Orbs on the Toedscool.
    G) Yes, use both Blowback Orbs on the level 17 Cutiefly.
    H) Yes, use both Blowback Orbs on the level 16 Cutiefly.
    I) Yes, use both Blowback Orbs on the level 15 Bounsweet.
    J) Yes, use both Blowback Orbs on the level 17 Bounsweet.
    K) Yes, use a Blowback Orb on the Toedscool and one on the level 17 Cutiefly.
    L) Yes, use a Blowback Orb on the Toedscool and one on the level 16 Cutiefly.
    M) Yes, use a Blowback Orb on the Toedscool and one on the level 15 Bounsweet.
    N) Yes, use a Blowback Orb on the Toedscool and one on the level 17 Bounsweet.
    O) Yes, use a Blowback Orb on the level 17 Cutiefly and one on the level 16 Cutiefly.
    P) Yes, use a Blowback Orb on the level 17 Cutiefly and one on the level 15 Bounsweet.
    Q) Yes, use a Blowback Orb on the level 17 Cutiefly and one on the level 17 Bounsweet.
    R) Yes, use a Blowback Orb on the level 16 Cutiefly and one on the level 15 Bounsweet.
    S) Yes, use a Blowback Orb on the level 16 Cutiefly and one on the level 17 Bounsweet.
    T) Yes, use a Blowback Orb on the level 15 Bounsweet and one on the level 17 Bounsweet.
    U) No, don't use a Blowback Orb now.

    5-2 A See-Trap Orb reveals all traps in the current room and the lead Pokemon will avoid stepping on them if possible. Do we use a See-Trap Orb in this room?
    A) Yes, use a See-Trap Orb.
    B) No, don't use a See-Trap Orb now.

    5-3 Do we use the Totter Orb in this room?
    A) Yes, use the Totter Orb on the Toedscool.
    B) Yes, use the Totter Orb on the level 17 Cutiefly.
    C) Yes, use the Totter Orb on the level 16 Cutiefly.
    D) Yes, use the Totter Orb on the level 15 Bounsweet.
    E) Yes, use the Totter Orb on the level 17 Bounsweet.
    F) No, don't use the Totter Orb now.

    5-4 The Trapbust Orb destroys all traps in the current room. Do we use the Trapbust Orb in this room?
    A) Yes, use the Trapbust Orb.
    B) No, don't use the Trapbust Orb now.

    6) We can heal after defeating 3 opponents. Should we heal?
    A) Yes, drink a Berry Juice. Heals up to 50 HP and also heals any status conditions.
    B) Yes, Eat an Oran Berry. Heals up to 100 HP.
    C) Yes, Eat a Sitrus Berry. Heals up to 250 HP.
    D) No, don't heal up.

    7) What do we do with the items in this room?
    A) Pick up all items.
    B) Pick up only the items that don't result in fighting the Bounsweet.
    C) Pick up only the shards.
    D) Pick up only the Cleanse Orb and Two-Edge Orb.
    E) Pick up only the Sitrus Berry and Berry Juice.
    F) Pick up the Sitrus Berry and Berry Juice and the Orbs.
    G) Pick up the Sitrus Berry and Berry Juice and the shards.
    H) Pick up only the Gold Ribbon.
    I) Pick up the Gold Ribbon and the Sitrus Berry and Berry Juice.
    J) Pick up the Gold Ribbon and the Orbs.
    K) Pick up the Gold Ribbon and the shards.
    L) Pick up the Gold Ribbon, the shards and the Orbs.
    M) Pick up the Gold Ribbon, the shards and the Sitrus Berry and Berry Juice.
    N) Pick up the Sitrus Berry and Berry Juice, the Orbs and the shards.
    O) Pick up the Sitrus Berry and Berry Juice, the Orbs and the Gold Ribbon.
    P) Pick up the Sitrus Berry and Berry Juice, the shards and the Gold Ribbon.

    Two-Edge Orb: Halves HP of all foes in the room as well as the Party Leader.

    8) Which exit do we take?
    A) Take the Northern exit. (we'll have to fight the nearby level 15 Bounsweet)
    B) Take the Eastern exit.
    C) Take the Western exit and go back to the Large Forest room to go clear out the remaining enemies and pick up the remaining items.
    D) Take the Western exit and go back to the Large Forest room and take the upper Eastern exit. (we'll have to fight the Nymble on the way)
    E) Take the Western exit and go back to the Large Forest room and take the middle Eastern exit.
    F) Take the Western exit and go back to the Large Forest room and take the lower Eastern exit.
    G) Go back to the room with Roserade in it and take the upper Western exit to the room with 5 hostile Ground types and 2 hostile Normal types.
    H) Go back to the room with Roserade in it and take the left Northern exit and then go to the room with 5 hostile Ground types and 2 hostile Normal types.
    I) Go back to the room with Roserade in it and take the right-Northern exit.
    J) Go back to the room with Roserade in it and take the lower-Eastern exit.
    K) Go back to the room with Roserade in it and take the right-southern exit.
    L) Go back to the room with Roserade in it and take the left-southern exit to go deal with the Paldean Wooper.


    Attachments

    • Pokemon Dungeon Escape
      chikoritacomplete1.png
      153.3 KB · Views: 34
    • Pokemon Dungeon Escape
      DungeonEscapeAct1-19.png
      139.2 KB · Views: 45
    • Pokemon Dungeon Escape
      chikoritacomplete2.png
      164 KB · Views: 34
    • Pokemon Dungeon Escape
      DungeonEscapeMove19.png
      17.3 KB · Views: 48
    • Pokemon Dungeon Escape
      inventory19.png
      127.1 KB · Views: 34
    • Pokemon Dungeon Escape
      Map15.png
      181.1 KB · Views: 34
    • Pokemon Dungeon Escape
      partypokemon18.png
      188.8 KB · Views: 34
    • Pokemon Dungeon Escape
      smolivconsdiag1.png
      166.1 KB · Views: 34
    • Pokemon Dungeon Escape
      smolivconsdiag2.png
      163.9 KB · Views: 34
    • Pokemon Dungeon Escape
      smolivescortcomplete1.png
      162.9 KB · Views: 34
    • Pokemon Dungeon Escape
      smolivescortcomplete2.png
      175.3 KB · Views: 34
    Last edited:
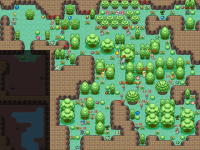
    Back
    Top