Jeff_PKLight
RMXP User
- 535
- Posts
- 19
- Years
- USA
- Seen Jun 29, 2011
*Note: This tutorial was based on marcus's tutorial. After I saw his mapping tutorial based on RMXP's default tilesets, I decided to do one on Pokemon.*
FOR: RPGMaker Series
Ever wanted to be a good mapper? Or perhaps get better at mapping? Well, this tutorial should help you out. :)
Let's start with the basics.
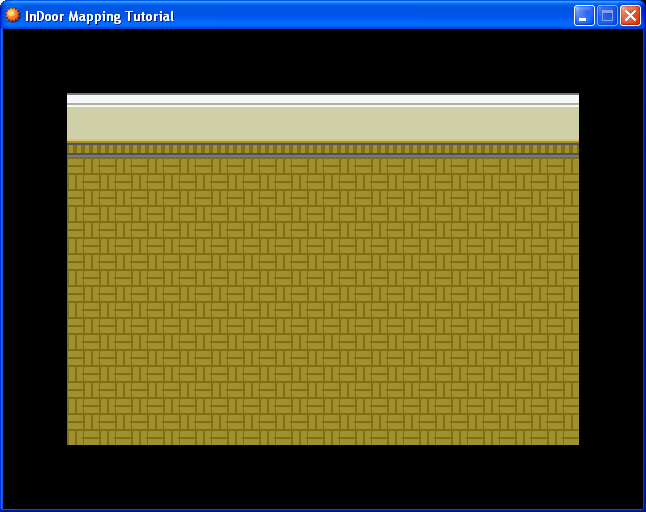
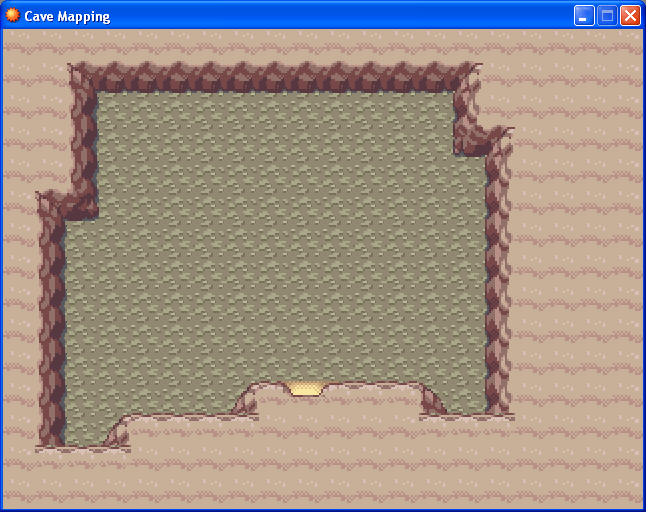
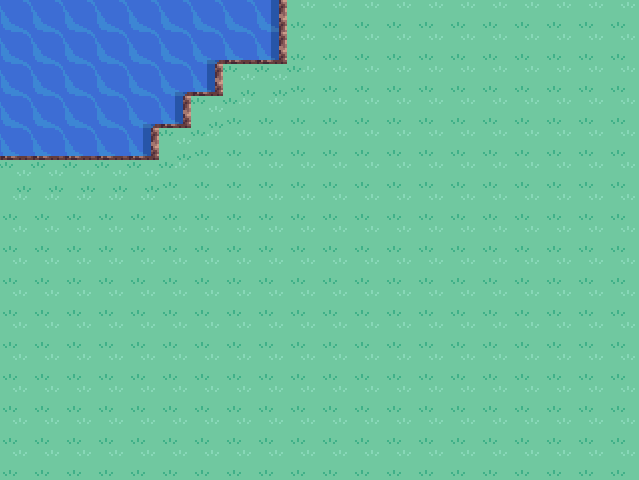
STEP 1 - Plain
In RMXP, the default mapping size is 20 x 15. Let's start with that size. Remember that a good map always include details. So, the bigger the size, the more details you should add.
Let's start with a grassy plain.

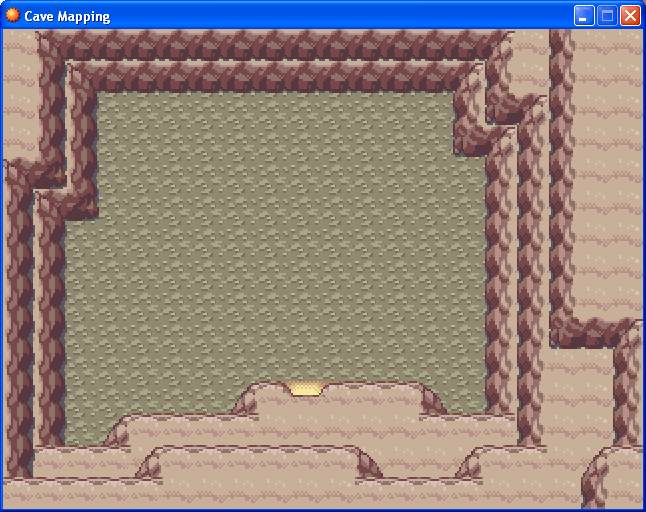
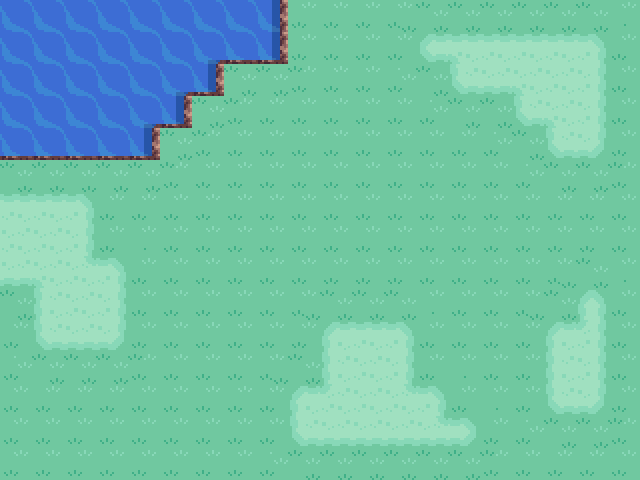
STEP 2 - Water
You can see that the map is very bland, with only grass. Remember that water can help brighten things up, as it covers the most area on Earth. So, bits of water will do. Try not do symmetry in your mapping. Nature isn't always perfect, just take a look outside. Make the water as natural as you can. Believe me, symmetry isn't always good. ;)
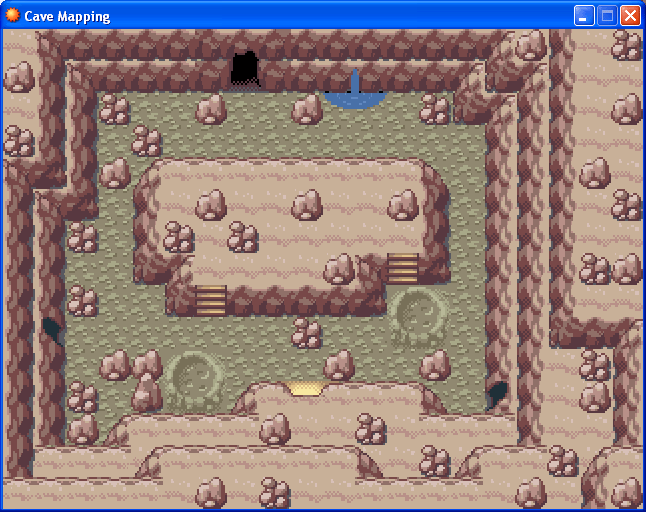
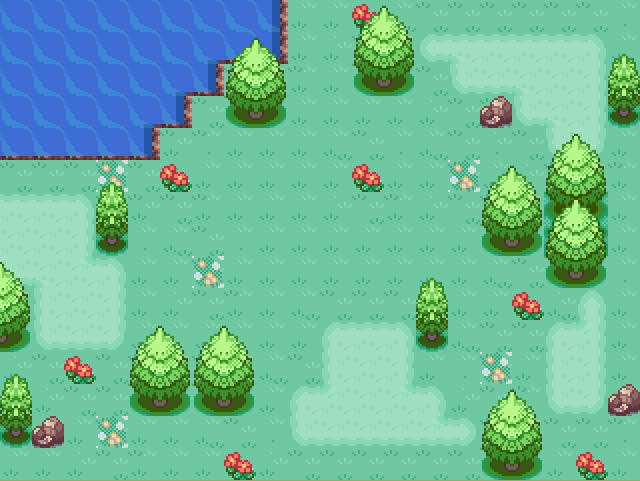
STEP 3 - Shades of Grass
Take a look at the first map we did above. One kind of grass just seems unrealistic. Add a few different kinds of grass. Whether it's light grass patches to dirt patches, they really attract your attention and can tell what kind of terrain your map is on. Again, make things natural. If you are making paths, you don't have to make them that natural, since mankind made them. Just pay attention to what things are natural and which aren't.
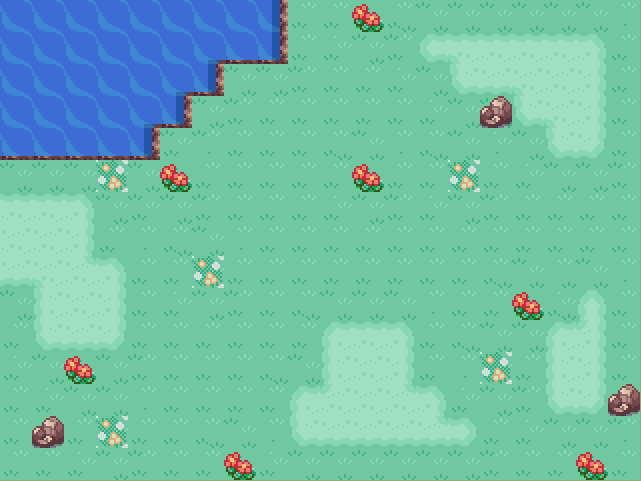
STEP 4 - Grassy Detail
Adding detail to grass can spice your map up. This includes flowers. Try not use only one kind of detail. The various kinds will obviously make your map attractive.
Let's add a few rocks and flowers.
STEP 5 - Trees provide oxygen!
Think about this. If there were no trees, there wouldn't be oxygen. So, what's the use if there aren't trees?
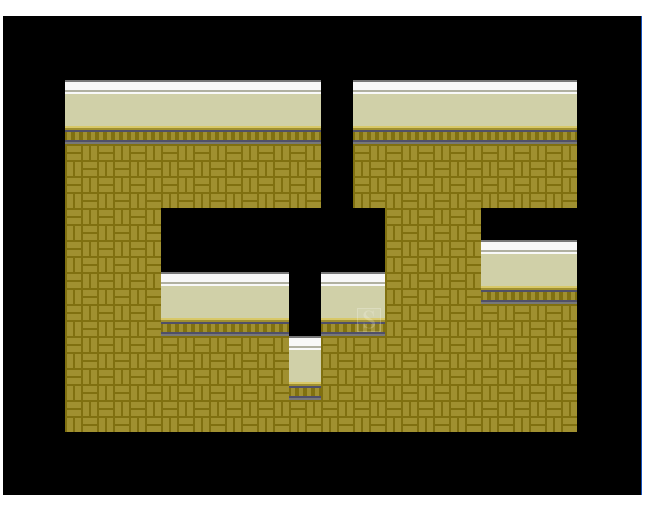
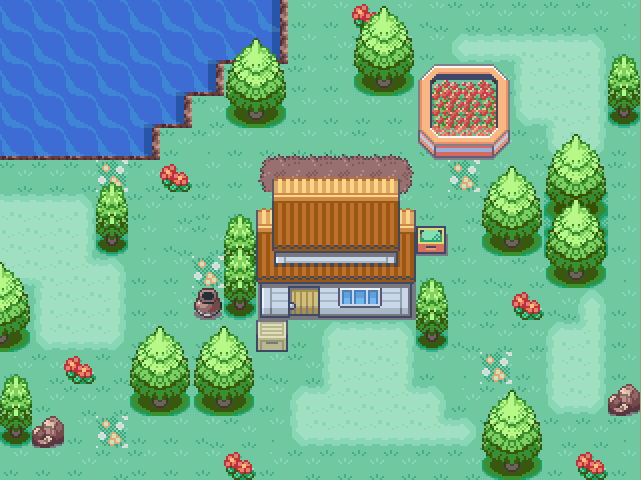
STEP 6 - Mankind
Alright, now it's time to pay attention to mankind's details. Throw in a few trees mankind probably planted, houses, and even pots and boxes.
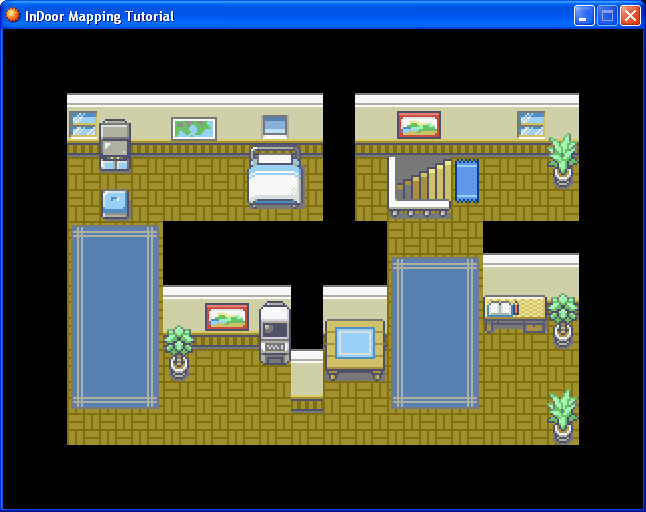
STEP 7 - Events, more details, events, even more details!
Lastly, a map always should have some events going on. People! There are billions of people living on Earth, so why shouldn't there be people on a map?
Also, add more detail to the map. Even add some underwater patches in the water! More details, the merrier.
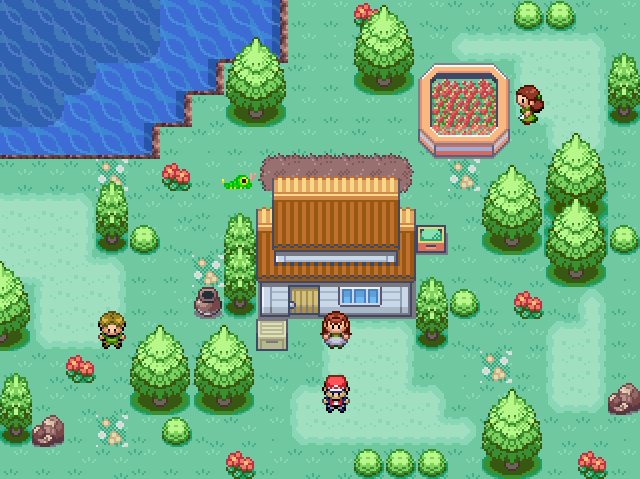
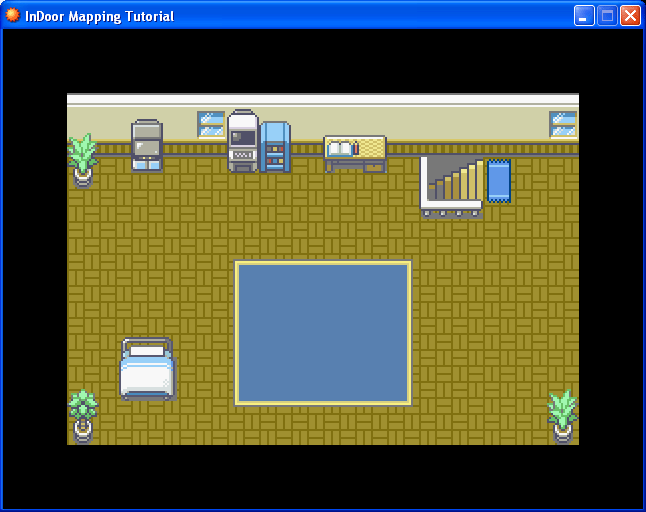
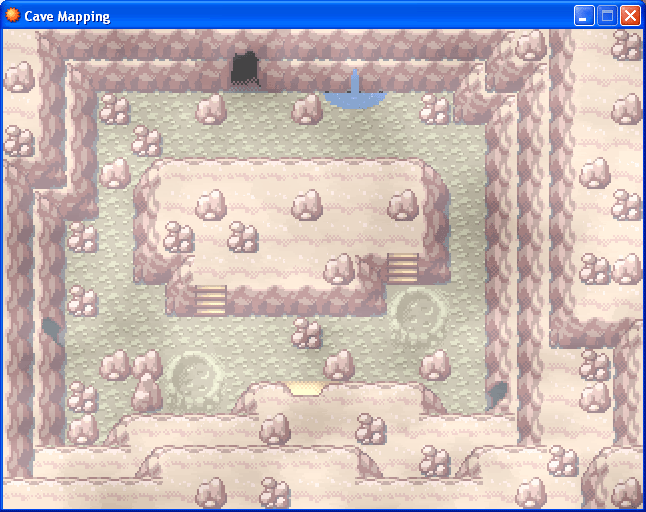
FINALY PRODUCT
This is our final product.
Think about it. Just use common sense and your mapping skills will be good in no time! :P
~Jeff
FOR: RPGMaker Series
Ever wanted to be a good mapper? Or perhaps get better at mapping? Well, this tutorial should help you out. :)
Let's start with the basics.
STEP 1 - Plain
In RMXP, the default mapping size is 20 x 15. Let's start with that size. Remember that a good map always include details. So, the bigger the size, the more details you should add.
Let's start with a grassy plain.
STEP 2 - Water
You can see that the map is very bland, with only grass. Remember that water can help brighten things up, as it covers the most area on Earth. So, bits of water will do. Try not do symmetry in your mapping. Nature isn't always perfect, just take a look outside. Make the water as natural as you can. Believe me, symmetry isn't always good. ;)
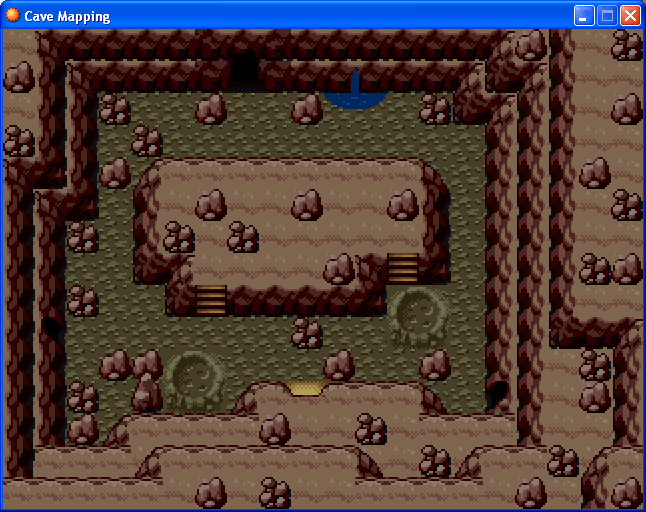
STEP 3 - Shades of Grass
Take a look at the first map we did above. One kind of grass just seems unrealistic. Add a few different kinds of grass. Whether it's light grass patches to dirt patches, they really attract your attention and can tell what kind of terrain your map is on. Again, make things natural. If you are making paths, you don't have to make them that natural, since mankind made them. Just pay attention to what things are natural and which aren't.
STEP 4 - Grassy Detail
Adding detail to grass can spice your map up. This includes flowers. Try not use only one kind of detail. The various kinds will obviously make your map attractive.
Let's add a few rocks and flowers.
STEP 5 - Trees provide oxygen!
Think about this. If there were no trees, there wouldn't be oxygen. So, what's the use if there aren't trees?
STEP 6 - Mankind
Alright, now it's time to pay attention to mankind's details. Throw in a few trees mankind probably planted, houses, and even pots and boxes.
STEP 7 - Events, more details, events, even more details!
Lastly, a map always should have some events going on. People! There are billions of people living on Earth, so why shouldn't there be people on a map?
Also, add more detail to the map. Even add some underwater patches in the water! More details, the merrier.
FINALY PRODUCT
This is our final product.
Think about it. Just use common sense and your mapping skills will be good in no time! :P
~Jeff
Last edited: