
Shinypoliwrath
RMXP Noob
- 38
- Posts
- 12
- Years
- Seen Oct 27, 2013
Hello there.
Since I am a complete noob when it comes to this sort of thing, I wanted to make a guide that's easy to understand, and should therefore be easy to follow for other newcomers, etc.
Okay, step one:
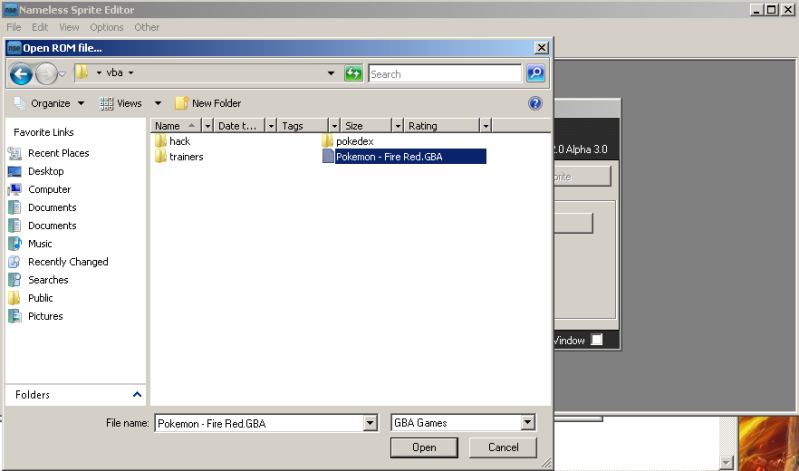
Open up Nameless Sprite Editor and load your ROM
Step two:
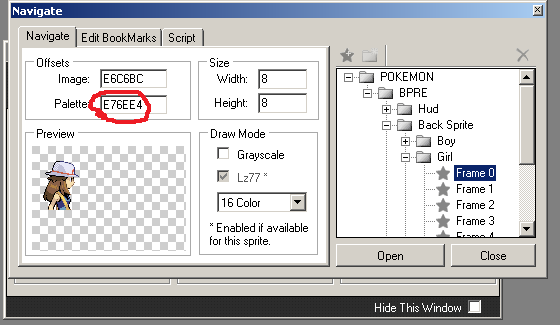
Find the backsprite you want to edit. (Using notepad or something similar, write down the Pallette offset, we'll need that later)
Step three:
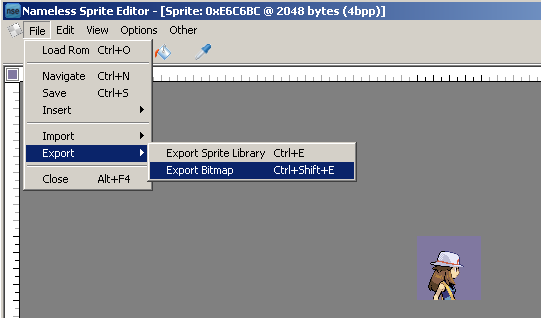
export the backsprite as a bitmap (since bitmap is the only option)
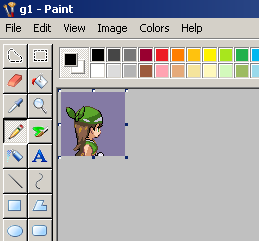
step four:
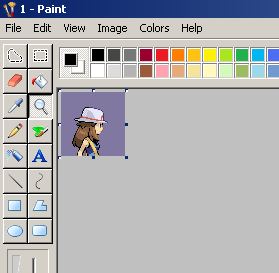
Open it up in paint (although it was saved as a BMP, it shouldn't have lost any image quality)
And edit it to your heart's content.
 This is a trainer I'm using for a hack of my own, so don't go stealing it. :)
(Now, remember to save your new image as a PNG to make sure no quality is lost)
Step five:
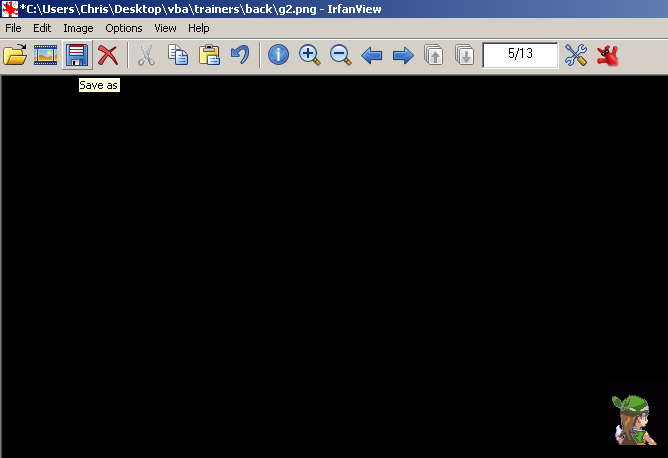
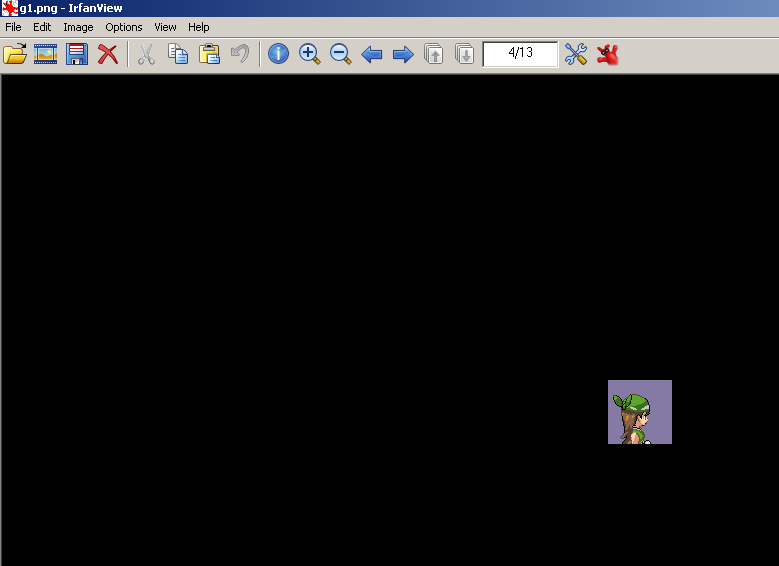 open it up in Irfanview.
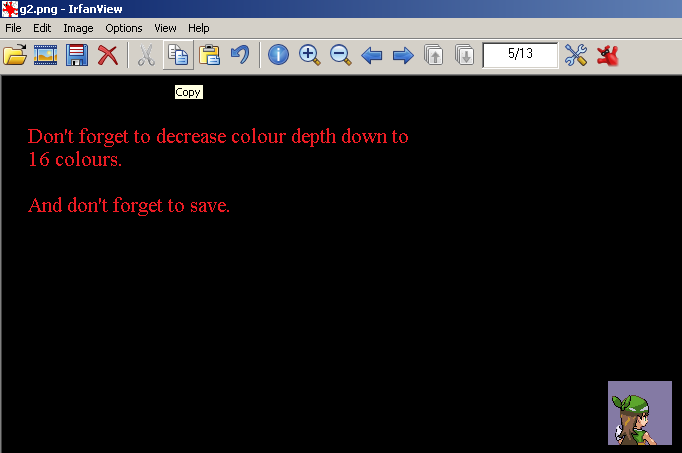
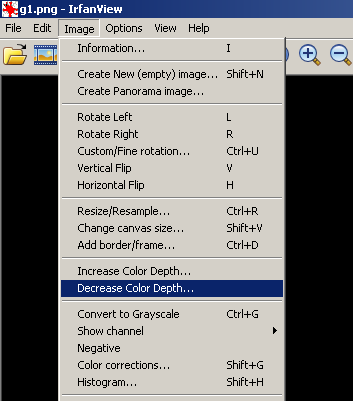 Image>Decrease colour depth.
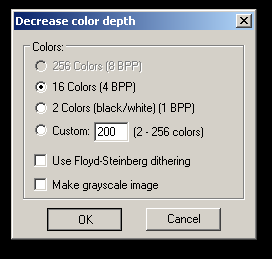 16 colours.
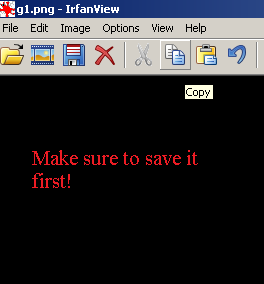 Now copy the image and don't forget to save it.
step six:
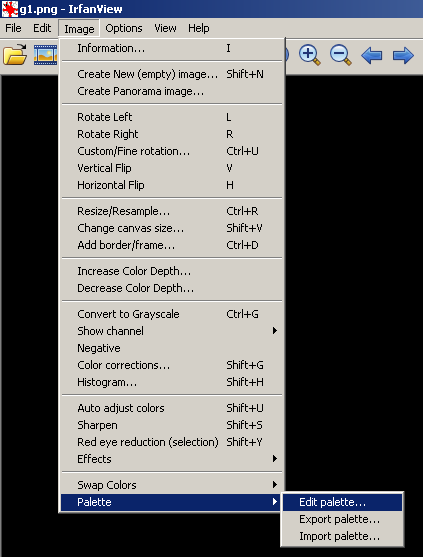 Image> Pallette> Edit Pallette.
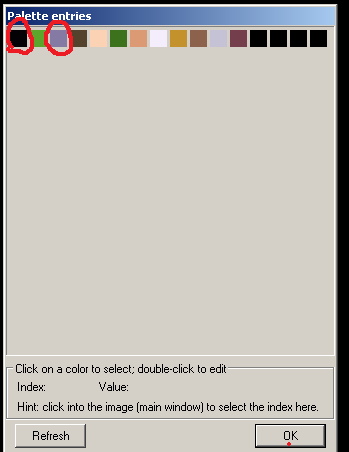 Now what you do here is change the first colour of the pallette with the background colour. (the background colour isn't always the 3rd colour in the pallette) Click OK, then save.
 It'll look like this but don't fret, we'll sort this out soon enough. :)
step seven:
step eight:
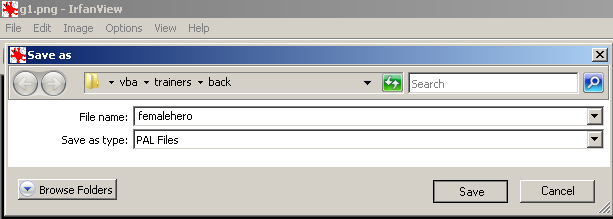
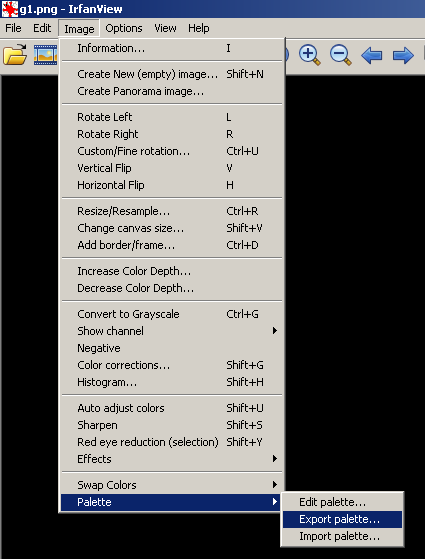 Image>Pallette>Export Pallette and save it somewhere you'll be able to find it.
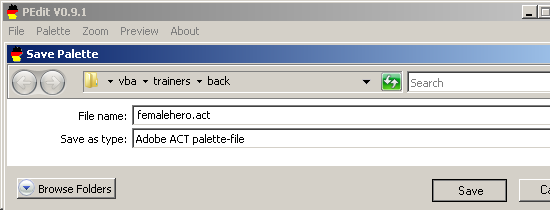
Now open up PEdit and open the pallette you just saved.
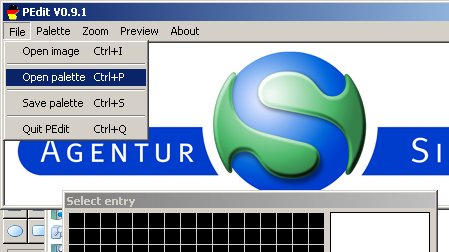
Then resave it as an ACT file.
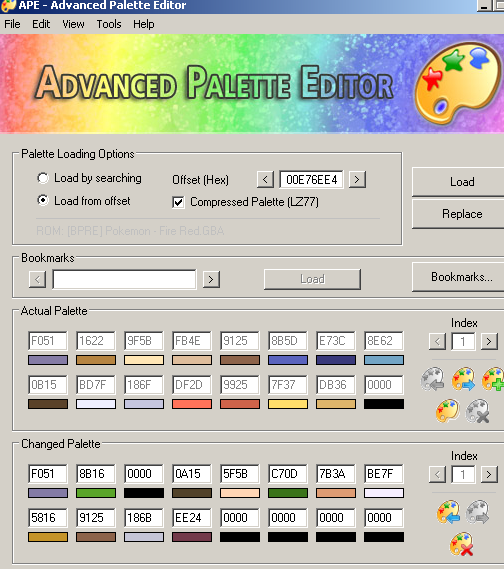
step nine:
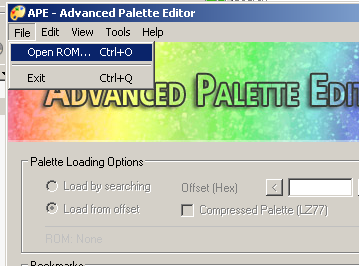 Open up APE and load your ROM.
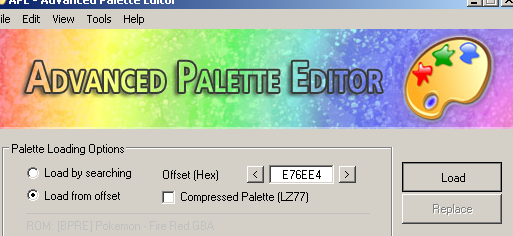 Remember I told you to write down the pallette offset? type it inot the offset box and hit load.
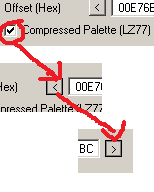 You'll see a load of red boxes come up, tick the compressed box, then the back button, then the forward button again... this'll make sure you're on the right pallette, and it's compressed.
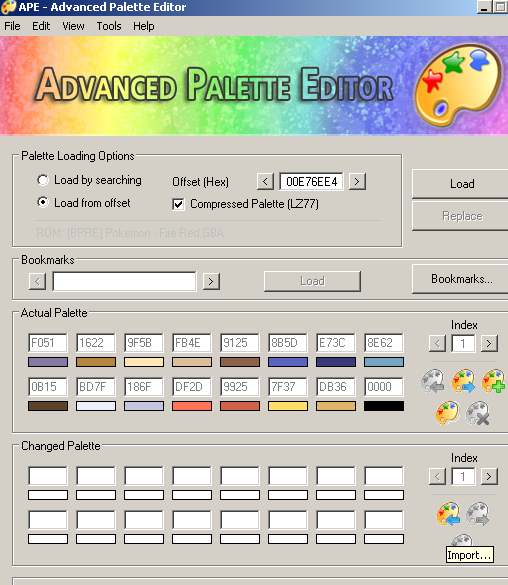 This is what it'll look like, now on the second pallete thingy, click Import and select the ACT file you created not too long ago.
 this is what it'll look like, very colouful.
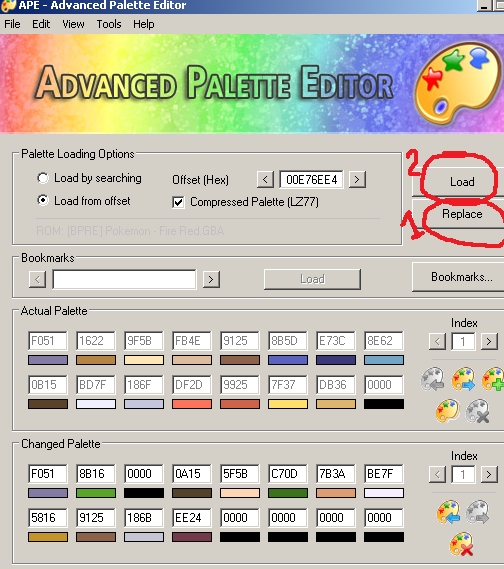 Now, click Replace, then Load. Then it's done and you can close APE.
step ten:
 Open up Nameless again, load your ROM and look back to teh backsprite you want to edit. if the last step worked, you should see that it's a bit discoloured. Load it up.
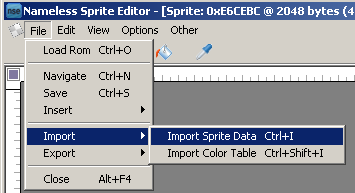
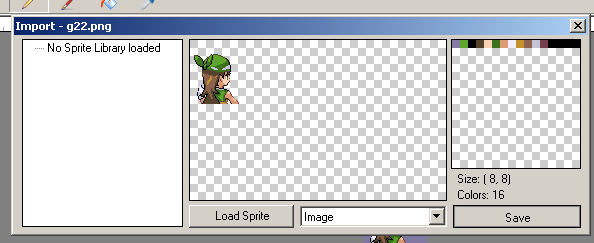
step eleven:
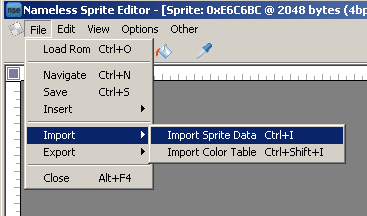 File> Import> Import sprite data and find your new backsprite.
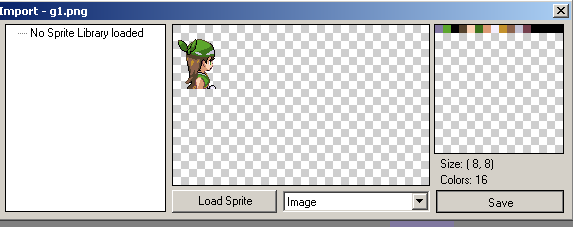 select Image in the drop box and hit Save.
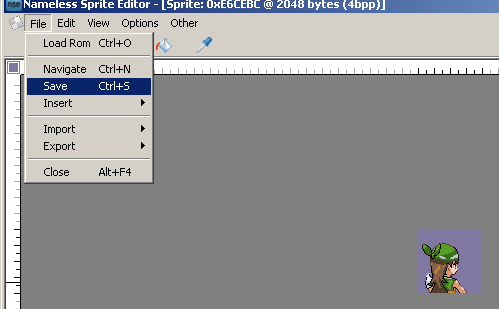
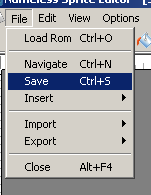 Just to make sure, I usually File>Save it here too.
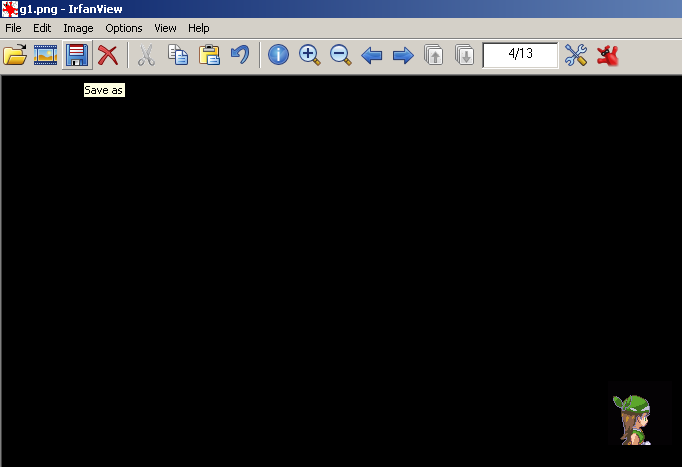
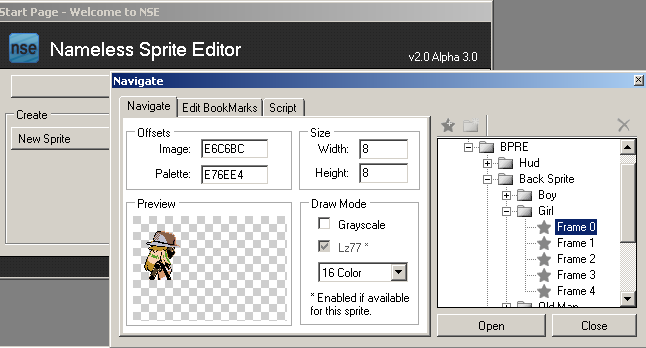
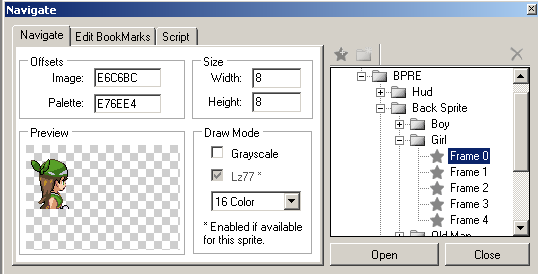
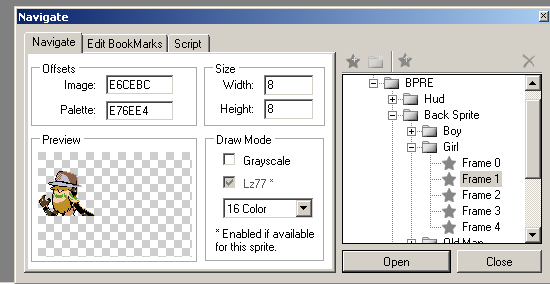
To see if it worked, go to File> Navigate and find your backsprite again, like this.
That's how to do one, but if you notice, there are 5 different backsprites.
Ok...
Step twelve:
 Assuming you've already made the other four backsprites, load the second into Irfanview and follow the instructions on the image above.
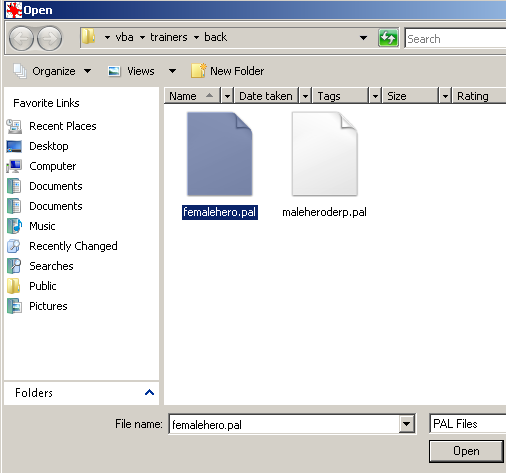 Then Edit> Pallette> Import Pallette and select the PAL file for the backsprite you want. Then COPY!!!
 Once again it'll look a bit wierd, Save it.
Step thirteen:
 open it up in paint and paste the old one over the top of the new messed up looking one. Then SAVE!
step fourteen:
 open Nameless again with your ROM and find the second backsprite of the trainer you want to edit.
I'm sure you know what to do here.
 save it again just to make sure.
For the 3rd, 4th and 5th backsprite frames, repeat steps 12-14 with the respective sprites.
If it all works out properly, you should end up with your new backsprite in-game
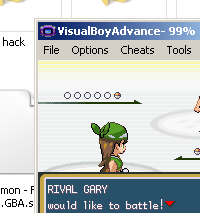 like this.
I hope this helped someone, I tried to make it as simple as possible. :)
Since I am a complete noob when it comes to this sort of thing, I wanted to make a guide that's easy to understand, and should therefore be easy to follow for other newcomers, etc.
Okay, step one:
Spoiler:
Open up Nameless Sprite Editor and load your ROM
Step two:
Spoiler:
Find the backsprite you want to edit. (Using notepad or something similar, write down the Pallette offset, we'll need that later)
Step three:
Spoiler:
export the backsprite as a bitmap (since bitmap is the only option)
step four:
Spoiler:
Open it up in paint (although it was saved as a BMP, it shouldn't have lost any image quality)
And edit it to your heart's content.
(Now, remember to save your new image as a PNG to make sure no quality is lost)
Step five:
Spoiler:
step six:
Spoiler:
step seven:
Spoiler:
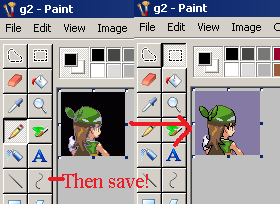
Now open it back up in Paint (remember I told you to copy the image before changing the pallette?)
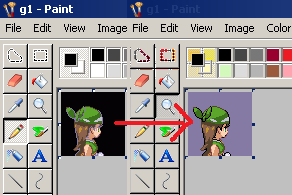 paste the old one onto the new one and Save it again.
Open it back up in Irfanview and go to Edit Pallette to see if it's done correctly.
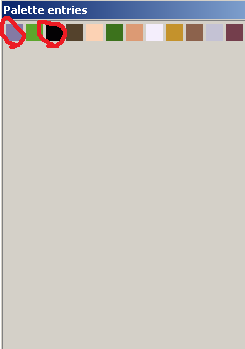 this is what it should look like if you've done it right.
Open it back up in Irfanview and go to Edit Pallette to see if it's done correctly.
step eight:
Spoiler:
Now open up PEdit and open the pallette you just saved.
Then resave it as an ACT file.
step nine:
Spoiler:
step ten:
Spoiler:
step eleven:
Spoiler:
To see if it worked, go to File> Navigate and find your backsprite again, like this.
That's how to do one, but if you notice, there are 5 different backsprites.
Ok...
Step twelve:
Spoiler:
Step thirteen:
Spoiler:
step fourteen:
Spoiler:
I'm sure you know what to do here.
For the 3rd, 4th and 5th backsprite frames, repeat steps 12-14 with the respective sprites.
If it all works out properly, you should end up with your new backsprite in-game
I hope this helped someone, I tried to make it as simple as possible. :)