• Our software update is now concluded. You will need to reset your password to log in. In order to do this, you will have to click "Log in" in the top right corner and then "Forgot your password?".
  • Welcome to PokéCommunity! Register now and join one of the best fan communities on the 'net to talk Pokémon and more! We are not affiliated with The Pokémon Company or Nintendo.

Completed Divine Offering - GT Pokémon Challenge

5,660
Posts
11
Years
  • Spoiler:

    Updated you all.
     
    426
    Posts
    5
    Years
  • Notable Events:
    So I'm about the enter the last segment with still 1 rule left to remove
    For that I need to go to Route 18 and pick up a Larvesta Egg.
    I also catch a Litwick in the Celestial Tower to make it easier to hatch.
    I catch a Stunfisk on Route 8 to at least have something new before continuing the story.
    I catch a Golett in Dragonspiral Tower as well.
    Sigilyph is still my highest levelled Pokemon even though I tried my best to not use it since gym 3, it just got stuck on me anyways.
    I nearly loose to the grunts at Dragonspiral Tower, so I decide to get a full team before continuing.
    I also realize that my Litwick actually has Flash Fire instead of Flame Body...
    So back to Celestial Tower, catching another Litwick and spend 15 minutes hatching my Larvesta.
    I realize I've made another mistake in my calculations: I originally wanted to keep Larvesta at level 1, but I actually need it to be 30+ for the offer requirement...
    I really want to sacrifice a level 1 Pokemon though, and since I already have all the tools I need, I breed and hatch a level 1 Dwebble (with Sturdy so that I wont need to look for a Focus Sash).
    Next I head to Mistralton Cave to catch an Axew, because it has False Swipe which I really need for the gym if I aim to sacrifice my level 1 Dwebble there.
    Surprise! I find a Cobalion in Mistralton Cave as well! I quickly catch it too, legendaries are always great to have. Getting rid of Stunfisk though, that one didn't measure up to my expectations...
    Trying to continue the story by entering the Relic Castle, but my team Really needs some grinding, I'll head back to route 8 and/or 18 for the trainers I previously skipped and get my team into shape.

    Gym Battle:
    None

    Sacrifices:
    None
     
    24,748
    Posts
    3
    Years
    • Any pronoun
    • Seen today
    Update #5: Clemont
    Zero rules, zero problems. Also a note on the last section: Received the Fly HM before the Grass gym. Could not learn it on anyone. Caught a level ~12 Ducklett later to use Fly out of battle.

    Hates Route 13 in X/Y. Deals with wind, getting chased by Pokemon, and Arena Trap. Cannot really control the wind. Waited 5-10 minutes for the wind to stop blowing to get a Sun Stone for SpecialSun (Helioptile). Evolved it at level 40 to snag Volt Switch.

    Blew through Team Flare. (Why do the end trainers only have one Pokemon each?) Tried to get NoLifeGround (Golett) some experience to evolve before Clemont. Struggled versus most of the Dark Pokemon, even with a 10 level advantage. Wound up being enough, however. Evolved into Golurk during the run up to Clemont. Helped quite a bit.

    Spoiler: Gym #5 Log

    Turn 1: Heliolisk: Volt Switch (95%, switch to Golurk) / Emolga: Aerial Ace (109/136)
    Turn 2: Emolga: Hyper Potion (heal to full) / Golurk: Shadow Punch (95%)
    Turn 3: Emolga: Hyper Potion (heal to full) / Golurk: Shadow Punch (95%)
    Turn 4: Emolga: Aerial Ace (85/136) / Golurk: Shadow Punch (95%)
    Turn 5: Clemont's Heliolisk: Grass Knot (15/136) / Golurk: Bulldoze (100%)
    (Level up.)
    Turn 6: Golurk: Switch to Lucario / Magneton: Mirror Shot (116/134, -1 Accuracy)
    (Mega Evolved Lucario)
    Turn 7: Lucario: Aura Sphere (99%) (Magneton's Sturdy) / Magneton: Electric Terrain
    Turn 8: Lucario: Aura Sphere (the rest)


    Took longer than usual. Won without much issue still.

    Gladly accepts the Thunderbolt TM. Discovered NoLifeGround learns Fly now. Okay, sure. Beats keeping Ducklett around.

    Sacrifices no one.

    Update #6: Valerie
    Corrected Vivillon's name to "FalseCold" for its Polar Pattern. Zipped off straight to Lavarre City. Battled whatever trainer wanted to fight. Did not seek them out.

    Oh, right. Tricked a Pecha Berry onto Calem's Meowstic with Shh (Mr. Mime). Stole it with PointFly (Beedrill). Wanted that in the wings, just in case.

    Spoiler: Gym #6 Log

    Turn 1: Golurk: Earthquake (100%) / Mawile: Fainted
    Turn 2: Golurk: Heavy Slam (100%) / Mr. Mime: Fainted
    (Level up.)
    Turn 3: Golurk: Heavy Slam (100%) / Sylveon: Fainted


    Flexed the 10+ level advantage over Sylveon and co.

    Sacrifices no one again.
     

    X_K.V.Jin_X

    XJinX
    129
    Posts
    3
    Years
  • Ok here we go, I went from Pallet to Viridian after choosing my plant friend.(already delivered Oak's package) Now I headed towards Viridian Forest, I caught Pikachu, Caterpie, Weedle. Then defeated Bug Catchers and exited the forest. Later I recognised some faults and came back from Pewter to catch a Pidgey. Fast forward, I trained Caterpie till level 17(yeah now a Butterfree), the guy forgot 2 moves(string shot and stun spore), making it eligible for stuff. Same with Pidgeotto, I raised it till level level 19 then evolved, allowing it to have the moves Whirlwind, Tackle, Gust and Sand Attack( again eligible for the other things). More fast forward, I avoid that rookie weakling in Pewter gym and went straight to Brock. Leading with Bulbasaur(level 10), I use Leech Seed then tackle then switch to Butterfree, Confusion almost OHKOs it, then I use Poisonpowder for sake of it and then confusion again, boom. Hahah whatever now came the so-called tanky Onix. Weak but took time. I tried sleep powder but Brock spammed Full Heal, so before switching, I use a confusion. Now time for gust + sand attack spam, 4 turns done- switch back to Butterfree. A tackle I used before switching back and finishing with Gust, Sacrificed my Butterfree and Pidgeotto. Was fun, ok anyway time for Misty, gotta leave Pewter. Lator!
    20221019_233405.jpg


    Sacrifices: 2
     
    Last edited:

    TwilightBlade

    All dreams are but another reality.
    7,243
    Posts
    16
    Years
  • Update:

    Current Clauses:
    Spoiler:


    Omega Ruby - Gym Badge #3 - Mauville City
    Current Team:
    259.png
    Mudslide the Marshtomp - Level 23
    262.png
    Mightyena - Level 18 (Route 101)
    263.png
    Zigzagoon - Level 18 (Route 103)
    280.png
    Ralts - Level 17 (Route 102)
    277.png
    Swellow - Level 23 (Route 104)
    043.png
    Basil the Oddish - Level 19 (Route 110)

    Gym Battle (16 Turns)
    Spoiler:


    Worthy sacrifice: Mightyena - defeated two of Watson's Pokemon by itself
    Option limits - You may only catch one Pokémon per area (you can choose it yourself; gifts don't count towards this rule). Offer Requirement: A lv. 10+ Pokémon from the Field Egg group.
     

    Miau

    If I fits...
    812
    Posts
    11
    Years
    • Seen Oct 31, 2022
    Pokemon Shield - Segment 3
    Life Drain 3 - Your Pokémon may only gain 30 levels while under your care, before you have to box them. Offer Requirement: A lv. 30+ Pokémon who has gained worthy status by defeating a Pokémon with a HP-draining damaging move.
    Thinking Matter 3 - All of your Pokémon must know a Psychic or Ghost-type move. Offer Requirement: A lv. 30+ Pokémon who may have the ability Rock Head, Reckless or Sheer Power.
    Ethereal Spirits 3 - In order to complete a Segment, you must first make it so that an opponent trainer will hit any of your Pokémon with a move they're immune to. Offer Requirement: A lv. 30+ Pokémon who may have the Levitate ability.


    Started by making sure only to keep current team members who know a Psychic or Ghost move; Beans the Diglett (knows Astonish) and Eclipse the Noctowl (knows Extrasensory) got to stay. Then returned to the wild area, and caught Wisp the Gastly, who soon evolved into Haunter, and a wanderer Onix, who knows Curse. The final member of our team took a while to catch, as Ralts in the wild area can only be caught in a specific place during a specific weather, but eventually we caught not one, but two! The first Ralts I ran into was female, and then fortunately the second was male. Welcome to the team, Romeo and Juliet! After training, Romeo evolved into Gallade, using a Dawn Stone also found in the wild area.

    Also made sure to activate the Ethereal Spirits rule; ran into a lady who had a Yamper, switched into my Diglett and caught an Electric-move (forgot which). Later in the rival battle against Marnie, managed to do it again by accident, catching a Fighting-type move onto my Haunter.

    The gym battle went as planned. Haunter went first, managed to hypnotize Ninetales on its 3rd turn, then got a OHKO with Hex, becoming worthy. Next Gallade went out against Arcanine. Arcanine was faster, but Hypnosis connected on the very first turn, and it took Gallade two Dream Eaters to finally take down his opponent, fully restoring his health and becoming worthy. Finally, Onix came out, dynamaxed, and obliterated Kabu's GMax Centiscorch with a Max Rockfall, thus becoming worthy.

    Sacrifices for this segment:
    Haunter - has the ability Levitate - removes Ethereal Spirits
    Gallade - become worthy by defeating his opponent with a HP-draining move - removes Life Drain
    Onix - has the ability Rock Head - removes Thinking Matter


    Spoiler:
     
    24,748
    Posts
    3
    Years
    • Any pronoun
    • Seen today
    Update 7: Olympia
    Punched through Frost Cavern. Still questions why high-ranking Team Flare members own only one Pokemon each.

    Grabbed the Experience Point O-Power in Anistar. Comes at a good time. Returns to something more than (just) punching good. Caught RainGoo the Goomy and DarkClaw the Sneasel for the gym. Leveled them up a bit. Taught DarkClaw Aerial Ace, rather than grab a Heart Scale for Feint Attack.

    Fought a surprise Rival battle in front of the gym. Pushes these battles too much. Appreciated the extra experience.

    Gym time. Swapped to Switch mode to make things easier. (Preferred it on Set to save time during trainers.)
    Spoiler: Gym #7 log

    Turn 1: Sigilyph: Light Screen / Sliggoo: Thunderbolt (20%)
    Turn 2: Sigilyph: Psychic (82/125) / Sliggoo: Body Slam (25%)
    Turn 3: Sigilyph: Psychic (33/125) / Sliggoo: Body Slam (25%, paralysis)
    Turn 4: Sliggoo: Moomoo Milk (heal to full) / Sigilyph: Psychic (83/125)
    Turn 5: Sliggoo: Body Slam (20%) / Sigilyph: Psychic (38/125)
    (Enemy Light Screen down.)
    Turn 6: Sigilyph: Hyper Potion (heal to full) / Sliggoo: Thunderbolt (50%)
    Turn 7: Sliggoo: Moomoo Milk (heal to full) / Sigilyph: Psychic (82/125)
    Turn 8: Sliggoo: Thunderbolt (45%) / Sigilyph: Paralyzed
    Turn 9: Sigilyph: Hyper Potion (heal to full) / Sliggoo: Thunderbolt (50%)
    Turn 10: Sliggoo: Thunderbolt (critical, the rest)
    (Switch in Golurk.)
    Turn 11: Golurk: Shadow Punch: 100% / Slowking: Fainted
    (Level up. Switch in Sneasel.)
    Turn 12: Meowstic: Fake Out (104/116) / Sneasel: Flinched
    Turn 13: Sneasel: Beat Up (5 hits with 1 critical, 100%)


    Took a while on Sigilyph, but good enough.

    Sacrifices two Pokemon:
    • RainGoo the level 44 Sliggoo. Defeated Olympia's Sigilyph. Has the ability Sap Sipper. Clears out Eleanor's Dustbowl 2 rule.
    • DarkClaw the level 48 Sneasel. Knocked out Olympia's Meowstic. Knows Aerial Ace, a move that cannot miss. Removes Eleanor's The Lens Was Useful... 2 rule.
     
    33,695
    Posts
    18
    Years
  • Update!!!

    Spoiler:
     

    Mewtwolover

    Mewtwo worshiper
    1,187
    Posts
    16
    Years
  • I took a chance and I'm praying there's a prize for not helping others or I'm gonna look like a selfish so and so!
    Notice that I didn't lifted anyone else's rules as well and I finished my challenge first so if there's a prize for not helping others, I'll get it or we both get it. I hope the latter.
     
    Last edited:

    Chr. Draco

    Spatial Rift
    1,070
    Posts
    15
    Years
    • Seen Apr 6, 2024
    Completed Segment 3:

    Trained some of my pokemon due to the multi-hit and dancer rules:

    Pokémon used and Sacrifice:

    Spoiler:


    Order of events during the last gym battle

    Spoiler:


    Sacrifice Summary:
    Spoiler:


    Spoiler:
     
    Last edited:
    33,695
    Posts
    18
    Years
  • Notice that I didn't lifted anyone else's rules as well and I finished my challenge first so if there's a prize for not helping others, I'll get it or we both get it. I hope the latter.

    I'm not even sure such a thing exists!!! 😅

    But if it does I would assume it was available to everyone who finishes.

    Not my event of course, but I'm assuming there won't be any speed related achievements due to two things.

    1. You are at the mercy of waiting for updates before you can play on, and some wait a lot longer than others due to irl getting in the way at different times.

    2. Some play on emulators, others play on real hardware with no save states or turbo options. My understanding is it's more about the challenge as a whole rather than speed, otherwise it's not a level playing field and we'd all be playing RBY on an emulator at turbo speed!
     

    Duck

    🦆 quack quack
    5,750
    Posts
    3
    Years
    • he, they
    • Seen Feb 23, 2023
    Log
    - Galarian Slowpoke valiantly sacrificed himself against the Bede battle.
    - Gastly evolved
    - Revived Arctozolt, Dracovish and Dracozolt
    - Venipede evolved twice
    - Toxel evolved (Amped Form)

    - vs. Gym Leader Opal

    I use Pidove as sacrifice to satisfy my rule and then switch Galarian Slowpoke in.

    Galarian Slowpoke dynamaxed and killed Weezing who was 7 levels stronger than it, becoming Worthy

    Toxtricity came in to deal with Mawile. It used Nuzzle twice and then spammed Spark until Mawile was weak enough that I let it kill Toxtricity.
    Haunter came in and killed with Shadow Ball, becoming Worthy

    Haunter let me heal Toxtricity and then cursed Togekiss, letting it accrue damage so Toxtricity could come in and kill it with Spark, becoming Worthy

    Toxtricity managed to waste one turn of Gmax Alcremie, and then Cinderace came in and started to soften Alcremie up for Scolipede which just spammed Venoshock, until Alcremie died and it became Worthy.

    Badges: 5 / 8

    Sacrifices
    - Galarian Slowpoke (Power Limits 2 on TwilightBlade)
    - Haunter (Flare Up! 3 on me)
    - Toxtricity (no rule)
    - Scolipede (Mind Power 2 on saniachan)

    Already Sacrificed
    - Thievul
    - Pidove
    - Farfetch'd
    - Alolan Marowak
    - Shiftry
    - Litwick
    - Drednaw
    - Corvisquire
    - Gardevoir
    - Igglybuff
    - Wobbuffet
    - Sirfetch'd
     
    5,660
    Posts
    11
    Years
  • Hi, I'll just need you to specify with rule you want to lift with each sacrifice.

    Eleanor already lifted your We got the groove 2, so it can't be lifted again.

    Spoiler:

    Updated.
     

    X_K.V.Jin_X

    XJinX
    129
    Posts
    3
    Years
  • I mean
    One of them is Back and Forth(use status and damage moves alternately), and other is Learning Assessment(needa learn all level up moves, no skipping). Requirements are(both lvl10+): pokémon with 2 status and 2 damaging moves, and pokémon which has already forgotten two moves by learning new ones, respectively.
    Sacrificed: Butterfree and Pidgeotto
    Please update my rules ma'am :) thankiesss
     
    5,660
    Posts
    11
    Years
  • I mean
    One of them is Back and Forth(use status and damage moves alternately), and other is Learning Assessment(needa learn all level up moves, no skipping). Requirements are(both lvl10+): pokémon with 2 status and 2 damaging moves, and pokémon which has already forgotten two moves by learning new ones, respectively.
    Sacrificed: Butterfree and Pidgeotto
    Please update my rules ma'am :) thankiesss
    Thank you. Updated.
     

    X_K.V.Jin_X

    XJinX
    129
    Posts
    3
    Years
  • Thank ya so much! 2 more sacrifices done btw:
    Okay so after Pewter I got rid of all da rookiez in ma way upto da Pokémon Centre in Mount Moon. I went to the lowest floor, caught Geodude, destroyed more noob NPCs, and got outta there. Got both da itemz, then jumped to the Pokémon Centre in Cerulean citay. Caught Ekans, and got all ma homiez high enough to fight. Destroyed my rival, cleared route 25, snatched the SS Anne ticket and got back to more grinding. Ivyaur, obviously, got me rid of thoze useless people in the gym. Then came da battle with Misty:
    My Pikachu was leading against Staryu. Thundershock, somehow, didn't OHKO, however that Staryu somehow couldn't damage ma homie Pikachu anyway. Thunder wave then thunder shock for sweep. Heh whatever now came some okie doomie playa, Starmie. Pika did whateva he could before dyin', then came ma ekanS. Wrap spam, but that Starmie almost OHKOed ma homie. Switch to Ivysaur, Tackle to bring dat rival down low, sleep powder, another tackle almost KOs, still that guy sleeping when I switch n bite him with ma Snake. Nice.
    20221021_175257.jpg

    20221021_175239.jpg


    Rules to be upgraded: Back and Forth 2(used Pikachu with Quick Attack/Thunder wave/Thunder shock/Growl ) and Team Effort( lvl 10+ pokémon that can have moves/abilities preventing switch) (Ekans got Wrap), I would love to have those rules upgraded :)
     
    Last edited:

    Chr. Draco

    Spatial Rift
    1,070
    Posts
    15
    Years
    • Seen Apr 6, 2024
    Completed segment 4:

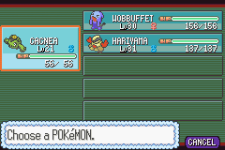
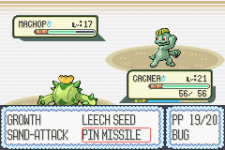
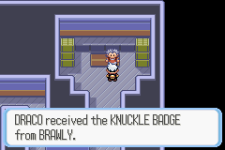
    Trained a Cacnea to vl 21 and let it learn Pin Missile to use vs Brawly (2nd gym leader) and hatched the lavaridge town Waynaut egg , evolved it into Wobbufet and trained it to lvl 30.

    Team used:

    Cacnea lv 21
    Wobbuffet lv 30
    Hariyama lv 31

    2/3 human like pokemon Egg group (cacnea and hariyama)
    1/3 fighting type pokemon (fighting type gym leader Brawly) (hariyama)

    "We got the moves" and "We got the flow" criteria completed

    Battle events:

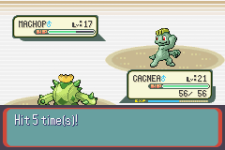
    Turn 1: Cacnea used Pin missile (5 hits) (completed "We got the groove" criteria)
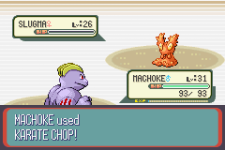
    Machop - not sure, may have used Leer or Bulk Up
    Turn 2 : Switched to Wobbuffet
    Machop - karate chop
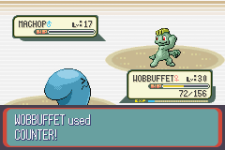
    The following turns were like this: Wobbuffet encore, machop karate chop, wobbuffet counter, gym leader using super potion and wasting a turn using another move with destiny bond for machop to use karate chop again, encore again until finally they ran out of super potion, karate chop, counter, seismic toss, counter, machop fainted.
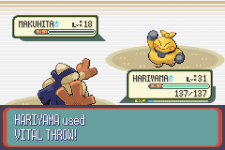
    Next turn was Makuhita used Bulk up and Hariyama used Vital Throw.

    Sacrifice Pokémon:
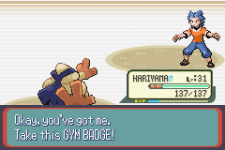
    Hariyama lv 31 - "We got the flow" - finishing fighting type move vs a fighting type pokemon.
    Wobbufet lv 30 - "We got the moves" Amorphous egg group.

    Spoiler:
     
    426
    Posts
    5
    Years
  • How I got my current team:
    (previous pst link)
    https://www.pokecommunity.com/showthread.php?p=10561577#post10561577

    Notable events:
    Grinding.
    Beaten the grunts at the Relic Castle.
    Grinding.
    Barely manage to get past Bianca with revives and Hyper Potions.
    Grinding.
    I feel like I have beaten every single trainer in the region...
    Grinding.
    And finally: the gym.
    Oh wait, after the gym: even more grinding, because Im gonna sacrifice half my team here...

    Gym battle:
    Starting with a Chandelure (43) to cripple enemy Fraxure (41) with a Will-O-Wisp and stall until Drayden runs out of potions.
    Switching in Larvesta (39) to finish it off.
    Against Druddigon (41) I use Chandelure (43) and my own Fraxure (43) to weaken it, Fraxure (43) has False Swipe, the main reason I brought it here.
    Once they're down and Druddigon (41) has 1 HP left, I send in Dwebble (1), which takes a hit from Chip Away thanks to Sturdy and finishes it off with a Fury Cutter. They both faint because Druddigon (41) has Rough Skin, so Dwebble (1) cant level up.
    Last opponent is a Haxorus (43). I use my Golurk (43) to weaken it and finish it off with Cobalion (42).

    Sacrifices:
    Larvesta (39) to get rid of my only remaining rule.
    Dwebble (1) and Cobalion (42).
     
    Back
    Top