• Our software update is now concluded. You will need to reset your password to log in. In order to do this, you will have to click "Log in" in the top right corner and then "Forgot your password?".
  • Welcome to PokéCommunity! Register now and join one of the best fan communities on the 'net to talk Pokémon and more! We are not affiliated with The Pokémon Company or Nintendo.

[Gen 7] Gachamon - A Gacha-based Moon Challlenge Run

24,712
Posts
3
Years
    • Any pronoun
    • Seen today
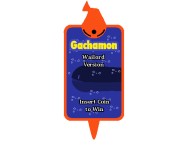
    Gachamon Title Screen PNG.png
    Basic Premise
    Begins with a semi-randomized Pokemon in Pokemon Moon. Imposes heavy restrictions: level limit, item limit, party size limit, and no Z-moves. Cannot catch any Pokemon to use either.

    Sounds difficult, right? Solves that how you solve most problems in gacha games: throwing money at it. Purchases upgrades, such as +1 level limit, with in-game money. Obtains Pokemon through a gacha system.

    Might ask what a gacha system is. Think of it as pulling Pokemon from a box. Contains many Pokemon, good and bad. (Weights it towards bad.) Gambles with in-game currency in hopes of acquiring what you want. May purchase in-game currency with real-world currency if you run out. (Will not involve real-world currency, in this case.)

    Cannot say how difficult this challenge will be. Attached numbers to perks and Pokemon pulls from scratch. Assigned rarities to Pokemon based on personal opinion and stats. Hoped for something vaguely balanced.

    Longwinded Default Rules
    Starts the challenge upon getting the ability to trade. Receives one of three different 4-star Pokemon in place of the starter. May choose which one. Views what the Pokemon are, unlike the normal gacha system, although not their particulars. Begins with one free pull on the first pull of a satchel as a Newbie Bonus also. (Cannot stack with other special offers.)

    May purchase perks and Pokemon with Pokedollars (detailed more below). Removes any money spent this way by buying Pokeballs at a shop. Cannot use any Pokemon caught with Pokeballs. Functions as a means to catch something to trade for a purchased Pokemon, level up Poke Pelago, or a wild shiny without sacrificing in-game cash.

    Victory Condition: Become Champion of Alola.
    Naming Theme: Gacha games and its characters.
    Item Limit: One per battle. Does not count Adrenaline Orbs or Pokeballs.
    Item Restrictions: One Leftovers maximum. No Revives or X items in-battle.
    Shop Restrictions: Cannot sell any kind of Pokeball except to correct money totals.
    Team Size Limit: Three.
    PC Storage Limit: Ten. Only counts Pokemon that can be used.
    Experience Share: Yes. Is not a masochist.
    Pokemon Refresh: Up to two hearts for all Pokemon.
    Poke Pelago: Isle Abeens (bean island) and Isle Avue (hot springs) only.
    Z-Moves: No.
    Battle Style: Set.
    Perma-death: No.
    Pyukumuku Chucking: Once only.
    Show-a-Pokemon quests: Yes, if obtained through the gacha

    Level Limit: Present. Must deposit any Pokemon over the limit. May still be used in the event of going above the limit during the trial itself.
    - Totem Raticate: 12
    - Hala: 15
    - Totem Wishiwashi: 19
    - Totem Salazzle: 21
    - Totem Lurantis: 23
    - Olivia: 26
    - Totem Vikavolt: 27
    - Totem Mimikyu: 31
    - Nanu: 37
    - Hapu: 45
    - Lusamine Round 2: 47
    - Elite Four/Champion: 51

    Reset Clause: Allows resetting for any reason. Includes whiting out and unwanted Sketch results.
    Lucky Egg Clause: Transferred Lucky Eggs over for use at any time.
    Shiny Clause: May catch and use any shiny Pokemon.
    Poke Pelago Numbers Clause: Permits disallowed Pokemon to catch Pokemon for Poke Pelago island requirements.

    The Gacha
    Looks like this upon deciding to summon.

    Moon Gacha Satchel Example.png
    Displays three Pokemon. Knows one of its types based on its ball. Created the chart below to identify each ball.
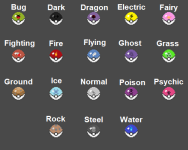
    All Gacha Balls.png

    Split Pokemon into three rarities: 3-star, 4-star, and 5-star. Indicates the general power level of the Pokemon (in a playthrough), as well as other benefits.
    3-star Pokemon: 1 egg move
    4-star Pokemon: 1 egg move + one of [Destiny Knot, Everstone, or another egg move]. Will not choose egg moves as the bonus if it does not have a second egg move.
    5-star Pokemon: 2 egg moves + two of [Destiny Knot, Everstone, or two more egg moves]. See above note, but with a third egg move.

    Designates three random Pokemon as the "Focus Pokemon" for a section. Adds a chance of getting that Pokemon at 5-stars. (Note: Can still receive a lower star version.)

    Determines the rarity of the Pokemon first, then the species. Displays one of that Pokemon's types at random. Odds of each rarity:
    - 3-star: 55%
    - 4-star: 39%
    - 5-star: 3%
    - Focus: 3% (1% each)

    Planned two special "banners" as well: Christmas and Anniversary. Features three random Pokemon from the five-star only pool, with a focus rate of 6% instead of 3%. Drops 2% from 3-star's odds and 1% from 4-star's odds.

    Lists each pool of Pokemon below.
    Spoiler: 3-Star Only Pool

    Bergmite
    Bidoof
    Burmy
    Carnivine
    Castform
    Caterpie
    Cherubi
    Chimecho
    Clamperl
    Combee
    Comfey
    Corsola
    Crabrawler
    Dedenne
    Deino
    Delibird
    Duskull
    Farfetch'd
    Feebas
    Finneon
    Fletchling
    Goldeen
    Hoothoot
    Hoppip
    Igglybuff
    Karrablast
    Klink
    Kricketot
    Larvesta
    Ledyba
    Luvdisc
    Minun
    Morelull
    Noibat
    Oranguru
    Pachirisu
    Panpour
    Pansage
    Pansear
    Paras
    Patrat
    Pidgey
    Pineco
    Plusle
    Poochyena
    Purrloin
    Pyukumuku
    Rattata (Alola)
    Rufflet
    Salandit
    Scatterbug
    Sentret
    Sewaddle
    Shelmet
    Skitty
    Slugma
    Smeargle
    Smoochum
    Spinarak
    Spinda
    Spritzee
    Stunfisk
    Sunkern
    Swirlix
    Trubbish
    Turtonator
    Tynamo
    Venipede
    Volbeat / Illumise
    Vullaby
    Weedle
    Wobbuffet
    Woobat
    Wurmple
    Yamask
    Zigzagoon

    Spoiler: 3- and 4-Star Pool

    Aipom
    Alomomola
    Amaura
    Anorith
    Aron
    Baltoy
    Barboach
    Basculin
    Bellsprout
    Binacle
    Blitzle
    Bronzor
    Buneary
    Bunnelby
    Cacnea
    Carbink
    Carvanha
    Chansey
    Chatot
    Chinchou
    Corphish
    Cottonee
    Cubchoo
    Cubone
    Cutiefly
    Deerling
    Diglett (Alola)
    Drampa
    Drifloon
    Drowzee
    Ducklett
    Dunsparce
    Ekans
    Electrike
    Elgyem
    Emolga
    Espurr
    Exeggcute
    Foongus
    Furfrou
    Geodude (Alola)
    Girafarig
    Glameow
    Golett
    Gothita
    Grubbin
    Gulpin
    Heatmor
    Helioptile
    Joltik
    Kabuto
    Kecleon
    Klefki
    Krabby
    Lickitung
    Lileep
    Litleo
    Lotad
    Lunatone
    Magnemite
    Mankey
    Mantine
    Maractus
    Mawile
    Meditite
    Meowth (Alola)
    Minior
    Mr. Mime
    Munna
    Natu
    Nincada
    Nosepass
    Numel
    Oddish
    Omanyte
    Onix
    Oricorio
    Pancham
    Phantump
    Phione
    Pikipek
    Poliwag
    Ponyta
    Psyduck
    Pumpkaboo
    Qwilfish
    Relicanth
    Remoraid
    Rhyhorn
    Sableye
    Sandshrew (Alola)
    Sandygast
    Seel
    Seviper
    Shellder
    Shieldon
    Shuppet
    Skiddo
    Skorupi
    Skrelp
    Slowpoke
    Sneasel
    Snorunt
    Snover
    Snubbull
    Solosis
    Solrock
    Spearow
    Spheal
    Spiritomb
    Spoink
    Stantler
    Stunky
    Sudowoodo
    Tirtouga
    Torkoal
    Tropius
    Tympole
    Vanillite
    Venonat
    Voltorb
    Wailmer
    Whismur
    Wimpod
    Wishiwashi
    Yungoos

    Spoiler: 4-Star Only Pool

    Absol
    Aerodactyl
    Audino
    Bruxish
    Buizel
    Clauncher
    Cranidos
    Croagunk
    Cryogonal
    Dewpider
    Diglett (Kanto)
    Doduo
    Druddigon
    Dwebble
    Eevee
    Ferroseed
    Fomantis
    Frillish
    Geodude (Kanto)
    Grimer (Kanto)
    Hippopotas
    Horsea
    Houndour
    Inkay
    Koffing
    Komala
    Lapras
    Lillipup
    Litwick
    Makuhita
    Mareanie
    Meowth (Kanto)
    Mienfoo
    Minccino
    Murkrow
    Pawniard
    Petilil
    Phanpy
    Pidove
    Porygon
    Rattata (Kanto)
    Roggenrola
    Sandshrew (Kanto)
    Sawk
    Scraggy
    Scyther
    Seedot
    Shinx
    Shroomish
    Shuckle
    Sigilyph
    Skarmory
    Surskit
    Swablu
    Swinub
    Tauros
    Tentacool
    Throh
    Togedemaru
    Tyrogue
    Tyrunt
    Wingull
    Wooper
    Yanma
    Zangoose
    Zorua

    Spoiler: 4- and 5-Star Pool

    Axew
    Bounsweet
    Bulbasaur
    Charmander
    Chespin
    Chikorita
    Chimchar
    Cleffa
    Cyndaquil
    Dhelmise
    Durant
    Elekid
    Fennekin
    Flabebe
    Froakie
    Gastly
    Gligar
    Goomy
    Grimer (Alola)
    Hawlucha
    Jangmo-o
    Kangaskhan
    Litten
    Machop
    Magby
    Marill
    Miltank
    Misdreavus
    Mudbray
    Mudkip
    Nidoran
    Oshawott
    Passimian
    Pichu
    Pinsir
    Piplup
    Popplio
    Rockruff
    Roselia
    Rotom
    Rowlet
    Sandile
    Shellos
    Snivy
    Squirtle
    Staryu
    Taillow
    Tangela
    Teddiursa
    Tepig
    Timburr
    Togepi
    Torchic
    Totodile
    Treecko
    Turtwig
    Vulpix (Alola)
    Vulpix (Kanto)
    Zubat

    Spoiler: 5-Star Only Pool

    Abra
    Archen
    Bagon
    Beldum
    Bouffalant
    Darumaka
    Dratini
    Drilbur
    Gible
    Growlithe
    Heracross
    Honedge
    Larvitar
    Magikarp
    Mareep
    Mimikyu
    Ralts
    Riolu
    Slakoth
    Snorlax
    Starly
    Stufful
    Trapinch


    Shop

    Personal Upgrades
    +1 level limit: 7000
    +1 level limit: 20000
    +1 level limit: 30000
    +1 level limit: 40000
    +1 level limit: 60000

    +1 party slot: 8000
    +1 party slot: 15000
    +1 party slot: 25000

    +1 item limit: 15000
    +1 item limit: 30000
    +1 item limit: 45000

    +3 PC slots: 10000
    +3 PC slots: 15000
    +3 PC slots (repeatable): 20000

    Switch Battle style: 75000

    VIP Pass (One use each of level 2 Isle Aphun and level 1 Isle Aplenny): 8000

    Pokemon Perks
    Third heart in Refresh: 30000
    Fourth heart in Refresh: 40000
    Fifth heart in Refresh: 30000
    (Note: Applies to one Pokemon. May purchase these multiple times.)

    Z-Crystal: 30000 per crystal.

    Move Tutoring: 30000 per move.

    Move Relearner: 5000 per move. Permits previously known moves only.

    Evolution
    (Note: Not available until Totem Lurantis's section.)

    Trade evolution cost: 20000
    (Covers Shelmet and Karrablast. Must own both, however.)

    Location-based evolution cost: 20000

    Evolution item + trade evolution bundle cost: 25000

    Summoning
    Cost for first Pokemon of a satchel: 25000
    Cost for second Pokemon of a satchel: 17000
    Cost for third Pokemon of a satchel: 10000

    Must pick at least one Pokemon upon seeing the satchel.

    Events
    Divided it by section.

    - Totem Raticate: Launch. One free summon for all players. (Redeemable during any section, unlike other free summons.)
    - Hala: One bundle offer.
    - Totem Wishiwashi: Version update. 25% off sale.
    - Totem Salazzle: Christmas celebration. Special banner and one free summon.
    - Totem Lurantis: Version update. Two bundle offers.
    - Olivia: Nothing.
    - Totem Vikavolt: Version update. 40% off sale.
    - Totem Mimikyu: Nothing.
    - Nanu: Anniversary celebration. Special banner and one free summon.
    - Hapu: Version update. 50% off sale.
    - Lusamine Round 2: Nothing.
    - Elite Four/Champion: Version update. 50% off to one entire summon satchel's costs.

    Sales: Marks down one random perk or service from the shop. Only applies to the next upgrade, not all of them. May discount perks that have been exhausted. Includes the cost of all clothing and one Technical Machine as well. Will not reduce the cost of summoning or evolutions. Cannot select something that is unavailable, such as a VIP Pass before Poke Pelago opens.

    Bundle Offer: Combines two random perks and services for a 25% discount. Contains all the caveats as the sale. Must purchase at least 10000 in clothing to satisfy a bundle with clothing.

    ___________________

    Pre-Challenge
    Random number: 5. The bottom-left trainer.

    Chose the name Dolphin. Refers to players to aquatic creatures based on spending. Calls people who spend no or little money "Minnows" and those who spend lots of money "Whales". Falls somewhere inbetween with "Dolphin".

    Kukui: "Ooh, I bet you've got a stylin' hat that'll match mine, yeah?" Sighs. Engage chicken hat.

    Iki Town resident: "On sunny days like this, I like to just wander around following the wind. Don't you?" Um. Happens to be the middle of the night.

    Rescued Nebby. Might be one of the few instances of Dolphin not smiling during a cutscene.

    Random number: 1. Chose Rowlet. Dreads fighting Primarina later. Good nature (Adamant) on it.

    Mom: "Here's a little pocket money for you. Don't go spending it on anything silly." Will definitely not spend it on an addicting game.

    Does no one else feel concerned about ordering a Rotom?

    Section 1: Totem Raticate
    Unlocked the ability to trade. Marks the actual start of the challenge. Who will the starters be?

    Starter Choice GIF.gif
    Petilil, Bounsweet, and Mienfoo. Mienfoo, hands down. Hoped for a Fighting or Fairy type. Performs well in the first island. Hopes for a decent egg move on it.

    Shallot the Mienfoo
    Level: 1
    Nature: Bold
    Ability: Reckless (Hidden Ability)
    Hitpoints: 12
    Attack: 6
    Defense: 6
    Special Attack: 6
    Speed: 6

    Picked Shallot from Dragon Ball Legends. (Never played it or cared for Dragon Ball Z, for the record. Applies to many games ahead.) Suits a Fighting-type perfectly.

    Knows Low Kick as its guaranteed egg move. Bred the parent with a Destiny Knot as the bonus. Calculates 30-31 IVs in Attack and 31 in Special Attack. Compensates for the nature a little.

    Works for Smeargle. Hm. Hold on. Remembers a Gastly on Route 2. Learns only Fighting and Normal moves. Forces summoning this section.

    This section's three Focus Pokemon: Ledyba, Swirlix, and Electrike. Nothing great. Sees little recourse. Will probably full summon.

    Summon Satchel 1.png
    The three Pokeballs: Electric, Poison, and Electric. Selects the leftmost Electric Ball.

    Spoiler: First Summon Satchel Result

    Summon 1.1 GIF.gif

    Not bad for its rarity. Foresees trouble at Totem Salazzle. Seems unlikely to improve with another Electric or Poison type.

    Lisa the Magnemite
    Level: 1
    Nature: Calm
    Ability: Sturdy
    Hitpoints: 11
    Attack: 4
    Defense: 6
    Special Attack: 7
    Special Defense: 6
    Speed: 6

    Stellar Special Defense between the nature and IVs. Minimum of decent in Special Attack and Speed. Pretty good. Serves as a good option for Wishiwashi (and Primarina).

    Did not expect Magnemite in the 3-4 star pool. (Categorized Pokemon months ago.) Reaches a good base stat total. Might have been the location evolution or the poor (Electric) level-up moves. Learns Thundershock at level 5, Spark at 19, Electro Ball at 29, and finally Discharge at 43.

    Named Lisa after a starter character in Genshin Impact. Shoots lightning. Good enough.

    Chose to not to summon further. Hates to pass up the cheaper rate. Planned the Christmas banner during Salazzle's section, however. Should be able to manage with these two until then.

    Cannot resist the curiosity of the other two, of course. What were they? Three star Seviper (with Body Slam) and four star Magnemite (with Destiny Knot). Whew. Accepts that.


    Possesses 35420 Pokedollars from the outset, for anyone curious.

    Paralyzed the Alolan Grimer at the Trainers' School on Turn 1. Defeated it easily. Tends to be nasty between Bite and poison damage. (Nibbled on Lisa for 10 of its 26 hitpoints in one Bite.)

    Next notable fight: the Trainers' School Principal.
    Turn 1: Mienfoo: Low Kick (35%) / Magnemite (enemy): Thundershock (20/29, paralyzed)
    Turn 2: Magnemite (enemy): Thundershock (critical, 7/29) / Mienfoo: Low Kick (35%)
    Turn 3: Mienfoo: Switch to Lisa (Magnemite) / Magnemite (enemy): Thundershock (23/26)
    Turn 4: Magnemite: Supersonic / Magnemite (enemy): Thunershock (20/26)
    Turn 5: Magnemite: Thundershock (20%) / Magnemite (enemy): (Removed confusion) Thundershock (17/26)
    Turn 6: Magnemite (enemy) Thundershock (14/26) / Magnemite: Thundershock (the rest)
    Turn 7: Alolan Meowth: Bite (8/26) / Magnemite: Flinched
    Turn 8: Magnemite: (Quick Claw) Thundershock (40%, paralyzed) / Alolan Meowth: Bite (2/26)
    Turn 9: Magnemite: Potion (Heal to 22/26) (Final item) / Alolan Meowth: Bite (16/26)
    Turn 10: Magnemite: Thundershock (40%) / Alolan Meowth: Bite (10/26)
    Turn 11: Magnemite: Thundershock (the rest)

    Hates you too, Supersonic.

    Sets up Team Skull as comic relief from the get-go by Ilima ignoring them. Forgot how prevalent they are in this game.

    Ilima time. Packs Ember on Smeargle, unfortunately.

    Turn 1: Magnemite: Thundershock (33%) / Yungoos: Pursuit (24/28)
    Turn 2: Magnemite: Thundershock (33%) / Yungoos: Leer
    Turn 3: Magnemite: Thundershock (the rest)
    Turn 4: Magnemite: (Quick Claw) Thundershock: (40%) / Smeargle: Ember (12/28)
    Turn 5: Magnemite: Switch to Shallot (Mienfoo) / Smeargle: Ember (20/29, Burn)
    Burn damage to 19/29
    Turn 6: Smeargle: Tackle (6/29) / Mienfoo: Low Kick (the rest)

    Thank goodness for Low Kick finishing the job through Burn. What are these effect rates? Cuts both ways, at least.

    Stands at levels 10 and 11 now. Approaches the level limit of 12. Avoided as many trainers as possible. (Will return for them upon getting the Amulet Coin.) Skirted around the Gastly trainer. ...Good information for next time.

    What is this Team Skull Drowzee? Scored three critical Pounds in six attacks (between two appearances).

    Grabbed the free-to-play Brick Break Technical Machine in Verdant Cavern. Goodbye, Low Kick.

    Rocked up to Totem Raticate. Ought to be a one-shot.

    (+1 Defense to Totem Raticate)
    Turn 1: Raticate: Tail Whip / Mienfoo: Brick Break (100%)

    Leveled up to 13 (and almost 14) on that fight.

    Section 2: Hala
    This section's Focus Pokemon: Pinsir, Fomantis, and Darumaka.
    Special bundle offer: +1 Party Slot and 1 Move Relearner use for 9750 Pokedollars. (Allows the Move Relearner via trading to Ultra Sun.)

    Likes this banner, but not for Salazzle. Skip. Declines the bundle too. Receives nothing good from the Move Relearner.

    Dodged more trainers. Cannot avoid Hau after Melemele Meadow, however.

    Turn 1: Pikachu: Play Nice / Magnemite: Thundershock (15%)
    Turn 2: Pikachu: Quick Attack (29/31) / Magnemite: Thundershock (15%)
    Turn 3: Pikachu: Quick Attack (27/31) / Magnemite: Thundershock (critical, 25%)
    Turn 4: Pikachu: Play Nice / Magnemite: Thundershock (15%)
    Turn 5: Pikachu: Quick Attack (25/31) / Magnemite: Thundershock (15%)
    Turn 6: Pikachu: Quick Attack (23/31) / Magnemite: Thundershock (the rest)
    Turn 7: (Quick Claw) Magnemite: Thundershock (50%) / Popplio: Water Gun (13/31)
    Turn 8: Popplio: Disarming Voice (10/31) / Magnemite: Thundershock (45%)
    Turn 9: Magnemite: Switch to Shallot (Mienfoo) / Popplio: Water Gun (25/38)
    Turn 10: Mienfoo: Fake Out (the rest)

    Ooh. Found a Sitrus Berry. Wants to hold onto that for a VIP Pass to the berry island later.

    Psh. Tackled a Growlithe trainer. Burned again.

    Brought everyone up to level 15 for Hala. Game plan: Lead with Shallot. Fake Out -> Meditate -> Brick Break sweep. Gave them an Oran Berry for safety.

    Turn 1: Mienfoo: Fake Out (25%) / Mankey: Flinch
    Turn 2: Mankey: Karate Chop (26/42) / Mienfoo: Meditate
    Turn 3: Mankey: Focus Energy / Mienfoo: Brick Break (the rest)
    Turn 4: Makuhita: Fake Out (17/42) (Oran Berry heal to 27/42) / Mienfoo: Flinched
    Turn 5: Mienfoo: Brick Break (90%) / Makuhita: Sand Attack
    Turn 6: Makuhita: Super Potion (Heal to full) / Mienfoo: Brick Break (miss)
    Turn 7: Mienfoo: Meditate / Makuhita: Sand Attack
    Turn 8: Mienfoo: Brick Break (miss) / Makuhita: Sand Attack
    Turn 9: Mienfoo: Brick Break (miss) / Makuhita: Sand Attack
    Turn 10: Mienfoo: Switch to Lisa (Magnemite) / Makuhita: Sand Attack
    Turn 11: (Quick Claw) Magnemite: Thundershock (25%) / Makuhita: Sand Attack
    Turn 12: (Quick Claw) Magnemite: Thunder Wave (miss) / Makuhita: Arm Thrust (2 hits, 21/37)
    Turn 13: Magnemite: Thundershock (25%) / Makuhita: Sand Attack
    Turn 14: (Quick Claw) Magnemite: Thundershock (25%) / Makuhita: Sand Attack
    Turn 15: Magnemite: Switch to Shallot (Mienfoo) / Makuhita: Arm Thrust (3 hits, 15/42)
    Turn 16: Mienfoo: Brick Break (the rest)
    Turn 17: Mienfoo: Switch to Lisa (Magnemite) / Crabrawler: All-Out Pummeling (0/37)
    Turn 18: Mienfoo: Fake Out (8%) / Crabrawler: Flinch
    Turn 19: Mienfoo: Super Potion (Heal to full) (Final item) / Crabrawler: Power-Up Punch (24/42)
    Turn 20: Mienfoo: Brick Break (35%) / Crabrawler: Power-Up Punch (0/42)

    Restarted. (Will count the item use and faintings in the stats.) New plan: Meditate x2.

    Turn 1: Mienfoo: Fake Out (25%) / Mankey: Flinch
    Turn 2: Mankey: Karate Chop (27/42) / Mienfoo: Meditate
    Turn 3: Mankey: Focus Energy / Mienfoo: Meditate
    Turn 4: Mankey: Karate Chop (critical, 2/42) (Oran Berry heal to 12/42) / Mienfoo: Karate Chop (the rest)
    Turn 5: Makuhita: Fake Out (4/42) / Mienfoo: Flinch
    Turn 6: Mienfoo: Brick Break (100%) / Makuhita: Fainted
    Turn 7: Mienfoo: Super Potion (heal to full) (Final item) / Crabrawler: All Out Pummeling (3/42)
    Turn 8: Mienfoo: Brick Break (55%) / Crabrawler: Power-Up Punch (0/42)
    Turn 9: Crabrawler: Power-Up Punch (1/37) (Sturdy) / Magnemite: Thundershock (30%)
    Turn 10: Crabrawler: Pursuit (0/37)

    Expected neither All Out Pummeling on such low health nor an attack from Crabrawler in the red. Cannot count on surviving on low hitpoints again.

    Round 3: Same strategy. Will heal on Makuhita's Fake Out this time. Might risk another Meditate. Hopes for the best. May need to buy an upgrade.

    Turn 1: Mienfoo: Fake Out (25%) / Mankey: Flinch
    Turn 2: Mankey: Focus Energy / Mienfoo: Meditate
    Turn 3: Mankey: Karate Chop (critical, 18/42) (Oran Berry heal to 28/42) / Mienfoo: Meditate
    Turn 4: Mankey: Karate Chop (critical, 3/42) / Mienfoo: Brick Break (the rest)
    Turn 5: Mienfoo: Super Potion (heal to full) / Makuhita: Fake Out (35/42)
    Turn 6: Mienfoo: Meditate / Makuhita: Sand Attack
    Turn 7: Mienfoo: Brick Break (100%) / Makuhita: Fainted
    Turn 8: Mienfoo: Brick Break (75%) / Crabrawler: Leer
    Turn 9: Mienfoo: Brick Break (the rest)
    (Level up.)

    ...Leer? Leer? Chose that now? Could have crushed Shallot with All Out Pummeling.

    Whatever. Pats Shallot on the back for hitting through Sand Attack all three times.

    Ends this entry. Enjoys this challenge so far. Made one difficult choice already. Would have been smoother with Seviper. Pays off in the future, hopefully. Thanks for reading.
    Spoiler: Playthrough and Pokemon Stats

    In-battle items used
    - Potion: 1
    - Super Potion: 3

    Fainted
    - Shallot the Mienfoo: 2
    - Lisa the Magnemite: 2

    Current money: 45082

    Upgrades
    None

    Expeditures outside the Gacha shop
    None

    Pokemon Stats
    Shallot the Mienfoo
    Level: 16
    Ability: Reckless
    Nature: Bold
    Hitpoints: 44
    Attack: 33
    Defense: 23
    Special Attack: 27
    Special Defense: 25
    Speed: 28
    Moves: Pound, Brick Break, Meditate, and Fake Out

    Lisa the Magnemite
    Level: 15
    Ability: Sturdy
    Nature: Calm
    Hitpoints: 37
    Attack: 13
    Defense: 29
    Special Attack: 37
    Special Defense: 28
    Speed: 21
    Moves: Light Screen, Thunder Wave, Thunder Shock, and Magnet Bomb

     
    Last edited:
    24,712
    Posts
    3
    Years
    • Any pronoun
    • Seen today
    Section 3: Totem Wishiwashi
    Updated the game to version 1.1! Introduces the lush Akala Island for players to explore. Look for brand new Pokemon to befriend! Overcome the two new Totem Pokemon hiding deep within. Expanded customization options for trainers. Look forward to more content soon!

    Level limit: 19
    This section's Focus Pokemon: Poliwag, Popplio, and Burmy
    Sale: Move Relearner for 3750.

    Frowns. Complicates the summoning decision. Likes Poliwag's and Popplio's possible egg moves (such as Haze and Charm). Stands a low chance of getting them at 5-stars, however. (Designed this system around far more summons.)

    Waits for now. Obtains the Amulet Coin during this section. May seem less expensive with that. Will purchase a level limit increase for 7000, though. Stays even with the challenges ahead.

    Explored more of Melemele Island with Tauros's help. Grabbed two Nuggets, a Pearl, a Star Piece, an Expert Belt, and an excellent Acrobatics Technical Machine. Thought it was Aerial Ace here. (Might be in Ultra.) Taught it to Shallot without hesitation.

    Hau: "I just told my mom that I'm going to Akala Island next! Then she slapped me on the back so hard I'm still feelin' it and sent me on my way!" Skimmed that conversation too fast. Missed "on the back" the first time. Alters it considerably.

    Hold on. Remembered Dexio (or...the other one) Sina up ahead. Uh...good luck, Shallot. Take an Oran Berry.

    Turn 1: Mienfoo: Fake Out (25%) / Delibird: Flinched
    Turn 2: Delibird: Present (31/44) / Mienfoo: Brick Break (60%)
    Turn 3: Delibird: Present (22/44) / Mienfoo: Brick Break (the rest)
    Turn 4: Glaceon: Icy Wind (0/44) / Mienfoo: Fainted
    Turn 5: Glaceon: Quick Attack (34/37) / (Quick Claw) Magnemite: Light Screen
    Turn 6: Glaceon: Quick Attack (31/37) / Magnemite: Thunder Wave
    Turn 7: Magnemite: Thunder Shock (15%) / Glaceon: Paralyzed
    Turn 8: Magnemite: Thunder Shock (15%) / Glaceon: Paralyzed
    Turn 9: Magnemite: Thunder Shock (15%) / Glaceon: Paralyzed
    Turn 10: Magnemite: Thunder Shock (15%) / Glaceon: Icy Wind (19/37, -1 Speed)
    Turn 11: Glaceon: Quick Attack (16/37) / Magnemite: Thundershock (15%)
    Turn 12: Glaceon: Quick Attack (13/37) / Magnemite: Thundershock (the rest)

    Thought it was Smoochum and Glaceon. Somehow remembered Ultra Moon's battle without playing it. Should have led with Lisa. Oh well. Did not appreciate Shallot being outsped by Glaceon. Matched each other in level and base Speed (65).

    Set up a Technical Machine shop here. Costs 10000 each for Light Screen, Protect, Safeguard, and Reflect. Charges 30000 for Aurora Veil. May return here later for Reflect and/or Light Screen.

    Noticed a lot of Corsolas running around: Kukui's Laboratory, the Route 2 Pokemon Center, and now the Tidesong Hotel. Outnumbers basically everything else.

    Ran around most trainers to Paniola Town. Met Hau for battle number four. Thought Hop in Sword/Shield was persistent.

    Turn 1: Mienfoo: Fake Out (25%) / Pikachu: Flinched
    Turn 2: Pikachu: Electro Ball (32/44) / Mienfoo: Brick Break (the rest)
    (Level up.)
    Turn 3: Mienfoo: Brick Break (30%) / Brionne: Pound (26/46)
    Turn 4: Mienfoo: Switch to Lisa (Magnemite) / Brionne: Breakneck Blitz (28/37)
    Turn 5: Brionne: Aqua Jet (16/37) / Magnemite: Light Screen
    Turn 6: Brionne: Aqua Jet (5/37) / Magnemite: Thundershock (30%)
    Turn 7: Magnemite: Super Potion (heal to full) (Final item) / Brionne: Aqua Jet (27/37)
    Turn 8: Brionne: Pound (24/3)7 / Magnemite: Thundershock (30%)
    Turn 9: Brionne: Disarming Voice (22/37) / Magnemite: Thundershock (the rest)

    Wasted time on that Light Screen. Predicted the Z-move, on the plus side.

    Remembers the rich person with a Carbink. Tosses out Full Restores. Coughs up tons of cash. Passed the Stealth check to bypass.

    Reached the breeding area. Knows this long dirt path well. Snagged the vital Amulet Coin. Contains the Hidden Power Technical Machine too. Hidden Power Ice on Magnemite. Amazing...but now? Might be shockingly effective with Sonic Boom versus Totem Wishiwashi.

    Robbed 6000 Pokedollars from one old man. Snatched the same from the Carbink trainer. Hit harder with Sonic Boom than Thundershock.

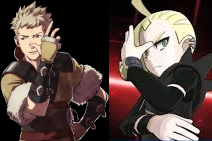
    Met Gladion. Confirmed being Dolphin. Looks down on you for giving your name. Proceeds to give out their own name. What? (Always thinks of Owain from Fire Emblem Awakening, also.)
    Owain and Gladion.png
    Turn 1: Zubat: Bite (35/42) / Magnemite: Thunder Wave
    Turn 2: Magnemite: Thundershock (99%) / Zubat: Bite (28/42)
    Turn 3: Magnemite: Switch to Shallot (Mienfoo) / Zubat: Bite (45/49)
    Turn 4: Mienfoo: Meditate / Zubat: Paralyzed
    Turn 5: Mienfoo: Meditate / Zubat: Wing Attack (21/49)
    Turn 6: Mienfoo: Acrobatics (the rest)
    (Level up for Shallot.)
    Turn 7: Mienfoo: Brick Break (99%) / Type: Null: Tackle (5/51)
    Turn 8: Mienfoo: Brick Break (the rest)

    Triggered fake Sturdy more than Lisa's actual Sturdy.

    Dropped Lisa's Thunder Shock for Charge Beam. Dislikes the accuracy loss. Ultimately chose it for a 70% chance of +1 Special Attack.

    Ferreted out the Scald Technical Machine here. Questions why they would give something so powerful here.

    Why? Confused Shallot with Supersonic. Hit itself 2 of 3 times. Fainted itself instead of landing the kill. Confused other things for 3 attacks worth. Never lasted for that long or did anything.

    Leveled Shallot and Lisa to 20. Plan for Wishiwashi: Light Screen turn 1. Kill Alomomola OR Thunder Wave on Totem Wishiwashi, depending on the ally.

    (+1 Defense on Totem Wishiwashi)
    Turn 1: Magnemite: Light Screen / Totem Wishiwashi: Water Gun (34/46)
    (Called for help. New enemy: Wishiwashi.)
    Turn 2: Magnemite: Thunder Wave at Totem Wishiwashi (miss) / Totem Wishiwashi: Aqua Ring / Wishiwashi: Soak
    Turn 3: Magnemite: Thunder Wave at Totem Wishiwashi / Wishiwashi: Feint Attack (29/46) / Totem Wishiwashi: Paralyzed
    Turn 4: Wishiwashi: Helping Hand / Magnemite: Charge Beam at Totem Wishiwashi (30%, +1 Special Attack) / Totem Wishiwashi: Growl
    Turn 5: Wishiwashi: Helping Hand / Magnemite: Charge Beam at Totem Wishiwashi (50%, +1 Special Attack) (Sitrus Berry heal to 40%) / Totem Wishiwashi: Paralyzed
    Turn 6: Wishiwashi: Helping Hand / Magnemite: Charge Beam at Totem Wishiwashi (the rest, +1 Special Attack) / Totem Wishiwashi: Fainted
    Turn 7: Wishiwashi: Helping Hand / Magnemite: Charge Beam (miss)
    Turn 8: Wishiwashi: Helping Hand / Magnemite: Charge Beam (the rest)

    Was practically given that victory. Whines a bit about missing two 90% attacks. Scored a few paralyzes in return.

    Decided not to go for this section's banner. Could use Water-types. Helps less on Salazzle than you might think between +1 Special Defense and heavy Poison damage. On to the next section.

    Section 4: Totem Salazzle
    Event: Special Anniversary banner. Features a 6% focus rate. Gifts all players one free summon too.
    This section's Focus Pokemon: Dratini, Riolu, and Starly
    Level limit: 21 + 1

    Waited for this. Summoning for sure.
    Summon Satchel 2.png
    Fire, Fighting, and Bug. Not ideal at all.
    Spoiler: Satchel 2 Results

    Fighting first.
    Pancham Summon GIF.gif

    Larvesta Summon GIF.gif
    Then Fire.

    Hm. Waffles on the Bug. Sees a few good possibilities and a lot of bad. Benefits from more options, though. Costs relatively little. Curses this enticing pricing scheme. Incoming poor decision.

    Skorupi Summon GIF.gif

    Stats for the newcomers:

    Juggernaut the Pancham
    Rarity: 4-stars
    Level: 1
    Nature: Bashful
    Ability: Scrappy (Hidden Ability)
    Hitpoints: 12
    Attack: 6 (Probably good)
    Defense: 6
    Special Attack: 6
    Special Defense: 6
    Speed: 6 (Also probably good)
    Moves: Tackle, Leer, and Foul Play

    Received a Destiny Knot and Foul Play for their bonuses. Never needs to worry about the Gastly problem with Juggernaut around.

    Originates from Marvel Strike Force (and probably many other Marvel media). Seems to be a free-to-play character. Relies on fists and bashing stuff.

    Ras the Larvesta
    Rarity: 3-stars
    Level: 1
    Nature: Mild
    Ability: Swarm (Hidden Ability)
    Hitpoints: 12
    Attack: 7 (Great)
    Defense: 5
    Special Attack: 6
    Special Defense: 6 (Perfect)
    Speed: 6
    Moves: Ember, String Shot, and Magnet Rise (egg move)

    Gross. Evolves at level 59. Will never happen outside of extreme coddling, likely right before the Champion.

    Named them after Ras from Epic Seven. Learns X-Slash. Sounds close to the bug move X-Scissor. Done.


    Alex the Skorupi
    Rarity: 4-stars
    Level: 1
    Nature: Adamant (Everstone)
    Ability: Sniper
    Hitpoints: 11
    Attack: 6
    Defense: 7 (High)
    Special Attack: 4
    Special Defense: 6
    Speed: 6
    Moves: Bite, Poison Sting, Leer, and Night Slash (egg move)

    Was excited at first. Relied on Drapion as a physical wall previously. Designed the parent to be a critical machine, however. Picked up a Scope Lens in the last section, though. Looks forward to seeing its performance.

    Pulled Alex's name from Dragalia Lost. Actually played this game. Benefitted from knowledge here. Possesses poison abilities as a Darkness-elemented character. Fits for Drapion.

    ...Oh. Values Skorupi even more. Realized Pancham's evolution requirement of being with a Dark type. Could be more ideal (Drapion's 40 versus Pancham's 32), but doable.


    Strategy time. Needs to take stock of the situation. Prefers not to summon after this section until Nanu (the Anniversary banner). What are the major threats until then?
    - Totem Salazzle: Resists every same-type attack move on the team except Lisa's Electric attacks. Lacks much physical defense, though. May be able to power through with Acrobatics and a Night Slash.
    - Totem Lurantis: Walls Lurantis itself quite well. Eyes its partners more. Suffers a crippling team weakness to Trumbeak's Pluck. Dislikes a Fire-type Weather Ball from Castform. Should do okay with Lisa here.
    - Olivia: Owns two Fighting types and a Steel type. Easy.
    - Totem Vikavolt: Hm. No strong options here. Could push for level limit increases to evolve Lisa into Magneton. Grimaces at the potential onslaught of Mud Slaps (mostly accuracy, but damage a bit too). Might hit hard enough to sink Vikavolt before going down, though.
    - Guzma: Zap everything with Lisa. Again. Carries the ball home with Acrobatics, if necessary.
    - Totem Mimikyu: Picks up Flash Cannon in time. Stands little chance in the event of a bad Hypnosis from Haunter/Gengar. Doubts Lisa's odds of outspeeding them. May pump out Night Shades, however.

    Solutions:
    - Summon again. How do these focus Pokemon help, though? Does not need another Fighting type or Fairy weakness. Considers Starly unhelpful in these instances.
    - Level limit upgrades. Beat them with raw stats. Maybe.
    - Move tutor. Learns lots of handy moves on Juggernaut (Pancham). Hurts Salazzle badly with Zen Headbutt. Lacks the Speed and defenses to weather a hit from Mimikyu, however. Alternatively, Aqua Tail on Alex (Skorupi).
    - Refresh hearts on Lisa. Costs a fortune. Amounts to an all-in. Lives and dies with Lisa. Basically said that above, though. Almost feels like a solo challenge run.
    - +1 Party Slot. Summoned poor options. Helps very little.

    Mulled it over while leveling the newcomers. Swept through the rest of Melemele for money and experience (minus the Sharpedo spots). Sold unneeded items. Carried 98084 Pokedollars. Decided to summon. Needs Pokemon.

    Noticed an error. Forgot to use the special banner rate last time. Compensated by making the focus 9% for this satchel.

    Summon Satchel 3.png
    Fire, Rock, and Bug.
    Spoiler: Satchel 3 Results

    Groans. Almost repeated last satchel's types. Rock first, no doubt. Hoped for an answer to Flying.
    Kabuto Summon GIF.gif

    ...Blast. Will choose the Fire-type too. Sees no world where Ras the Larvesta does anything past Lurantis. Please not another Larvesta.

    Ponyta Summon GIF.gif

    Hard no on the Bug. Filled the 3-star pool with initial Bug-types like Weedle. Does not need another Pokemon with a Flying weakness either. Must know for curiosity's sake. ...4-star Scyther. Sighs. Figures.

    New Pokemon stats:

    Medusa the Kabuto
    Rarity: 3-stars
    Level: 1
    Nature: Serious
    Ability: Weak Armor (Hidden Ability)
    Hitpoints: 11 (Good)
    Attack: 6
    Defense: 7 (Good)
    Special Attack: 6
    Special Defense: 5
    Speed: 6
    Moves: Scratch, Harden, and Mud Shot (egg move)

    Interesting. Welcomes your presence against Salazzle. Never used a Weak Armor Pokemon before. Seems like a bad ability.

    Stole their name from Fate/Grand Order. Prioritized the scythe rather than a main character. Happens to be Earth-element. Comes sort of close.

    Slapped Scald on Medusa immediately. Probably outperforms its only physical Water move by level-up (Aqua Jet at 31). Upgrades to Liquidation with a move tutor after evolving.

    Pecorine the Ponyta
    Rarity: 3-stars
    Level: 1
    Nature: Naive
    Ability: Flame Body (Hidden Ability)
    Hitpoints: 12 (Perfect)
    Attack: 7 (Probably perfect)
    Defense: 6
    Special Attack: 6
    Special Defense: 5
    Speed: 7 (Good)
    Moves: Growl, Tackle, and Double Kick (egg move)

    Okay, a much better Fire option. Rolled a meh egg move. Could have known High Horsepower or Hypnosis.

    Picked Pecorine from Princess Connect as their namesake. Felt like a princess-y Pokemon. Chose the one with orange hair.


    Drowns in level 40 evolutions now: Kabuto, Ponyta, Skorupi, and essentially Pancham.


    Solves the immediate problem. Awaits next section's bundle deals before spending more.

    Engaged in a (forced) Battle Royal with Lisa. Blasted Brionne for the win. (Earns nothing for winning or losing, other than pride.)

    Challenged the wicked Kadabra trainer at Wela Volcano.

    Turn 1: Kadabra: Psybeam (20/56, confused) / Ponyta: Flame Wheel (80%)
    Turn 2: Kadabra: Disable / Ponyta: Disabled
    Turn 3: Kadabra: Psybeam (0/56) / Ponyta: Fainted
    Turn 4: Kadabra: Psybeam (critical, 0/46) / Kabuto: Fainted
    Turn 5: Kadabra: Psybeam (0/58) / Pancham: Fainted

    Sheesh. Outsped Pectorine (Ponyta), despite being +Speed (and one level under Kadabra). Saved beforehand for a reason. Replayed the battle. Switched to Stomp instead of a second Flame Wheel.

    Coughs. Two Ancient Powers boosts from one trainer's Corsola (out of three uses). What is going on?

    Trained the Pokemon for Salazzle up to 22. Lost Medusa once to a Salandit's Dragon Rage while training. Forgot about that. Refuses to add permadeath to challenges because of updates like this.

    The lineup for Totem Salazzle:
    - Medusa the Kabuto: Super effective attacks and resistant to Fire and Poison. The obvious choice. Doubts its ability to defeat Salazzle. Relies on Kabuto's unimpressive Special Attack versus Salazzle's massive Special Defense. Guesses three Scalds to topple it.
    - Pecorine the Ponyta: Resists Fire. Delivers decent damage with Stomp and good Speed.
    - Shallot the Mienfoo: Brings Fake Out. Could tip over a teetering Salazzle.

    Gave Pecha Berries (poison removal) to Medusa and Pecorine. Emptied Shallot's hands for Acrobatics. Lost 10 hitpoints on Medusa to the trial's lead-in (namely, Magmar's Fire Spin).

    (+1 Special Defense on Totem Salazzle)
    Turn 1: Totem Salazzle: Flame Burst (32/52) / Kabuto: Scald (critical, 80%) (Totem Salazzle's Petaya Berry: +1 Special Attack)
    (New enemy: Salandit)
    Turn 2: Totem Salazzle: Toxic (Kabuto's Pecha Berry) / Salandit: Taunt / Kabuto: Rock Tomb (miss)
    Turn 3: Salazzle: Torment / Salandit: Poison Gas / Kabuto: Scald at Totem Salazzle (the rest)
    (Level up. Poison damage to 27/53)
    Turn 4: Kabuto: Switch to Shallot / Salandit: Venoshock (36/57)
    Turn 5: Mienfoo: Fake Out (25%) / Salandit: Flinch
    Turn 6: Mienfoo: Acrobatics (the rest)
    (Level up.)

    Lauds the vicious opening critical. Was the 5% miss chance really necessary? (Spaced on Rock being super-effective. Thought Poison canceled it out. Would have been way better.)

    Finishes this segment. Farewell until next update.

    Spoiler: Playthrough and Pokemon Stats

    In-battle items used
    - Potion: 1
    - Super Potion: 3

    Fainted
    - Shallot the Mienfoo: 4
    - Lisa the Magnemite: 2
    - Pecorine the Ponyta: 1
    - Medusa the Kabuto: 2
    - Juggernaut the Pancham: 1

    Current money: 79252

    Upgrades
    - Level Limit +1

    Expeditures outside the Gacha shop
    None

    Pokemon Stats
    Shallot the Mienfoo
    Level: 23
    Rarity: 4-stars
    Ability: Reckless
    Nature: Bold
    Hitpoints: 60
    Attack: 46
    Defense: 30
    Special Attack: 37
    Special Defense: 35
    Speed: 39
    Moves: Acrobatics, Brick Break, Meditate, and Fake Out

    Lisa the Magnemite
    Level: 22
    Rarity: 3-stars
    Ability: Sturdy
    Nature: Calm
    Hitpoints: 50
    Attack: 18
    Defense: 40
    Special Attack: 53
    Special Defense: 39
    Speed: 28
    Moves: Light Screen, Thunder Wave, Charge Beam, and Sonic Boom

    Ras the Larvesta
    Level: 20
    Rarity: 3-stars
    Ability: Swarm
    Nature: Mild
    Hitpoints: 57
    Attack: 48
    Defense: 26
    Special Attack: 34
    Special Defense: 33
    Speed: 32
    Moves: Ember, Take Down, Magnet Rise, and Absorb

    Alex the Skorupi
    Level: 22
    Rarity: 4-stars
    Ability: Sniper
    Nature: Adamant
    Hitpoints: 51
    Attack: 35
    Defense: 51
    Special Attack: 18
    Special Defense: 36
    Speed: 40
    Moves: Bug Bite, Poison Sting, Leer, and Night Slash

    Juggernaut the Pancham
    Level: 22
    Rarity: 4-stars
    Ability: Scrappy
    Nature: Bashful
    Hitpoints: 63
    Attack: 51
    Defense: 39
    Special Attack: 29
    Special Defense: 33
    Speed: 28
    Moves: Slash, Leer, Foul Play, and Brick Break

    Medusa the Kabuto
    Level: 23
    Ability: Weak Armor
    Nature: Serious
    Hitpoints: 53
    Attack: 49
    Defense: 53
    Special Attack: 35
    Special Defense: 26
    Speed: 34
    Moves: Rock Tomb, Thief, Mud Shot, and Scald

    Pecorine the Ponyta
    Level: 22
    Ability: Flame Body
    Nature: Naive
    Hitpoints: 60
    Attack: 49
    Defense: 35
    Special Attack: 41
    Special Defense: 35
    Speed: 58
    Moves: Growl, Stomp, Double Kick, and Flame Wheel
     
    24,712
    Posts
    3
    Years
    • Any pronoun
    • Seen today
    Pushed another update to the game: version 1.2! Continue your journeys on Akala Island through the Lush Jungle. Meet old friends and new. Learn about the mysterious Ultra WormholesTM appearing in Alola. Prove yourself against Olivia, the island's kahuna!

    Section 5: Totem Lurantis
    This section's Focus Pokemon: Honedge, Pumpkaboo, and Makuhita
    Level limit: 23 + 1
    Bundle offers:
    - +1 Item Limit and 1 Z-Crystal for 33750 Pokedollars
    - +3 PC Slots and 1 Move Relearner for 11250 Pokedollars

    Ignores the second bundle outright. Ponders on the first. Could pick Steel's Z-Crystal for a Z-Flash Cannon on Mimikyu. Competes with Eviolite, a Chesto Berry, or even Refresh hearts. Serves some purpose later, but nothing huge.

    Mmm...no. Values Z-Crystals less than even 18750.

    Purchases the VIP Pass for 8000. Likely deserved a higher price tag. May recoup the expenses in one treasure run, plus berries. Sort of prefers it cheap for the berries, though. Provides spot-healing. Idea for next time: plant Oran Berries for free.

    2 Hard Stones and 2 Float Stones from a Brilliant Stone search. Totals 5000 Pokedollars. May have priced this decently after all.

    Opts to buy +2 level limit and +1 party slot for a combined 58000. Might as well benefit from them now. Bumps up this section's level limit to 26.

    Hello, Colress. Thank you for Flame Charge. Goodbye forever. Wonders why these Generation 5 cameos were put in. Snuck in Dexio and Sina with Zygarde. What are Colress and Grimsley connected to? The introduction of Flame Charge in Generation 5?

    Discovered an interesting bit of trivia. Fought a double battle with Alex and Pecorine. Picked Poison Sting for poisoning because of ineffective options. Defeated one Machop with Pecorine. Leveled up Alex before its turn. Replaced Poison Sting with Poison Fang. Still used Poison Sting, despite no longer knowing it.

    Battled the Route 8 Ace Trainer.
    Turn 1: Ponyta: Switch to Lisa (Magnemite) / Wingull: Water Pulse (29/50, confused)
    Turn 2: Wingull: Water Pulse (8/50) / Magnemite: Charge Beam (100%, +1 Special Attack)
    Turn 3: Magnemite: Super Potion (heal to full) (Final item) / Fearow: Pursuit (37/50)
    Turn 4: Fearow: Pursuit (25/50) / Magnemite: (Not confused) Charge Beam (100%)

    A brief, but nasty fight. Thank you for not using your Z-move.

    Another Ace Trainer fight. Remembered Sylveon somewhere on this route. Came prepared.

    Turn 1: Pancham: Brick Break (90%) / Goomy: Dragon Breath (36/65)
    Turn 2: Goomy: Switch to Sylveon / Pancham: Brick Break (15%)
    Turn 3: Pancham: Switch to Alex / Sylveon: Draining Kiss (41/53, heal to 95%)
    Turn 4: Skorupi: Poison Fang (40%) / Sylveon: Swift (20/53)
    Turn 5: Skorupi: Switch to Lisa / Sylveon: Swift (43/52)
    Turn 6: Sylveon: Swift (34/52) / Magnemite: Light Screen
    Turn 7: Sylveon: Swift (30/52) / Magnemite: Mirror Shot (40%)
    Turn 8: Sylveon: Draining Kiss (24/52) (Heal to 10%) / Magnemite: Mirror Shot (the rest)
    (Level up.)
    Turn 9: Magnemite: Mirror Shot (the rest) / Goomy: Fainted

    Wow, an enemy trainer switch. Could be the only one this playthrough.

    Suffered a one-shot on Alex from a Psychic Z-move against another route boss. Earned the Nature Power Technical Machine for winning. Cannot wait to use that on nobody.

    Finally reached a better grinding spot. Preyed on Oricorios before. Bullies Trumbeaks and Fletchinders instead now. Ought to be easy for...the Pokemon with good levels already. Curses this massive Flying weakness. Upgrades to Raticates and Gumshoos in the next section, at least. Jumped up to level 26 after one death by Ras.

    Totem Lurantis's lineup:
    - Lisa the Magnemite. Leads with Thunder Wave. Resists a lot of the incoming damage.
    - Pecorine the Ponyta. Obvious Fire choice.
    - Shallot the Mienfoo. Largely for Fake Out. Deals fair damage with Acrobatics.
    - Medusa the Kabuto. A Rock/Water type to a Grass trial? Serves to clean up Lurantis's partners after it goes down. Handles Pluck, Rock Blast, and Weather Ball (Fire) well.

    Hm. Probably prioritizes partners over Lurantis. Makes Kabuto pointless. Oh well. Too late now. Handed out freshly harvested Sitrus Berries to everyone but Shallot.

    (+2 Speed to Totem Lurantis)
    Turn 1: Totem Lurantis: X-Scissor (47/57) / Magnemite: Thunder Wave
    (New enemy: Trumbeak.)
    Turn 2: Totem Lurantis: Razor Leaf (miss) / Trumbeak: Pluck (Stole the Sitrus Berry) / Magnemite: Charge Beam (at Trumbeak, 100%)
    Turn 3: Magnemite: Switch to Pecorine (Ponyta) / Totem Lurantis: Paralyzed
    Turn 4: Ponyta: Flame Wheel (40%) / Totem Lurantis: Razor Leaf (miss)
    (New enemy: Castform.)
    Turn 5: Ponyta: Double Kick (at Castform 70%) / Totem Lurantis: Paralyzed / Castform: Sunny Day
    Turn 6: Ponyta: Stomp (at Castform, 25%) / Totem Lurantis: Synthesis (heal to full) / Castform: Headbutt (55/70)
    Turn 7: Ponyta: Stomp (at Castform, the rest) / Totem Lurantis: Solar Blade (30/70) (Sitrus Berry heal to 47/70)
    Turn 8: Ponyta: Flame Wheel (70%) / Totem Lurantis: X-Scissor (36/70)
    Turn 9: Ponyta: Flame Wheel (the rest)
    (Level up.)

    Feels so bad for Lurantis. Missed two 95% Razor Leaves. Incidentally comes the day after suggesting that as a Pokemon achievement in another thread. Foreshadowing?

    What is happening to these Totem Pokemon?
    - Raticate: One-shot. No surprise.
    - Wishiwashi: Three straight turns of paralysis. Hit for damage once (on Turn 1), and then never again.
    - Salazzle: Opening critical.
    - Lurantis: Two 95% misses.

    Odd. Claimed the food for the trial was spicy. How? Used a Rocky Helmet, Fresh Water, Rare Bone, Thick Club, Mago Berry (sweet), Revival Herb (bitter), Small Mushroom, and Miracle Seed. Makes no sense.

    Received a Smart Strike Technical Machine. Could learn this on Pecorine after evolving into Rapidash. Helps so few Pokemon in this game.


    Section 6: Olivia
    Level limit: 26 + 3
    This section's Focus Pokemon: Wailmer, Mareanie, and Ralts

    Not a bad banner. Is not desperate enough to summon.

    Bought another VIP Pass for 8000.

    ...Whoops. Never left the grinding mindset. Forgot to re-equip the Amulet Coin for a while. Probably lost 5000 Pokedollars.

    Yes please to an Eviolite. Will be able to use it for a looooong time.

    Defeated trainers along the way without too many problems. Struggled against a Chinchou between Volt Absorb, confusion, and paralysis. Led to the Plumeria fight:
    Turn 1: Golbat: Confuse Ray / Kabuto: Rock Tomb (90%, -1 Speed)
    Turn 2: Golbat: Air Cutter (53/64) / Kabuto: (Not confused) Rock Tomb (the rest)
    Turn 3: Salandit: Poison Gas / Kabuto: Rock Tomb (100%)

    Easy. No Salazzle yet, apparently. Much less scary than the Gyarados or Hariyama trainers just beforehand.

    Did not record the Diglett's Tunnel route boss. Short version: Smashed everyone with Hariyama between Knocking Off Lucky Eggs and an All Out Pummeling. Brought Juggernaut from full health to 2 hitpoints on the Z-move. Won thanks to Alex's Poison Fang. Swapped between Pokemon while poison killed it. Sacrificed Ras in the process.

    The team against Olivia:
    - Lisa the Magnemite. Resists Rock and Nosepass's Electric stuff.
    - Juggernaut the Pancham. Fighting. Duh.
    - Shallot the Mienfoo. Fighting. Still duh.
    - Medusa the Kabuto. Water. Of course.

    Chose all the ones that resisted Rock, rather than the ones weak to it. Sitrus Berries for everyone except an Amulet Coin on Lisa. (Should have brought that new Eviolite. Whoops.)

    Turn 1: Magnemite: Mirror Shot (60%) / Nosepass: Rock Slide (55/63)
    Turn 2: Magnemite: Mirror Shot (the rest)
    Turn 3: Magnemite: Switch to Shallot / Boldore: Mud-Slap (68/73, -1 Accuracy)
    Turn 4: Mienfoo: Fake Out (critical, 3%) / Boldore: Flinched
    Turn 5: Mienfoo: Switch to Medusa / Boldore: Headbutt (57/65) (Medusa's Weak Armor)
    Turn 6: Kabuto: Scald (85%) / Boldore: Rock Blast (4 hits, Weak Armor x3, Sitrus Berry, 0/65)
    Turn 7: Boldore: Super Potion (heal to 80%) / Magnemite: Charge Beam (40%, +1 Special Attack)
    Turn 8: Magnemite: Mirror Shot (the rest)
    Turn 9: Lycanroc: Bite (30/63) / Magnemite: Flinched
    Turn 10: Lycanroc: Bite (1/63) / Magnemite: Thunder Wave
    Turn 11: Magnemite: Super Potion (heal to 62/63) (Final item) / Lycanroc: Full Heal
    Turn 12: Lycanroc: Bite (35/63) / Magnemite: Thunder Wave
    Turn 13: Magnemite: Mirror Shot (miss) / Lycanroc: Bite (7/63)
    Turn 14: Magnemite: Mirror Shot (100%)

    Big oof on the Rock Blast. Shredded Medusa's defenses.

    Spent five extra turns and an item because of one Bite flinch. Was uncertain of the Mirror Shot one-shot, even at +1 (especially after the Boldore). Wanted a more certain victory. Figured it knew something besides Bite and a Rock move. Apparently not.

    Hauled in a Red Shard, Dusk Stone, Revive, and Hard Stone from the VIP Pass cave expedition. Lucked out in pricing that perk.

    Closes this update. Deals with Totem Mimikyu next time. Farewell for now.

    Spoiler: Playthrough and Pokemon Stats

    In-battle items used
    - Potion: 1
    - Super Potion: 5

    Fainted
    - Shallot the Mienfoo: 4
    - Lisa the Magnemite: 2
    - Pecorine the Ponyta: 1
    - Medusa the Kabuto: 3
    - Juggernaut the Pancham: 1
    - Alex the Skorupi: 1
    - Ras the Larvesta: 2

    Current money: 79076

    Upgrades
    - Level Limit +3
    - Party Slot +1

    Expeditures outside the Gacha shop
    None

    Pokemon Stats
    Shallot the Mienfoo
    Level: 29
    Rarity: 4-stars
    Ability: Reckless
    Nature: Bold
    Hitpoints: 73
    Attack: 59
    Defense: 38
    Special Attack: 46
    Special Defense: 42
    Speed: 50
    Moves: Acrobatics, Brick Break, Meditate, and Fake Out

    Lisa the Magnemite
    Level: 29
    Rarity: 3-stars
    Ability: Sturdy
    Nature: Calm
    Hitpoints: 63
    Attack: 26
    Defense: 52
    Special Attack: 69
    Special Defense: 50
    Speed: 38
    Moves: Light Screen, Thunder Wave, Charge Beam, and Mirror Shot

    Ras the Larvesta
    Level: 26
    Rarity: 3-stars
    Ability: Swarm
    Nature: Mild
    Hitpoints: 71
    Attack: 63
    Defense: 32
    Special Attack: 42
    Special Defense: 41
    Speed: 41
    Moves: Flame Charge, Take Down, Magnet Rise, and Acrobatics

    Alex the Skorupi
    Level: 29
    Rarity: 4-stars
    Ability: Sniper
    Nature: Adamant
    Hitpoints: 65
    Attack: 46
    Defense: 67
    Special Attack: 24
    Special Defense: 47
    Speed: 54
    Moves: Bug Bite, Poison Fang, Leer, and Night Slash

    Juggernaut the Pancham
    Level: 29
    Rarity: 4-stars
    Ability: Scrappy
    Nature: Bashful
    Hitpoints: 80
    Attack: 68
    Defense: 50
    Special Attack: 37
    Special Defense: 42
    Speed: 38
    Moves: Slash, Leer, Foul Play, and Brick Break

    Medusa the Kabuto
    Level: 29
    Ability: Weak Armor
    Nature: Serious
    Hitpoints: 65
    Attack: 63
    Defense: 66
    Special Attack: 43
    Special Defense: 33
    Speed: 44
    Moves: Rock Tomb, Thief, Mud Shot, and Scald

    Pecorine the Ponyta
    Level: 29
    Ability: Flame Body
    Nature: Naive
    Hitpoints: 77
    Attack: 67
    Defense: 45
    Special Attack: 53
    Special Defense: 45
    Speed: 75
    Moves: Growl, Stomp, Double Kick, and Flame Wheel
     
    24,712
    Posts
    3
    Years
    • Any pronoun
    • Seen today
    Updated the game to version 1.3! Whisks trainers away to Ula'ula Island. Meet the creator of Festival Plaza and undergo their trial! Brave an abandoned megamart in search of a Totem Pokemon! Confront Team Skull on their home turf! All this and more in this new game update.

    Section 7: Totem Vikavolt
    Level limit: 27 + 3
    This section's Focus Pokemon: Houndour, Cutiefly, and Kecleon
    Today's sale: Switch Battle Style for 45000.

    What a conundrum. Worries about Totem Pokemon at present. Gains nothing by getting Switch style. Values it a lot later, however. Lacks many Pokemon with the stats to set up buffs well. Relies on good switch-ins more than usual. Saves 30000 by pouncing now.

    ...Pass? Weighs it against more Pokemon. Do you value 2 (close to 3) more Pokemon or Switch? Pokemon. Sees a wall beyond Mimikyu on the horizon: Hapu. What does this team do against Hapu? Will have Pangoro, Mienfoo (potentially Mienshao with all the level limit increases), Larvesta, and four Ground weaknesses. Describes that as a disaster in the making. Summons before then, sure. What if another Fire, Bug, [X] satchel shows up? May need the cash. (Could actually use the Bug.)

    Hurts so bad to decline. Loves this challenge because of it, though. May rethink it later this section.

    Must be careful about levels. Increased the limit by only one. Almost hit it on Lisa before even starting.

    Nihilego battle:
    (+2 Defense for Nihilego)
    Turn 1: Nihilego: Venoshock (41/65) / Kabuto: Scald (30%)
    Turn 2: Kabuto: Switch to Lisa / Nihilego: Venoshock (immune)
    Turn 3: Nihilego: Psywave (37/63) / Magnemite: Light Screen
    Turn 4: Nihilego: Headbutt (32/63) / Magnemite: Charge Beam (15%)
    Turn 5: Magnemite: Charge Beam (15%, +1 Special Attack) / Nihilego: Fled

    Gladly accepts a Psychic Technical Machine over malasadas.

    ...Uh. Was not prepared to face Hau immediately afterward. Enters with the same team for Olivia.

    Turn 1: Kabuto: Switch to Lisa / Alolan Raichu: Psychic (37/63)
    Turn 2: Alolan Raichu: Psychic (12/63) / Magnemite: Light Screen
    Turn 3: Magnemite: Super Potion (heal to full) (Final item) / Alolan Raichu: Psychic (51/63, -1 Special Defense)
    Turn 4: Alolan Raichu: Psychic (33/63) / Magnemite: Mirror Shot (15%)
    Turn 5: Alolan Raichu: Psychic (12/63) / Magnemite: Mirror Shot (15%)
    Turn 6: Alolan Raichu: Psychic (0/63)
    (Light Screen down)
    Turn 7: Alolan Raichu: Psychic (critical, 0/80) / Pancham: Fainted
    Turn 8: Alolan Raichu: Psychic (0/65) / Kabuto: Fainted
    Turn 9: Mienfoo: Fake Out (15%) / Alolan Raichu: Flinched
    Turn 10: Alolan Raichu: Psychic (0/73)

    Brutal. Continues the story as normal. Sacrifices nothing for losing (except not getting the experience or victory money). Highlights yet another team weakness. (Improves with two Dark evolutions, fortunately.)

    Strolled through Malie Garden. Dislikes Hau and some nameless NPC blocking your route to the center. Extends to a lot of this game's roadblocks.

    Good Technical Machines at the shop: Swords Dance, Bulldoze, and U-turn. Lives without them for now.

    Sold off stuff. Chucked Pyukumuku. Bought another VIP Pass. 142432 Pokedollars. Will pull the trigger on Switch. Saves money in the long run. Should have enough with the oodles of trainers about. Demonstrated how rough trainers can get with Hau.

    Challenged Molayne in front of the Electric trial.

    Turn 1: Pancham: Switch to Lisa / Skarmory: Air Cutter (61/63)
    Turn 2: Skarmory: Metal Claw (58/63) / Magnemite: Charge Beam (45%, +1 Special Attack)
    Turn 3: Skarmory: Air Cutter (critical, 54/63) / Magnemite: Charge Beam (the rest, +1 Special Attack)
    (Level up. Switch to Juggernaut.)
    Turn 4: Alolan Dugtrio: Sucker Punch (64/80) / Pancham: Brick Break (100%, -1 Speed from Tangling Hair)
    (Level up.)
    Turn 5: Metang: Zen Headbutt (10/82) / Pancham: Foul Play (35%)
    Turn 6: Pancham: Switch to -- / Metang: Pursuit (0/82)
    Turn 7: Ponyta: Flame Wheel (critical, 55%) / Metang: Pursuit (65/77)
    Turn 8: Metang: Super Potion (Heal to 75%) / Ponyta: Flame Wheel (35%, Burn) (Shell Bell heal to 69/77)
    Turn 9: Metang: Full Heal / Ponyta: Flame Wheel (the rest)

    Feels like cheating to use Switch. Grimaces at that Pursuit, also. Whatever.

    Evolved Lisa into Magneton. Thank goodness for someone finally evolving. Will not see it again for a while. Replaced Mirror Shot for Tri Attack for the upcoming battle.

    Ooh, a Comet Shard. Thought there was one in here, but still. Sells for a monstrous 30000 Pokedollars. Underestimated how much cash you can get from items. Hawked X items and vitamins for good cash too. Could pawn off rare candies for 5000 each.

    Trained the team to 30. Matches up against evolved Pokemon regularly now. Delivers increasingly underwhelming damage. Hit a Marowak for less than half its health with Alex's critical Night Slash (with Sniper). Bodes ill.

    Lineup for Totem Vikavolt:
    - Lisa the Magneton. Equipped them with an Eviolite. Should be sturdy, in more ways than one. Please hurt it bad.
    - Pecorine the Ponyta. Fire for a big bug. Remembers the Occa Berry on Vikavolt.
    - Shallot the Mienfoo. Fake Out, as always.
    - Alex the Skorupi. Solid Defense for a physical-focused Totem Pokemon. (Why did they give Vikavolt purely physical moves? Designed it for special moves.)

    Hm. 75% to a Grubbin. Paralyzed with the first Tri Attack, though. ...Is Vikavolt going to get frozen? Jives with the luck Totem Pokemon have gotten so far. Suffered a lot of damage on Pecorine in the lead-up. (Wanted to preserve Lisa's health a little more.)

    (+1 to all stats for Totem Vikavolt.)
    Turn 1: Magneton: Tri Attack (critical, 45%) / Totem Vikavolt: Spark (59/80)
    (New enemy: Charjabug.)
    Turn 2: Magneton: Tri Attack (at Totem Vikavolt, 20%) / Totem Vikavolt: Charge / Charjabug: Mud-Slap (47/80, -1 Accuracy)
    Turn 3: Magneton: Tri Attack (at Totem Vikavolt, 10%) / Totem Vikavolt: Charge / Charjabug: Mud-Slap (35/80, -1 Accuracy)
    Turn 4: Magneton: Tri Attack (at Totem Vikavolt, 10%) / Totem Vikavolt: Charge / Charjabug: Mud-Slap (23/80, -1 Accuracy)
    Turn 5: Magneton: Switch to Shallot / Totem Vikavolt: Charge / Charjabug: Mud-Slap (71/76, -1 Accuracy)
    Turn 6: Mienfoo: Acrobatics (at Totem Vikavolt, the rest) / Charjabug: Thunder Wave
    Turn 7: Charjabug: Spark (34/76) / Mienfoo: Acrobatics (40%)
    Turn 8: Mienfoo: Switch to Alex / Charjabug: Spark (45/67)
    Turn 9: Skorupi: Night Slash (critical, 40%) / Charjabug: Thunder Wave
    Turn 10: Skorupi: Paralyzed / Charjabug: Spark (23/67)
    Turn 11: Skorupi: Bug Bite (the rest)

    No freeze. Smiled at the opening critical, though. Applauds Lisa and Shallot for hitting through accuracy drops.


    Section 8: Totem Mimikyu
    Level limit: 31 + 3
    This section's Focus Pokemon: Pinsir, Snover, and Lunatone

    Pass on the banner. Helps against Hapu. Would worry about Rock moves for the first two and Gastrodon for Lunatone. (Swaps a hypothetical Lunatone out for free, though, thanks to that Switch purchase.)

    Recorded a Hariyama trainer. Remembers trouble around here. Might be a Bewear somewhere too.

    Turn 1: Ponyta: Growl / Hariyama: Belly Drum
    Turn 2: Ponyta: Stomp (20%) / Hariyama: Vital Throw (0/79)
    Turn 3: Mienfoo: Fake Out (15%) / Hariyama: Flinched
    Turn 4: Mienfoo: Acrobatics (critical, the rest)

    Explains why this was a terror. Figured it was bad because of being Hariyama. Faced two already.

    Oh, right. Guzma. Should be no issue. Enjoys how much they shoehorned in Kukui's "four" animation. Finds Dolphin's smile while confronting a gang leader a bit funny, also.

    Turn 1: Magneton: Charge Beam (55%) (Golisopod's Emergency Exit)
    Turn 2: Magneton: Switch to Pecorine (Ponyta) / Ariados: Sucker Punch (miss)
    Turn 3: Ariados: Sucker Punch (54/79) / Ponyta: Flame Weak (65%)
    Turn 4: Ariados: Sucker Punch (30/79) / Ponyta: Flame Wheel (the rest)
    (Level up. Switch to Lisa.)
    Turn 5: Magneton: Charge Beam (the rest) / Golisopod: Fainted

    Yep, no issue. Dislikes how much damage Pecorine took, but--wait. Swapped the Amulet Coin to Lisa. Had the Eviolite on Pecorine. ...Oh boy. Good news: Evolves almost everyone in time for Nanu.

    Collector: "You see those leaves around here? I heard that in the Kalos region there are Pokemon with those leaves in their mouths." Yes. Leads with one right now.

    Underutilized the Ride Pager Mudsdale. Never used rocky ground in any sections before now.

    Smirks. Decided between reaching the next Pokemon Center and challenging trainers. Chose the trainers. Realized how good swimmers would be for Lisa's level grind later (not currently in the party, due to being close to the level limit) while beginning the first beach battle. Threw out Whiscash and Sandygast. Neeeeever mind.

    Met Hau in front of a hotel. Did not want a battle. Whew.

    Hau: "The Elite Four and our island kahunas...I wonder which ones are stronger." About that...

    Psh. Battled against a Gabite. Missed every attack (three total) with Sandstorm active. Served as a poor debut for Shallot's new Drain Punch.

    Trained everyone to 34. Thrashed two route bosses in the process. Sits on 217496 Pokedollars. Suffices for two more upgrades: +1 party slot and +1 item limit for a combined 30000 Pokedollars. (May not have scaled prices enough. Earned a surprising amount of cash from selling things.)

    The plan for Totem Mimikyu: Lead with Alex. Hit it with Bug Bite to remove Disguise and the Lum Berry. Spam Poison Fang until Alex drops. Send in Lisa. Slow it down with Thunder Wave. Fire Flash Cannons. Win?

    Other ideas, if necessary:
    - Reflect on Lisa. Hates to do that under the threat of Hypnosis. May negate it with a critical anyways. No.
    - Safeguard on someone. Neutralizes the ally for several turns at the cost of Mimikyu damage. Probably not worth it.

    (+1 to all stats for Totem Mimikyu)
    Turn 1: Totem Mimikyu: Mimic (failed) / Skorupi: Bug Bite (Totem Mimikyu's Disguise. Ate its Lum Berry.)
    (New enemy: Haunter.)
    Turn 2: Totem Mimikyu: Shadow Claw (32/75) / Haunter: Hypnosis / Skorupi: Asleep
    Turn 3: Haunter: Sucker Punch (24/75) / Totem Mimikyu: Shadow Claw (0/75)
    Turn 4: Haunter: Sucker Punch (failed) / Totem Mimikyu: Shadow Claw (62/90) / Magneton: Thunder Wave (at Totem Mimikyu)
    Turn 5: Haunter: Sucker Punch (56/90) / Totem Mimikyu: Shadow Claw (29/90) / Magneton: Flash Cannon (at Totem Mimikyu, 65%)
    Turn 6: Totem Mimikyu: Paralyzed / Haunter: Hypnosis / Magneton: Asleep
    Turn 7: Haunter: Night Shade (2/90) / Totem Mimikyu: Shadow Claw (0/90) / Magneton: Fainted
    Turn 8: Ponyta: Flame Wheel (at Totem Mimikyu, 15%) / Haunter: Sucker Punch (78/89) (Pecorine's Flame Body) / Totem Mimikyu: Shadow Claw (17/89) (Sitrus Berry heal to 39/89)
    Turn 9: Ponyta: Flame Wheel (at Totem Mimikyu, the rest) / Haunter: Hypnosis
    Turn 10: Ponyta: Switch to Juggernaut / Haunter: Sucker Punch (failed)
    Turn 11: Haunter: Lick (89/92, paralyzed) / Juggernaut: Foul Play (the rest)

    Met expectations, roughly. Lopped off one-third of Lisa's health with Eviolite. Never scored any Shadow Claw criticals, thankfully. Had Medusa with Aqua Jet in the wings if Pecorine failed to finish Mimikyu.

    Ends this update. Overcame a major obstacle. Summons a lot of Pokemon next time. Farewell for now.

    Spoiler: Playthrough and Pokemon Stats

    In-battle items used
    - Potion: 1
    - Super Potion: 6

    Fainted
    - Shallot the Mienfoo: 7
    - Lisa the Magnemite: 4
    - Pecorine the Ponyta: 2
    - Medusa the Kabuto: 4
    - Juggernaut the Pancham: 3
    - Alex the Skorupi: 2
    - Ras the Larvesta: 2

    Current money: 188912

    Upgrades
    - Level Limit +3
    - Party Slot +2
    - Item Limit +1

    Expeditures outside the Gacha shop
    None

    Pokemon Stats
    Shallot the Mienfoo
    Level: 34
    Rarity: 4-stars
    Ability: Reckless
    Nature: Bold
    Hitpoints: 85
    Attack: 71
    Defense: 45
    Special Attack: 54
    Special Defense: 49
    Speed: 59
    Moves: Acrobatics, Drain Punch, Meditate, and Fake Out

    Lisa the Magneton
    Level: 34
    Rarity: 3-stars
    Ability: Sturdy
    Nature: Calm
    Hitpoints: 90
    Attack: 45
    Defense: 78
    Special Attack: 97
    Special Defense: 70
    Speed: 61
    Moves: Light Screen, Thunder Wave, Charge Beam, and Flash Cannon

    Ras the Larvesta
    Level: 28
    Rarity: 3-stars
    Ability: Swarm
    Nature: Mild
    Hitpoints: 76
    Attack: 68
    Defense: 35
    Special Attack: 46
    Special Defense: 45
    Speed: 45
    Moves: Flame Charge, Take Down, Magnet Rise, and Acrobatics

    Alex the Skorupi
    Level: 34
    Rarity: 4-stars
    Ability: Sniper
    Nature: Adamant
    Hitpoints: 75
    Attack: 57
    Defense: 79
    Special Attack: 27
    Special Defense: 55
    Speed: 64
    Moves: Bug Bite, Poison Fang, Leer, and Night Slash

    Juggernaut the Pancham
    Level: 34
    Rarity: 4-stars
    Ability: Scrappy
    Nature: Bashful
    Hitpoints: 92
    Attack: 80
    Defense: 59
    Special Attack: 44
    Special Defense: 49
    Speed: 44
    Moves: Body Slam, Leer, Foul Play, and Brick Break

    Medusa the Kabuto
    Rarity: 3-stars
    Level: 34
    Ability: Weak Armor
    Nature: Serious
    Hitpoints: 76
    Attack: 75
    Defense: 77
    Special Attack: 50
    Special Defense: 38
    Speed: 52
    Moves: Rock Tomb, Aqua Jet, Mud Shot, and Scald

    Pecorine the Ponyta
    Rarity: 3-stars
    Level: 34
    Ability: Flame Body
    Nature: Naive
    Hitpoints: 89
    Attack: 79
    Defense: 52
    Special Attack: 62
    Special Defense: 54
    Speed: 90
    Moves: Growl, Stomp, Double Kick, and Flame Wheel
     
    24,712
    Posts
    3
    Years
    • Any pronoun
    • Seen today
    Section 9: Nanu
    Level limit: 37 + 3
    Special event banner (6% Focus rate): Archen, Dratini, and Growlithe. One free summon.

    Bleh. Dislikes another Rock and Fire type among the focus Pokemon. Summons regardless. Made sure to use the correct function for special banners. (Note: Drew focus Pokemon from the 5-star only pool. Consists of only 23 options. Is not super surprised to see Dratini again.)

    Summon Satchel 4.png

    Ghost, Normal, and Water. Thank you. Easy full summon here.
    Spoiler: Summon Satchel 4 Results

    Picks all of them without question.

    Shuppet Summon GIF.gif
    Buneary Summon GIF.gif
    Seel Summon GIF.gif

    Silas the Shuppet
    Rarity: 3-stars
    Level: 1
    Ability: Frisk
    Nature: Gentle
    Hitpoints: 11
    Attack: 6
    Defense: 4
    Special Attack: 6
    Special Defense: 5
    Speed: 6
    Moves: Knock Off and Phantom Force (egg move)

    Good egg move. Ought to be usable.

    Originates from AFK Arena. Evolves into something with claws like Silas's. Belongs on the dead team as well.

    Lydie the Buneary
    Rarity: 3-stars
    Level: 1
    Ability: Klutz
    Nature: Relaxed
    Hitpoints: 12
    Attack: 6
    Defense: 5
    Special Attack: 6
    Special Defense: 6
    Speed: 5
    Moves: Splash, Pound, Foresight, and Fake Out (egg move)

    Relaxed and Klutz? Bleh. Learns Charm very late. Could accomplish something with Z-Splash, Agility, and Baton Pass. Foresees little use.

    Struck while the iron is white hot. Comes from a recent trailer from Tales of Luminaria. May or may not even be a gacha game. Carries a big rabbit doll.

    Fjorm the Seel
    Rarity: 3-stars
    Level: 1
    Ability: Thick Fat
    Nature: Modest
    Hitpoints: 12
    Attack: 5
    Defense: 6
    Special Attack: 5
    Special Defense: 6
    Speed: 6
    Moves: Headbutt and Disable (egg move)

    Good ability and nature. Prefers a Special focus for Ice moves, especially after missing the egg move Icicle Spear. Definitely needs the extra punch (base 70 Attack and Special Attack). Welcome to the squad for Hapu.

    Smirks. Just thought of pairing Encore and Disable. Should be quick eno--base 70 Speed? Why are you as fast as a Magneton?

    Named them after Fjorm, a princess from the frozen land of Nifl in Fire Emblem: Heroes. Played this one as well. Modeled the summoning animations and rarity rates after it.

    Is disappointed by the number of three-stars.


    Forked over 27000 for that satchel. Dives in again.

    Summon Satchel 5.png

    Fairy, Grass, and Flying. Delivers on more new types. Excellent. Another full pull incoming. Paid the 52000 Pokedollars without even seeing the results. Could get Archen with that Flying ball.
    Spoiler: Summon Satchel 5 Results

    All at once. No hesitation.

    Carbink Summon GIF.gif
    Cherubi Summon GIF.gif
    Woobat Summon GIF.gif


    Raiden the Carbink
    Rarity: 3-stars
    Level: 1
    Ability: Clear Body
    Nature: Hardy
    Hitpoints: 12
    Attack: 6
    Defense: 8
    Special Attack: 6
    Special Defense: 8
    Speed: 6
    Moves: Tackle and Harden

    Not that enthused. Could work as a dual screen setter. Stinks for Totem Kommo-o because of its Flash Cannon, however.

    Picked Raiden from Honkai Impact 3rd for its name. Lacks a good reason for this one.

    Rosetta the Cherubi
    Rarity: 3-stars
    Level: 1
    Ability: Chlorophyll
    Nature: Sassy
    Hitpoints: 11
    Attack: 5
    Defense: 6
    Special Attack: 6
    Special Defense: 6
    Speed: 5
    Moves: Morning Sun, Tackle, and Healing Wish (egg move)

    Aw. Missed out on Weather Ball. Not bad for Totem Kommo-o between Leech Seed, Dazzling Gleam, and no weakness besides Scizor's Fury Cutter. Helps against Hapu too.

    Tapped Granblue Fantasy for this name. Features a lot of roses in their art. Sure.

    Bettie the Woobat
    Rarity: 3-stars
    Level: 1
    Ability: Unaware
    Nature: Lonely
    Hitpoints: 12
    Attack: 6
    Defense: 5
    Special Attack: 6
    Special Defense: 6
    Speed: 6
    Moves: Confusion and Charm (egg move)

    Wow. Was excited about a fast Charm. Winds up being Unaware and a poor nature. Could have had Simple and Stored Power. Imagines a world of Baton Passing into Swoobat. Not today, however. Welcome to the bench.

    Might recognize this game: Pokemon Masters EX. Never played it. Struggled for a name here too. (Would have been a good Pikachu and nothing else.)


    Frowns. Another satchel? Sure. Is not an automatic full pull this time.

    Summon Satchel 6.png

    Ghost, Psychic, Psychic.
    Spoiler: Summon Satchel 6 Results

    Middle Psychic first.
    Smoochum Summon GIF.gif

    Eh. Not impressed by that. Right Psychic next.

    Espurr Summon GIF.gif

    Hm. Already got Silas the Shuppet. Should do okay. Is it a waste to summon the final Ghost? Missed Seviper and Scyther from cheaping out before. Snagged Alex from doing the final one too. Going for it.

    Drifloon Summon GIF.gif

    Stats for the newcomers.

    Doctor the Smoochum
    Rarity: 3-stars
    Level: 1
    Ability: Hydration (Hidden Ability)
    Nature: Timid
    Hitpoints: 11
    Attack: 4
    Defense: 5
    Special Attack: 6
    Special Defense: 6
    Speed: 6
    Moves: Pound and Fake Out (egg move)

    Another Fake Out Pokemon. Missed out on Nasty Plot, unfortunately. Serves as a decent answer to Water-types with its eventual ability of Dry Skin and some Grass Technical Machine moves. Solid nature. Looks serviceable.

    Swiped this name from Arknights. Mentioned the Doctor having psychic powers. Earmarked it for a Psychic-type.

    Feinne the Espurr
    Rarity: 3-stars
    Level: 1
    Ability: Own Tempo (Hidden Ability)
    Nature: Sassy
    Hitpoints: 12
    Attack: 6
    Defense: 6
    Special Attack: 6
    Special Defense: 6
    Speed: 5
    Moves: Scratch, Leer, and Barrier (egg move)

    Is a male Espurr, despite the name. (Disregarded the Pokemon's gender a lot.) Acquires Prankster upon evolving. Meshes with its nature. Learns Light Screen, Reflect, and Charm from leveling. Snags Thunder Wave from a Technical Machine. An excellent support option. Sought someone like this.

    Represents Another Eden. Displays a cat in the game's title art and this character's art. Fits an Espurr perfectly. (No. No pun.)

    Enterprise the Drifloon
    Rarity: 4-stars (Bonus: Destiny Knot)
    Level: 1
    Ability: Unburden
    Nature: Naughty
    Hitpoints: 13
    Attack: 6
    Defense: 5
    Special Attack: 6
    Special Defense: 5
    Speed: 6
    Moves: Constrict, Minimize, and Body Slam (egg move)

    Finally a 4-star. Too bad about not getting Clear Smog. Wonders how to best use it. Statted it out like a faster Wigglytuff. Shies away from an offensive moveset. Sees a Baton Pass strategy with Minimize and Stockpile. Supplies an alternate form of support from Feinne above.

    Called on Azur Lane for this name. Acts as an aircraft carrier...or something. Launches flying things. Supports the team's damage-dealers too. Good enough.


    Stops there. Odds of not having a 5-star in any satchel yet: 20.12%. Ouch.

    Was disappointed initially. Figured out some good movesets. Came through (relatively) big in that last satchel. Picked up some team members for Hapu also. Feels capable of closing out the game with this crew.

    Sold some items. Currently at 82912 Pokedollars. Purchased 6 PC Slots, the final Party Slot, and a VIP Pass for 58000 total. Never specified if Pokemon in your party count towards the storage limit. Will just buy them anyways.

    Remembered a quest at the start of the game. Asked to register Drifloon. Paid 10000 Pokedollars. Covered the cost of summoning it.

    Mentioned looking into moves. Eyes this as the Elite Four team:
    - Shallot the Mienshao. Blossoms very late. Launches powerful Jump Kicks with its Reckless ability. Possesses sufficient Speed to sweep with Swords Dance.
    - Alex the Drapion. Functions as another physical sweeper with Swords Dance. Works with fewer recovery options and less Speed, but still functional.
    - Enterprise the Drifblim. Assists Shallot and Alex in setting up. Protects them by Baton Passing Minimizes and Stockpiles.
    - Feinne the Meowstic. Shares Enterprise's role. Focuses on screens and either Charm or Thunder Wave. Notes an unfortunate Dark weakness in both support Pokemon (doubly so with Prankster).
    - Lisa the Magnezone. Old faithful. Leads the way with Special Attack.
    - Doctor the Jynx? Makes sense between strong Special Attack, Special Defense, and Speed. Brings coverage not otherwise on the team (Psychic, Ice Beam, and Energy Ball). Could set up Calm Minds or try a quick, inaccurate Sing. Respected Jynx in Sword/Shield Dynamax Adventures.

    Speaks about times far ahead, however. Accesses crucial moves and evolutions later. Relies on others, such as Fjorm the Seel and Rosetta the Cherubi, to get there.

    Trained all the newcomers to 34. Stole a Light Clay between Silas's Frisk and Feinne's Covet. Encountered some really bad luck against old trainers. (See: Four straight turns of hitting themselves on confusion chances.) Does not count fainting while "training" in the stats, for the record.

    Back to the actual game. Leads off with Plumeria:

    Turn 1: Golbat: Confuse Ray / Kabuto: Hit itself (64/76)
    Turn 2: Golbat: Air Cutter: (49/76) / Kabuto: Hit itself (37/76)
    Turn 3: Golbat: Air Cutter: (22/76) / Kabuto: Rock Tomb (75%, -1 Speed)
    Turn 4: Kabuto: Switch to Lisa / Golbat: Air Cutter (87/90)
    Turn 5: Golbat: Confuse Ray / Magneton: Hit itself (79/90)
    Turn 6: Golbat: Air Cutter (76/90) / Magneton: (Not confused) Charge Beam (the rest)
    (Switch to Silas)
    Turn 7: Salazzle: Flame Burst (2/74) / Shuppet: Phantom Force
    Turn 8: Salazzle: Flame Burst (miss) / Shuppet: Phantom Force (65%)
    Turn 9: Shuppet: Switch to Mienfoo / Salazzle: Flame Burst (27/85)
    Turn 10: Mienfoo: Fake Out (20%) / Salazzle: Flinched
    Turn 11: Mienfoo: Switch to Medusa / Salazzle: Flame Burst (5/76)
    Turn 12: Kabuto: Aqua Jet (the rest)

    ...What was that garbage? Nerfed confusion down to 33%. Certainly does not feel like it this section.

    Grimsley: "Someone actually bothered coming to this kind of sad place?" Yes. Also Team Skull and the three other trainers very nearby.

    Next trainer: more Confuse Ray. Averaged something fairly normal. Guarded the Wild Charge Technical Machine, which is usable by Pecorine the Ponyta (now or later).

    Glanced at Pokemon stats. Notes a huge disparity between Lisa's Special Attack (100) and everyone else's offensive stat (71, 58, 72, 77, and 65) currently in the party. Probably deserves an upgrade to 4-star only. May have rated it 3- to 4- star because of no egg moves. Originally planned 2 egg moves baseline for 4- and 5-stars.

    Suffered three critical hits in four attacks (Spark and Crunch x2) against one trainer. What is going on?

    Acquired a slew of move upgrades via Technical Machines: X-Scissor, Poison Jab, and Rock Slide. Shores up the team's weaker members.

    Nailed Po Town's atmosphere. Conveys a nice, dreary tone. Rarely notices music in routes and towns. Stuck out, alongside Seaward Cave.

    Grins. Made the first non-Gacha Shop purchase: 10 Pokedollars at Po Town's Pokemon Center

    ...Knew it. Learned Jump Kick on Shallot a while ago. Decided to use it over Drain Punch for kicks (no pun intended). Missed for half its health on its first ever use. Died to the level 35 Alolan Rattata's ensuing Double-Edge.

    Arrived at Guzma's room for a battle.

    Turn 1: Magneton: Charge Beam (75%, +1 Special Attack) (Golisopod's Emergency Exit)
    Turn 2: Ariados: Sucker Punch (71/100) / Magneton: Flash Cannon (90%)
    Turn 3: Ariados: Sucker Punch (45/100) / Magneton: Flash Cannon (the rest)
    (Sent out Shallot.)
    Turn 4: Mienfoo: Fake Out (5%) / Golisopod: Flinched
    Turn 5: Mienfoo: Acrobatics (the rest)

    Never mind. Expected more than two Pokemon (namely Pinsir). Somehow remembered the Ultra fight again.

    Battled a surprise, angry Gladion.

    Turn 1: Golbat: Acrobatics (90/100) / Magneton: Charge Beam (80%)
    Turn 2: Golbat: Acrobatics (81/100) / Magneton: Charge Beam (the rest)
    (Level up.)
    Turn 3: Sneasel: Faint Attack (56/100) / Magneton: Flash Cannon (critical, 100%)
    Turn 4: Magneton: Flash Cannon (55%) / Type Null: Crush Claw (39/102, -1 Defense)
    Turn 5: Magneton: Flash Cannon (the rest)

    Another simple battle.

    Trained most Pokemon to 40. Evolved multiple Pokemon (Juggernaut the Pangoro, Alex the Drapion, Medusa the Kabutops, and Pecorine the Rapidash) for a massive team power spike. Sold off more items to reach 255362 Pokedollars. (Fought a bunch of trainers this update. Obtained a Big Nugget, Comet Shard, and Pearl String too.) Went on a shopping spree:
    - 30000 Pokedollar Stomping Tantrum (from an Ultra Sun move tutor) for Alex.
    - 10000 Pokedollar Swords Dance Technical Machine.
    - 40000 Pokedollar +1 level limit
    - 30000 Pokedollar +1 item limit

    Rolled up to Nanu full of confidence.

    Turn 1: Sableye: Fake Out / Pangoro: Flinched (118/130)
    (Leftovers heal to 126/130)
    Turn 2: Pangoro: Swords Dance / Sableye: Shadow Ball (107/130)
    (Leftovers heal to 115/130)
    Turn 3: Pangoro: Swords Dance / Sableye: Shadow Ball (93/130)
    (Leftovers heal to 101/130)
    Turn 4: Pangoro: Brick Break (100%)
    (Leftovers heal to 109/130. Krokorok's Intimidate.)
    Turn 5: Krokorok: Earthquake (52/130) / Pangoro: Brick Break (100%)
    (Leftovers heal to 60/130.)
    Turn 6: Pangoro: Lemonade (heal to full) / Alolan Persian: Fake Out (122/130)
    (Leftovers heal to full.)
    Turn 7: Alolan Persion: Power Gem (113/130) / Pangoro: Brick Break (100%)

    Worried pointlessly about a Z-move. Made one real mistake here: forgetting the Amulet Coin.

    Section 10: Hapu
    Welcome back, players! Updated the game to version 1.4! Continues from the cliffhanger of the previous update. Rescue Lilly from the clutches of the Aether Foundation. Discover more about deep history between Nebby and Alola. Does not end there, however! Set foot on Alola's final island: Poni Island. Bring your five-star Pokemon and Hyper Potions for the final Grand Trial!

    Level limit: 45 + 4
    This section's Focus Pokemon: Ducklett, Sunkern, and Alolan Geodude
    Sale: 50% off all clothes.

    Yay. Will totally plunk down Pokedollars for vanity items. Accepts the self-nerf. Grew tired of the default trainer.
    - Striped V-Neck Tee (Green) for 980
    - Capri Pants (Black) for 1120
    - Sporty Sneakers (Green) for 5150
    - Messenger Bag (Black) for 3520
    - Sea-Star Headband (Green) for 1800
    - Crew Socks (White) for 300

    Snapped an awful phone picture.
    Dolphin Outfit.png

    Refunded 6400 by selling Pokeballs. Spent that immediately on a haircut (Black, Romantic Tuck, Sideswept Bangs) for 5000. Purchased a VIP Pass too. Fun note: Currently owns 132 Pokeballs, 336 Great Balls, and 297 Ultra Balls.

    Waded through some Aether Foundation grunts. Laughed at an Alolan Dugtrio against Enterprise the Drifblim. Stalled out its Sucker Punches by setting up Minimizes and Stockpile. Only had Ground moves besides that. Tried the same against a Primeape. Struck Enterprise with Assurance. Lived by enough to try setting up more. Was not prepared for Punishment.

    Battled alongside Hau for a few trainers. Loved being on the same side as Alolan Raichu. Cannot say the same for Primarina. Smacked everyone with Sparkling Aria. Wonders how many people lost a Pokemon in a Nuzlocke to that.

    Interesting. Did not remember this enemy Electabuzz and Magmar pair using Discharge and Lava Plume. Destroyed each other.

    Time for the real Guzma fight. Sidenote: Wishes trainers would begin battles with injured Pokemon. Showed Gladion losing to Guzma. Why are Guzma's Pokemon healthy?

    Turn 1: Magneton: Discharge (100%) / Golisopod: Fainted
    (Switch to Pecorine.)
    Turn 2: Rapidash: Flame Wheel (80%) / Pinsir: Brick Break (70/124)
    Turn 3: Rapidash: Flame Wheel (the rest)
    (Switch to Medusa. Masquerain's Intimidate.)
    Turn 4: Masquerain: Bug Buzz (38/120, -1 Special Defense) / Kabutops: Rock Slide (100%)
    (Switch to Alex.)
    Turn 5: Drapion: Night Slash (critical, 100%) / Ariados: Fainted

    A clear victory. Good debut for Lisa's new Discharge.

    Transitions to Lusamine right after. Questions why Hau has to battle Guzma. Whatever.

    Turn 1: Drapion: Swords Dance / Clefable: Metronome (Mach Punch) (112/120)
    Turn 2: Drapion: Swords Dance / Clefable: Cosmic Power
    Turn 3: Drapion: Swords Dance / Clefable: Moonblast (64/130, -1 Special Attack)
    Turn 4: Drapion: Poison Jab (100%)
    Turn 5: Drapion: Poison Jab (100%) / Milotic: Fainted
    Turn 6: Drapion: Poison Jab (70%) / Bewear: Hammer Arm (0/120, -1 Speed to itself)
    Turn 7: Rapidash: Flame Wheel (15%) / Bewear: Hammer Arm (28/127)
    Turn 8: Rapidash: Flame Wheel (the rest)
    (Switch to Juggernaut.)
    Turn 9: Mismagius: Mystical Fire (critical, 87/145, -1 Special Attack) / Pangoro: Crunch (100%)
    (Switch to Lisa.)
    Turn 10: Lilligant: Teeter Dance / Magneton: Hit itself (105/116)
    Turn 11: Lilligant: Teeter Dance / Magneton: Hit itself (95/116)
    Turn 12: Lilligant: Petal Dance (62/116) / Magneton: Thunder Wave
    Turn 13: Magneton: Light Screen / Lilligant: Paralyzed
    Turn 14: Magneton: (Not confused) Flash Cannon (70%) / Lilligant: Petal Dance (46/116)
    Turn 15: Magneton: Flash Cannon (the rest)

    Hm. Knew Bewear was tanky. (Rated it as five-star only for a reason.) Expected Drapion at +6 to do better (and maybe survive Bewear's hit, given the best Defense on the current team). Hates confusion really bad, also.

    Looks like Lillie took advantage of 50% off clothes too. (Technically bought it earlier. Shh.) Changed outfits as part of character growth. Enjoys Sun and Moon's story at moments like this.

    Ventured to Poni Island. Sees two Corsola in town already. Reused Starmie and Poliwhirl too.

    Who gives out free Aerodactyls? Would be like going to a museum and getting dinosaur bones for free. Sure, whatever. Cannot use it, of course.

    Bought Calm Mind for 10000 at the Poni Island shop. Laid down the cash for the final level limit and item limit upgrades for a combined 105000 Pokedollars. Never expected to buy both final upgrades. Usually fights the Elite Four at level 55 with three items. Will enter at level 56, four items, and Switch this time.

    Sighs. Two criticals in three hits against Alex. Fainted because of the last one (well, and not one-shotting a Toxapex with Stomping Tantrum at +4 Attack or having Battle Armor). Would have lived with a more useful item than the Amulet Coin. Loves (and limited) Leftovers for a reason.

    Encountered a trainer with a Geodude and Graveler. Exploded with the former against Juggernaut. Expected the same thing with Graveler. Switched to Enterprise the Drifblim. Self-destructed instantly. Nice.

    Trained everyone to 50. Spaced about Oricorio having Revelation Dance, which knocked out Medusa. Whoops. Purchased the third Refresh Heart for Shallot for 30000 also.

    Lineup for Hapu:
    - Feinne the Meowstic. Sets the stage with Charm and Reflect. Would have preferred Enterprise in this role. Learns Baton Pass at 52, unfortunately.
    - Shallot the Mienshao. Evolved after all this time. Will hopefully sweep after Swords Dances.
    - Juggernaut the Pangoro. Just a big, beefy panda. Lives up to its name.
    - Doctor the Jynx. Brings a strong Energy Ball and Frost Breath.
    - Rosetta the Cherrim. Grass. Duh.
    - Fjorm the Dewgong. Weak offensively, but perhaps capable of something. Considered Medusa here too. Opted not to invest 30000 into Liquidation, given its Ground weakness.


    Turn 1: Meowstic: Charm / Alolan Dugtrio: Sandstorm
    (Sandstorm damage to 135/144)
    Turn 2: Meowstic: Charm / Alolan Dugtrio: Earthquake (110/144)
    (Sandstorm damage to 101/144)
    Turn 3: Meowstic: Charm / Alolan Dugtrio: Earthquake (81/144)
    (Sandstorm damage to 74/144)
    Turn 4: Alolan Dugtrio: Sucker Punch (failed) / Meowstic: Reflect
    (Sandstorm damage to 65/144)
    Turn 5: Meowstic: Switch to Shallot / Alolan Dugtrio: Sucker Punch (failed)
    (Sandstorm over.)
    Turn 6: Alolan Dugtrio: Sandstorm / Mienshao: Swords Dance
    (Sandstorm + Leftovers = no health change.)
    Turn 7: Alolan Dugtrio: Earthquake (131/143) / Mienshao: Swords Dance
    (Sandstorm + Leftovers = no health change.)
    Turn 8: Alolan Dugtrio: Earthquake (119/143) / Mienshao: Swords Dance
    (Sandstorm + Leftovers = no health change. Reflect down.)
    Turn 9: Alolan Dugtrio: Earthquake (94/143) / Mienshao: Drain Punch (100%, heal to full)
    (Sandstorm + Leftovers = no health change.)
    Turn 10: Mienshao: Bounce / Mudsdale: Tectonic Rage (miss)
    (Sandstorm over.)
    Turn 11: Mienshao: Bounce (miss) / Mudsdale: Earthquake (27/143)
    (Leftovers heal to 34/143)
    Turn 12: Mienshao: Drain Punch (100%, heal to 118/143)
    (Leftovers heal to 126/143)
    Turn 13: Mienshao: Drain Punch (100%, heal to full) / Gastrodon: Fainted
    Turn 14: Flygon: Earth Power (67/143) / Mienshao: Drain Punch (100%, heal to 140/143)
    (Level up.)

    Feels so sketchy without critical protection. Would consider Lucky Chant on Feinne (over a planned Thunder Wave) if it was an option. Might be the only time anyone has said that.

    Doubted +6 Drain Punch on Mudsdale. Distrusted Jump Kick in a sandstorm. Expected a Z-move. (Would have absolutely fainted to it.) Chose Bounce in the moment. Earned huge style points by dodging the Z-move. Lost some by missing.

    Was surprised by Shallot being outsped by Flygon. Edges it out by 5 base Speed, not to mention a three level advantage. Checked it out. Drained 73 hitpoints, which is exactly half of 146 (31 IVs and 0 EVs). Reaches 124 Speed with 31 IVs, 0 EVs, and a +Speed nature. Cannot pinpoint Shallot's Speed, due to leveling. Sports 131 Speed at level 51, however. Indicates Effort Values for Flygon in Speed. (Likely Alolan Dugtrio as well: 122 Speed at level 47 with 31 IVs, 0 EVs, and a neutral nature.)

    Broke through that barrier. Moseys down the final stretch next time. Thanks for reading. Farewell for now.

    Spoiler: Playthrough and Pokemon Stats

    In-battle items used
    - Potion: 1
    - Super Potion: 6
    - Lemonade: 1

    Fainted
    - Shallot the Mienfoo: 8
    - Lisa the Magnemite: 4
    - Pecorine the Ponyta: 2
    - Medusa the Kabuto: 5
    - Juggernaut the Pancham: 3
    - Alex the Skorupi: 4
    - Ras the Larvesta: 2
    - Doctor the Jynx: 1
    - Enterprise the Drifblim: 1

    Current money: 164544

    Upgrades
    - Level Limit +5
    - Party Slot +3
    - Item Limit +3
    - PC Slots +6

    Expeditures outside the Gacha shop
    - Po Town Pokemon Center heal: 10
    - Swords Dance Technical Machine: 10000
    - Clothes: 6435 (after 50% off)
    - Hairstyle: 5000
    - Calm Mind Technical Machine: 10000

    Pokemon Stats
    Shallot the Mienshao
    Level: 51
    Rarity: 4-stars
    Ability: Reckless
    Nature: Bold
    Hitpoints: 146
    Attack: 144
    Defense: 84
    Special Attack: 124
    Special Defense: 83
    Speed: 131
    Moves: Bounce, Drain Punch, Jump Kick, and Swords Dance

    Lisa the Magneton
    Level: 50
    Rarity: 3-stars
    Ability: Sturdy
    Nature: Calm
    Hitpoints: 131
    Attack: 71
    Defense: 120
    Special Attack: 147
    Special Defense: 103
    Speed: 93
    Moves: Light Screen, Thunder Wave, Discharge, and Flash Cannon

    Ras the Larvesta
    Level: 35
    Rarity: 3-stars
    Ability: Swarm
    Nature: Mild
    Hitpoints: 92
    Attack: 85
    Defense: 43
    Special Attack: 57
    Special Defense: 57
    Speed: 56
    Moves: Flame Charge, Leech Life, Magnet Rise, and Acrobatics

    Alex the Drapion
    Level: 50
    Rarity: 4-stars
    Ability: Sniper
    Nature: Adamant
    Hitpoints: 138
    Attack: 133
    Defense: 137
    Special Attack: 70
    Special Defense: 100
    Speed: 127
    Moves: Swords Dance, Poison Jab, Stomping Tantrum, and Night Slash

    Juggernaut the Pangoro
    Level: 50
    Rarity: 4-stars
    Ability: Scrappy
    Nature: Bashful
    Hitpoints: 162
    Attack: 166
    Defense: 106
    Special Attack: 90
    Special Defense: 95
    Speed: 84
    Moves: Swords Dance, Crunch, Bullet Punch, and Brick Break

    Medusa the Kabutops
    Rarity: 3-stars
    Level: 50
    Ability: Weak Armor
    Nature: Serious
    Hitpoints: 139
    Attack: 149
    Defense: 134
    Special Attack: 87
    Special Defense: 81
    Speed: 105
    Moves: Rock Slide, Aqua Jet, Scald, and Swords Dance

    Pecorine the Rapidash
    Rarity: 3-stars
    Level: 50
    Ability: Flame Body
    Nature: Naive
    Hitpoints: 145
    Attack: 137
    Defense: 96
    Special Attack: 109
    Special Defense: 91
    Speed: 154
    Moves: Flare Blitz, Stomp, Wild Charge, and Flame Wheel

    Feinne the (male) Meowstic
    Level: 50
    Rarity: 3-stars
    Ability: Prankster
    Nature: Sassy
    Hitpoints: 144
    Attack: 71
    Defense: 107
    Special Attack: 106
    Special Defense: 111
    Speed: 121
    Moves: Psychic, Light Screen, Charm, and Reflect

    Doctor the Jynx
    Level: 50
    Rarity: 3-stars
    Ability: Dry Skin
    Nature: Timid
    Hitpoints: 128
    Attack: 68
    Defense: 63
    Special Attack: 139
    Special Defense: 109
    Speed: 121
    Moves: Frost Breath, Energy Ball, Psychic, and Calm Mind

    Rosetta the Cherrim
    Level: 50
    Rarity: 3-stars
    Ability: Reckless
    Nature: Sassy
    Hitpoints: 134
    Attack: 76
    Defense: 98
    Special Attack: 103
    Special Defense: 112
    Speed: 102
    Moves: Petal Dance, Sunny Day, Morning Sun, and Leech Seed

    Fjorm the Dewgong
    Level: 50
    Rarity: 3-stars
    Ability: Thick Fat
    Nature: Modest
    Hitpoints: 154
    Attack: 87
    Defense: 105
    Special Attack: 89
    Special Defense: 107
    Speed: 99
    Moves: Brine, Aurora Beam, Sheer Cold (for fun), and Encore

    Silas the Banette
    Level: 47
    Rarity: 3-stars
    Ability: Frisk
    Nature: Gentle
    Hitpoints: 120
    Attack: 124
    Defense: 75
    Special Attack: 98
    Special Defense: 82
    Speed: 88
    Moves: Feint Attack, Phantom Force, Screech, and Shadow Sneak

    Enterprise the Drifblim
    Level: 50
    Rarity: 4-stars
    Ability: Unburden
    Nature: Naughty
    Hitpoints: 229
    Attack: 121
    Defense: 61
    Special Attack: 116
    Special Defense: 69
    Speed: 106
    Moves: Stockpile, Minimize, Body Slam, and Ominous Wind

    Raiden the Carbink
    Level: 40
    Rarity: 3-stars
    Ability: Clear Body
    Nature: Hardy
    Hitpoints: 104
    Attack: 49
    Defense: 142
    Special Attack: 47
    Special Defense: 138
    Speed: 59
    Moves: Ancient Power, Reflect, Gyro Ball, and Sharpen

    Lydie the Lopunny
    Level: 35
    Rarity: 3-stars
    Ability: Klutz
    Nature: Relaxed
    Hitpoints: 101
    Attack: 69
    Defense: 71
    Special Attack: 51
    Special Defense: 78
    Speed: 80
    Moves: Splash, Return, Agility, and Baton Pass

    Bettie the Swoobat
    Level: 34
    Rarity: 3-stars
    Ability: Unaware
    Nature: Lonely
    Hitpoints: 100
    Attack: 56
    Defense: 45
    Special Attack: 63
    Special Defense: 53
    Speed: 95
    Moves: Heart Stamp, Charm, Attract, and Air Slash
     
    24,712
    Posts
    3
    Years
    • Any pronoun
    • Seen today
    Section 11: Lusamine Round 2
    Level limit: 47 + 5
    This section's Focus Pokemon: Yamask, Bruxish, and Mankey

    First order of business: one VIP Pass for 8000. Stocks up on more Sitrus and Leppa Berries, mainly.

    Operates with little wiggle room for leveling. Increased by two. Activate trainer dodging mode.

    Good start. Faced a Torkoal with Doctor the Jynx (with Dry Skin). Did not want to take the incoming sun-boosted Fire attack on anyone. Hoped to one-shot it with Psychic. Nope. Avoided a second death from correctly predicting Extreme Speed on an Arcanine, at least.

    Evolved Lisa into a Magnezone. Realized something interesting. Essentially obtained Pokemon in three batches:
    - Batch 1: Mienfoo and Magnemite
    - Batch 2: Pancham, Ponyta, Kabuto, Skorupi, and Larvesta
    - Batch 3: Seel, Carbink, Woobat, Cherubi, Espurr, Drifloom, Smoochum, Buneary, and Shuppet

    Fully evolved all of Batch 3, then Batch 2 (except Larvesta), then Batch 1.

    Yikes. One-shot Doctor the Jynx with a Dynamic Punch. Knew about its terrible Defense. Disrespected Poliwrath too much, regardless. (Swapped to Cherrim for extra experience. Fell asleep from Hypnosis.)

    Trained everyone to 52 prior to Totem Kommo-o. Decided to give Rosetta the limelight. Strategy: Debuff it with Feinne. Set up buffs on Enterprise. Baton Pass them to Rosetta. Set up two Leech Seeds (with Big Root). Blast it down with Dazzling Gleam. Unnecessary? Yes.

    (+1 to all stats for Totem Kommo-o.)
    Turn 1: Meowstic: Light Screen / Totem Kommo-o: Clanging Scales (113/149, -1 to its Defense)
    (New enemy: Hakamo-o)
    Turn 2: Meowstic: Thunder Wave (at Totem Kommo-o) / Totem Kommo-o: Clanging Scales (62/149, -1 to its own Defense) / Hakamo-o: Autotomize
    Turn 3: Meowstic: Charm (at Totem Kommo-o) / Hakamo-o: Autotomize / Totem Kommo-o: Clanging Scales (16/149, -1 to its own Defense)
    Turn 4: Meowstic: Hyper Potion (heal to 136/149) / Hakamo-o: Work Up / Totem Kommo-o: Clanging Scales (85/149, -1 to its own Defense)
    Turn 5: Meowstic: Switch to Enterprise / Totem Kommo-o: Paralyzed / Hakamo-o: Work Up
    Turn 6: Totem Kommo-o: Paralyzed / Hakamo-o: Work Up / Enterprise: Minimize
    Turn 7: Hakamo-o: Work Up / Enterprise: Minimize / Totem Kommo-o: Clanging Scales (167/237, -1 to its own Defense)
    (Leftovers heal to 181/237)
    Turn 8: Totem Kommo-o: Protect / Hakamo-o: Work Up / Enterprise: Minimize
    (Leftovers heal to 195/237. Light Screen down.)
    Turn 9: Hakamo-o: Work Up / Enterprise: Stockpile / Totem Kommo-o: Flash Cannon (158/237)
    (Leftovers heal to 172/237)
    Turn 10: Totem Kommo-o: Paralyzed / Hakamo-o: Autotomize / Enterprise: Stockpile
    (Leftovers heal to 186/237)
    Turn 11: Totem Kommo-o: Paralyzed / Hakamo-o: Bide / Enterprise: Stockpile
    (Leftovers heal to 200/237)
    Turn 12: Totem Kommo-o: Protect / Hakamo-o: Bide / Enterprise: Ominous Wind (at Hakamo-o, 99%)
    (Leftovers heal to 214/237)
    Turn 13: Hakamo-o: Bide (immune) / Enterprise: Ominous Wind (at Hakamo-o, the rest) / Totem Kommo-o: Flash Cannon (194/237)
    (Leftovers heal to 208/237)
    Turn 14: Totem Kommo-o: Protect / Enterprise: Baton Pass (to Rosetta)
    Turn 15: Cherrim: Leech Seed / Totem Kommo-o: Flash Cannon (miss)
    Turn 16: Totem Kommo-o: Protect / Cherrim: Dazzling Gleam (blocked)
    Turn 17: Cherrim: Dazzling Gleam (55%) / Totem Kommo-o: Flash Cannon (126/139)
    (Leech Seed heal to full. New enemy: Scizor.)
    Turn 18: Cherrim: Leech Seed (at Scizor) / Totem Kommo-o: Sky Uppercut (123/139) / Scizor: Fury Cutter (miss)
    (Leech Seed heal to full. Fainted Totem Kommo-o.)
    Turn 19: Cherrim: Dazzling Gleam (40%) / Scizor: Fury Cutter (miss)
    Turn 20: Cherrim: Dazzling Glean (40%) / Scizor: Fury Cutter (119/139)
    (Leech Seed to 128/139. Fainted Scizor.)

    Sorry, what were those hit chances? Went 1/1 with two Minimizes up and 5/8 with all three up. Should have a 33% chance of hitting. Almost doubled that. Worries about the Elite Four now. (Tanked hits pretty well on Enterprise, on the plus side. Survived well outside of Light Screen and despite a -Special Defense nature.)

    Now then, time for the real battle: Lusamine. Brought the endgame team. Plans a similar strategy as above, but with Shallot at the end. (Thought about Doctor. Frets about potential Sucker Punches.) Dropped Bounce for Poison Jab, also. Might set up a lot of Cosmic Powers on Clefable.

    Totally would have caught and used Nihilego Lusamine on a team, by the way.

    (+1 Special Defense on Clefable)
    Turn 1: Meowstic: Thunder Wave / Clefable: Cosmic Power
    Turn 2: Meowstic: Light Screen / Clefable: Moonblast (119/149)
    Turn 3: Meowstic: Charm / Clefable: Metronome (Spite)
    Turn 4: Meowstic: Switch to Enterprise / Clefable: Moonblast (195/237)
    (Leftovers heal to 209/237)
    Turn 5: Drifblim: Minimize / Clefable: Metronome (Nasty Plot)
    (Leftovers heal to 223/237)
    Turn 6: Drifblim: Minimize / Clefable: Cosmic Power
    (Leftovers heal to full)
    Turn 7: Drifblim: Minimize / Clefable: Paralyzed
    Turn 8: Drifblim: Stockpile / Clefable: Paralyzed
    Turn 9: Drifblim: Stockpile / Clefable: Moonblast (193/237, -1 Special Attack)
    (Leftovers heal to 207/237. Light Screen down.)
    Turn 10: Drifblim: Stockpile / Clefable: Paralyzed
    (Leftovers heal to 221/237)
    Turn 11: Drifblim: Baton Pass to Shallot / Clefable: Cosmic Power
    Turn 12: Mienshao: Swords Dance / Clefable: Moonblast (22/148)
    Turn 13: Mienshao: Hyper Potion (heal to 142/148) / Clefable: Moonblast (miss)
    Turn 14: Mienshao: Swords Dance / Clefable: Paralyzed
    Turn 15: Mienshao: Swords Dance / Clefable: Moonblast (32/148)
    Turn 16: Mienshao: Hyper Potion (heal to full) / Clefable: Metronome (Seed Flare) (95/148)
    Turn 17: Mienshao: Drain Punch (25%, heal to 122/148) / Clefable: Moonblast (miss)
    Turn 18: Mienshao: Drain Punch (25%, heal to full) / Clefable: Moonlight (heal to 95%)
    Turn 19: Mienshao: Poison Jab (90%) / Clefable: Moonblast (miss)
    Turn 20: Mienshao: Poison Jab (the rest)
    (+1 Special Attack on Lilligant)
    Turn 21: Lilligant: Leech Seed / Mienshao: Poison Jab (100%)
    (+1 Attack on Milotic)
    Turn 22: Mienshao: Drain Punch (100%) / Milotic: Fainted
    (+1 Defense on Bewear)
    Turn 23: Mienshao: Drain Punch (75%) / Bewear: Pain Split (103/148)
    (Leech Seed damage to 85/148)
    Turn 24: Mienshao: Drain Punch (the rest, heal to 146/148)
    (Level up. +1 Speed on Mismagius.)
    Turn 25: Mismagius: Mystical Fire (miss) / Mienshao: Poison Jab (100%)

    Absolutely vile Metronomes. Thank goodness for not getting the 40% -2 Special Defense effect from Seed Flare. Did not get Haze or Clear Smog (or a critical), at least.


    Section 12: The Elite Four and Champion
    Welcome back, trainers! Released the final free content update as part of version 1.5! Finished the construction of the Pokemon League. Take on the strongest trainers in Alola and be crowned Champion.

    Look forward to a future paid downloadable content: The Ultra Invasion! Allows trainers to continue their journey beyond becoming Champion! Sticks in all the mechanics you expected in the main game Reintroduces beloved concepts from past titles in the series, such as Mega Evolution, Generation 1 characters (!), and a post-game. Do not miss out when it releases!

    (Will not bother with postgame stuff, for the record.)

    Level limit: 51 + 5
    This section's Focus Pokemon: Tangela, Beldum, and Oddish.
    Event: 50% off the entire first Summon Satchel.

    No point in summoning. Will do it after the challenge to see what it would have contained.

    Exited Ultra Space. Forces you to catch Lunala. Worked after one Quick Ball and maybe five Ultra Balls.

    Followed Nanu to Mount Lanakila. Ran into Gladion.

    Turn 1: Meowstic: Charm / Crobat: Cross Poison (128/149)
    Turn 2: Meowstic: Thunder Wave / Crobat: Cross Poison (106/149)
    Turn 3: Meowstic: Charm / Crobat: Cross Poison: (91/149)
    Turn 4: Meowstic: Charm / Crobat: Cross Poison (81/149, poisoned)
    Turn 5: Meowstic: Switch to Alex / Crobat: Acrobatics (130/143)
    Turn 6: Drapion: Swords Dance / Crobat: Acrobatics (117/143)
    Turn 7: Drapion: Swords Dance / Crobat: Acrobatics (105/143)
    Turn 8: Drapion: Swords Dance / Crobat: Acrobatics (92/143)
    Turn 9: Drapion: Super Potion (heal to full) / Crobat: Paralyzed
    Turn 10: Drapion: Night Slash (100%)
    Turn 11: Silvally: Multi-Attack (94/143) / Drapion: Poison Jab (100%)
    Turn 12: Lucario: Aura Sphere (25/143) / Drapion: Stomping Tantrum (100%)
    (Switch to Shallot.)
    Turn 13: Weavile: Ice Shard (100/152) / Mienshao: Drain Punch (100%, heal to full))

    Never factored in getting outsped so much. Trusted base 95 Speed on Alex and base 105 on Shallot.

    Raced up Mount Lanakila to battle Hau now. (Mentioned hating to face Primarina at the beginning. Thought Hau was the Champion in Sun/Moon and Kukui in Ultra Sun/Moon. Mixed them up. Dislikes facing Primarina regardless.) Dares not set up against Alolan Raichu.

    Turn 1: Alolan Raichu: Thunderbolt (55/143) / Drapion: Night Slash (critical, 100%)
    (Switch to Meowstic.)
    Turn 2: Meowstic: Charm / Komala: Sucker Punch (failed)
    Turn 3: Meowstic: Charm / Komala: Shadow Claw (118/152)
    Turn 4: Meowstic: Charm / Komala: Shadow Claw (96/152)
    Turn 5: Meowstic: Switch to Shallot / Komala: Shadow Claw (137/152)
    Turn 6: Mienshao: Swords Dance / Komala: Wood Hammer (111/152)
    Turn 7: Mienshao: Swords Dance / Komala: Wood Hammer (84/152)
    Turn 8: Mienshao: Drain Punch (the rest, heal to full)
    Turn 9: Mienshao: Poison Jab (critical, 100%) / Primarina: Fainted
    (Level up. Switch to Lisa.)
    Turn 10: Magnezone: Switch to Enterprise / Flareon: Flare Blitz (55/242)
    (Leftovers heal to 70/242)
    Turn 11: Drifblim: Switch to Shallot / Flareon: Flare Blitz (21/154)
    Turn 12: Mienshao: Hyper Potion (heal to 141/154) / Flareon: Quick Attack (111/154)
    Turn 13: Mienshao: Drain Punch (the rest, heal to 149/154)

    Felt good to critical that Alolan Raichu into oblivion. Had the Amulet Coin on Lisa, also. Chose poorly.

    Taught Cross Poison to Alex at the Move Relearned. Allows this for free (minus the Heart Scale cost). Charged for it before because of accessing it earlier than intended.

    Sold off unneeded items. Amassed nine Rare Candies for 5000 each. Held onto some rarer bits and bobs (like Magmarizer) and decent held items (like Silk Scarf) out of hoarder instinct. Totaled 371566 Pokedollars. Went on a final shopping spree.
    - Hyper Potion x10 for 15000
    - Max Potion for 2500
    - Full Restore x6 for 18000
    - Aerial Ace Technical Machine for 10000
    - Bulldoze Technical Machine for 10000
    - Shallot's 4th Refresh Heart for 40000
    - 3rd and 4th Refresh Heart for Enterprise and Feinne for 140000
    - All Refresh Hearts for Alex for 100000
    - 3rd Refresh Heart for Lisa for 30000

    Leaves 6066 Pokedollars remaining. Realized how good Refresh Hearts are on Sniper Pokemon. Grants extra criticals.

    Leveled the team of Shallot, Alex, Lisa, Feinne, Enterprise, and Doctor to 56.

    Worst first: Hala. Knows about Hariyama's Knock Off, as well as Punishment on Primeape. Presents issues with setting up. Attempts it anyways. Gave no item to Feinne.

    Turn 1: Hariyama: Fake Out (132/161) / Meowstic: Flinched
    Turn 2: Meowstic: Charm / Hariyama: Close Combat (97/161)
    Turn 3: Meowstic: Charm / Hariyama: Close Combat (76/161)
    Turn 4: Meowstic: Charm / Hariyama: Close Combat (60/161)
    Turn 5: Meowstic: Switch to Shallot / Hariyama: Close Combat (115/160)
    Turn 6: Mienshao: Swords Dance / Hariyama: Close Combat (76/160)
    Turn 7: Mienshao: Swords Dance / Hariyama: Knock Off (65/160. Knocked off Wide Lens.)
    Turn 8: Hariyama: Fake Out (failed) / Mienshao: Swords Dance
    Turn 9: Hariyama: Fake Out (failed) / Mienshao: Drain Punch (100%, heal to full)
    Turn 10: Primeape: Punishment (89/160) / Mienshao: Drain Punch (100%, heal to full)
    Turn 11: Mienshao: Drain Punch (100%) / Crabominable: Fainted
    Turn 12: Mienshao: Jump Kick (100%) / Bewear: Fainted
    Turn 13: Mienshao: Aerial Ace (100%) / Poliwrath: Fainted
    (Level up.)

    Would have raged if Jump Kick missed. Went far too well, overall. What was Hariyama thinking? Why would you use Close Combat and Fake Out over Knock Off against a Psychic Pokemon?

    Next worst: Acerola. Cannot use Feinne to set up against Sableye period. Feels iffy to send in Enterprise. Therefore: Alex alone. Dreads the incoming confusion with Attack boosts.

    Turn 1: Sableye: Fake Out (137/153) / Drapion: Flinched
    (Leftovers heal to 146/153)
    Turn 2: Drapion: Swords Dance / Sableye: Confuse Ray
    (Leftovers heal to full.)
    Turn 3: Drapion: Swords Dance / Sableye: Shadow Claw (132/153)
    (Leftovers heal to 141/153)
    Turn 4: Drapion: (Not confused) Swords Dance / Sableye: ShadowClaw (120/153)
    (Leftovers heal to 129/153)
    Turn 5: Drapion: Night Slash (100%)
    (Leftovers heal to 138/153)
    Turn 6: Drapion: Night Slash (100%) / Palossand: Fainted
    (Leftovers heal to 147/153)
    Turn 6: Froslass: Confuse Ray / Drapion: Hit itself (76/153)
    (Leftovers heal to 85/153)
    Turn 7: Froslass: Blizzard (critical, 0/153)
    Turn 8: Froslass: Confuse Ray / Magnezone: Flash Cannon (100%)
    (Level up. Switch to Doctor.)
    Turn 9: Jynx: Shadow Ball (50%) / Dhelmise: Shadow Ball (53/143, -1 Special Defense)
    Turn 10: Jynx: Shadow Ball (the rest) (Shell Bell heal to 62/143)
    (Level up. Switch to Lisa.)
    Turn 11: Magnezone: (Quick Claw) Discharge (75%, paralyzed) / Drifblim: Ominous Wind (137/170)
    Turn 12: Drifblim: Full Heal / Magnezone: Discharge (the rest)

    Insulted Alex hard with that Blizzard critical. Misjudged Froslass's Speed. Remembered it was quick. (Used it in an Ice monotype. Filled the same role as Feinne with Charm and Thunder Wave.) Did not think it was 110 base Speed.

    Accumulated plenty of Revives from playing, also. Never sold those. Figured someone would get criticaled and faint.

    Third: Kahili. Going for full setup with Alex.

    Turn 1: Meowstic: Charm / Skarmory: Steel Wing (134/164)
    Turn 2: Meowstic: Thunder Wave / Skarmory: Spikes
    Turn 3: Meowstic: Charm / Skarmory: Steel Wing (miss)
    Turn 4: Meowstic: Charm / Skarmory: Steel Wing (121/164)
    Turn 5: Meowstic: Switch to Enterprise / Skarmory: Spikes
    Turn 6: Drifblim: Minimize / Skarmory: Paralyzed
    Turn 7: Drifblim: Minimize / Skarmory: Steel Wing (critical, 114/256)
    (Leftovers heal to 130/256)
    Turn 8: Drifblim: Minimize / Skarmory: Steel Wing (106/256)
    (Leftovers heal to 122/256)
    Turn 9: Drifblim: Hyper Potion (heal to 242/256) / Skarmory: Paralyzed
    (Leftovers heal to full.)
    Turn 10: Drifblim: Stockpile / Skarmory: Paralyzed
    Turn 11: Drifblim: Stockpile / Skarmory: Steel Wing (246/256)
    (Leftovers heal to full.)
    Turn 12: Drifblim: Stockpile / Skarmory: Paralyzed
    Turn 13: Drifblim: Baton Pass to Alex (Spikes damage to 127/153) / Skarmory: Steel Wing (miss)
    Turn 14: Drapion: Swords Dance / Skarmory: Spikes
    Turn 15: Drapion: Swords Dance / Skarmory: Paralyzed
    Turn 16: Drapion: Swords Dance / Skarmory: Steel Wing (miss)
    Turn 17: Drapion: Night Slash (critical, 99%) (Skarmory's Sturdy) / Skarmory: Steel Wing (123/153)
    Turn 18: Skarmory: Full Restore (heal to full, no paralysis) / Drapion: Night Slash (99%, critical) (Skarmory's Sturdy)
    Turn 19: Drapion: Night Slash (critical, the rest)
    (Level up.)
    Turn 20: Drapion: Cross Poison (critical, 100%) / Mandibuzz: Fainted
    Turn 21: Drapion: Cross Poison (critical, 100%) / Toucannon: Fainted
    Turn 22: Oricorio: Teeter Dance / Drapion: Cross Poison (critical, 100%)
    Turn 23: Crobat: Swift (115/156) / Drapion: Hit itself (86/156)
    Turn 24: Crobat: Swift (73/156) / Drapion: (Not confused) Night Slash (critical, 100%)

    A. Hates confusion even more. Mitigated it somewhat with Stockpile.
    B. Wow. Made Alex super angry. Had the Scope Lens this time. Did not expect a 100% critical rate with seven straight criticals.

    Last: Olivia. May take a while with Relicanth's Yawn.

    Turn 1: Meowstic: Light Screen / Relicanth: Yawn
    Turn 2: Meowstic: Switch to Enterprise / Relicanth: Hydro Pump (miss)
    Turn 3: Drifblim: Minimize / Relicanth: Yawn
    Turn 4: Drifblim: Minimize / Relicanth: Ancient Power (miss)
    (Fell asleep from Yawn.)
    Turn 5: Drifblim: Asleep / Relicanth: Ancient Power (miss)
    Turn 6: Drifblim: Asleep / Relicanth: Ancient Power (208/260)
    (Leftovers heal to 224/260)
    Turn 7: Drifblim: Asleep / Relicanth: Ancient Power (miss)
    (Shook itself awake. Leftovers heal 240/260.)
    Turn 8: Drifblim: Minimize / Relicanth: Yawn
    (Leftovers heal to 256/260. Light Screen down.)
    Turn 9: Drifblim: Stockpile / Relicanth: Ancient Power (190/260)
    (Fell asleep from Yawn. Leftovers heal to 206/260)
    Turn 10: Drifblim: Asleep / Relicanth: Hydro Pump (miss)
    (Leftovers heal to 222/260)
    Turn 11: Drifblim: Asleep / Relicanth: Hydro Pump (miss)
    (Leftovers heal to 238/260)
    Turn 12: Drifblim: Baton Pass to Mienshao / Relicanth: Hydro Pump (miss)
    Turn 13: Mienshao: Swords Dance / Relicanth: Hydro Pump (miss)
    Turn 14: Relicanth: Switch to Carbink / Mienshao: Swords Dance
    Turn 15: Mienshao: Jump Kick (critical, 100%)
    Turn 16: Mienshao: Jump Kick (99%) (Probopass's Sturdy) / Probopass: Thunder Wave
    Turn 17: Probopass: Full Restore (heal to full) / Mienshao: Aerial Ace (critical, 15%)
    (Shook off the paralysis.)
    Turn 18: Mienshao: Drain Punch (the rest)
    Turn 19: Mienshao: Drain Punch (100%) / Lycanroc: Fainted
    Turn 20: Mienshao: Drain Punch (critical, 99%) (Alolan Golem's Sturdy) / Alolan Golem: Thunder Punch (miss)
    Turn 21: Alolan Golem: Full Restore (heal to full) / Mienshao: Aerial Ace (7%)
    Turn 22: Mienshao: Drain Punch (the rest)
    Turn 23: Mienshao: Drain Punch (100%) / Relicanth: Fainted
    (Level up.)

    Received more good luck there. Shook off the paralysis without healing, as hoped. Wanted those Refresh Hearts for things like this. Fared much better on dodging this fight as well. Flummoxed Relicanth in particular.

    One battle left: Kukui. Winds up being another poor matchup for both setup options. Is this just a Shallot solo? ...No. Runs into trouble against another Sturdy Pokemon (Magnezone). Calls for a standard setup. Good luck, Feinne and Enterprise. Gave Shallot a Lum Berry, also.

    Turn 1: Meowstic: Charm / Lycanroc: Stealth Rock
    Turn 2: Meowstic: Thunder Wave / Lycanroc: Crunch (119/167)
    Turn 3: Meowstic: Charm / Lycanroc: Crunch (79/167)
    Turn 4: Meowstic: Charm / Lycanroc: Crunch (55/167)
    Turn 5: Meowstic: Switch to Enterprise (Stealth Rock damage to 195/260) / Lycanroc: Crunch (149/260, -1 Defense)
    (Leftovers heal to 165/260)
    Turn 6: Drifblim: Minimize / Lycanroc: Paralyzed
    (Leftovers heal to 181/260)
    Turn 7: Drifblim: Minimize / Lycanroc: Stone Edge (miss)
    (Leftovers heal to 197/260)
    Turn 8: Drifblim: Minimize / Lycanroc: Stone Edge (critical, 0/260)
    (Stealth Rocks damage to Mienshao.)
    Turn 9: Mienshao: Swords Dance / Lycanroc: Stone Edge (142/168)
    Turn 10: Mienshao: Swords Dance / Lycanroc: Stone Edge (miss)
    Turn 11: Mienshao: Swords Dance / Lycanroc: Stone Edge (miss)
    Turn 12: Lycanroc: Accelrock (136/168) / Mienshao: Drain Punch (100%, heal to full)
    Turn 13: Mienshao: Drain Punch (100%) / Braviary: Fainted
    Turn 14: Alolan Ninetales: Dazzling Gleam (miss) / Mienshao: Drain Punch (100%)
    Turn 15: Mienshao: Drain Punch (99%) (Magnezone's Sturdy) / Magnezone: Thunder Wave (Ate its Lum Berry.)
    Turn 16: Magnezone: Full Restore (heal to full) / Mienshao: Aerial Ace (10%)
    Turn 17: Mienshao: Drain Punch (the rest)
    (Level up.)
    Turn 18: Mienshao: Drain Punch (100%) / Incineroar: Fainted
    Turn 19: Mienshao: Drain Punch (critical, 100%) / Snorlax: Fainted

    Could have soloed it with Shallot. Resisted everything Lycanroc had. Got really unlucky with that Stone Edge critical (between hitting with an inaccurate move through three Minimizes, critting, and no Refresh save). Made up for it with the Dazzling Gleam Refresh dodge.

    Completes this challenge. Total playtime: 47:50. Enjoyed it quite a bit. Used unfamiliar Pokemon (and some familiar). Functioned as desired, in that respect. Awards Most Valuable Pokemon to Lisa the Magnezone. Held the team together through the entire challenge. Led the way against several totems (Wishiwashi, Vikavolt, and Mimikyu).

    Hold on. Wrote this while the credits were rolling. Forgot about Tapu Koko. Do you think 433 Ultra Balls is enough? (Caught it in three. Maintained the challenge rules for fun. Used all four items. Spent most on Enterprise barely hanging on from Electro Balls.)

    Underestimated how much money you get in the game. Wound up leaps and bounds more powerful than planned. Some quick accounting:
    - Level Limits: 157000
    - Party Slots: 48000
    - Item Limit: 90000
    - PC Slots: 25000
    - Switch style: 45000
    - Refresh Hearts: 340000
    - Move Tutoring: 30000
    - Summoning: 204000
    - Healing: 35510
    - Technical Machines: 40000
    - Vanity: 11435
    - Cash on hand: 6066

    (Will not count 7 VIP Passes. Nearly paid for itself.)

    Totals 1,022,011 Pokedollars. Crested one million by a hair.

    Likely changes for next time:
    1. More Pokeballs per summon satchel. Perhaps 5?
    2. More scaling on upgrade prices. Felt good at the beginning. Swam in cash at the end.
    3. Rarity changes. Demote Mienfoo to "3- to 4-stars". Overvalued its start. Takes too long to evolve. Promote Magnemite to 4-star only. Maybe more changes?
    4. Forbid Shedinja again. Removed that rule sort of last second. Probably trivializes several Totems.
    5. Maybe more sales or events. Will remove "Move Relearner" from the possible options. Perhaps challenge-type events for more money? Packages them as "daily quests" instead.
    6. Allow berry harvesting for free? Walked back to the Pokemon Center a lot. Cost money to use Potions. May allow buying Potions and Super Potions instead of Pokeballs for out-of-battle healing at certain breakpoints.
    7. Remove, rework, or clarify PC slots. Thought of the limit as "party slots + PC slots". Becomes thorny when you deposit Pokemon while training. Makes more sense to be "total Pokemon" or something.
    8. Add the rarity roll to summoning info. Makes luck/unluckiness more visible.
    9. Give 4-stars another baseline egg move. Differentiates them from 3-stars a bit more.

    Anyways, thank you for reading all this way. Leaves on a note befitting this challenge: one final Summon Satchel. What would that 50% off satchel have given? (Will not bother with images, gifs, or actually hatching them.)

    Final satchel: Dark, Grass, and Dragon. Reminds you of this section's Focus Pokemon: Oddish, Beldum, and Tangela. Could be that missing 5-star in Grass. Probably rated Dragon-types highly too.
    Spoiler: Summon Satchel 7 Results

    Dark: 3-star Purrloin with Foul Play.
    Grass: 3-star Pansage with Low Kick.
    Dragon: 3-star Drampa with Hurricane.

    Better luck next time? (Also, three-star Drampa? Really? Picks up Round via Technical Machine very early. Could tutor it with lots of nice things. Might become 4-star only.)

    Dug further to find a 5-star. Popped up in Summon Satchel 10 (Abra). Trudged through all 3-stars in satchels 8 and 9.

    Spoiler: Playthrough and Pokemon Stats

    In-battle items used
    - Potion: 1
    - Super Potion: 7
    - Lemonade: 1
    - Hyper Potion: 3

    Fainted
    - Shallot the Mienfoo: 8
    - Lisa the Magnemite: 4
    - Pecorine the Ponyta: 2
    - Medusa the Kabuto: 5
    - Juggernaut the Pancham: 3
    - Alex the Skorupi: 5
    - Ras the Larvesta: 2
    - Doctor the Jynx: 2
    - Enterprise the Drifblim: 2

    Current money (before entering the Elite Four): 6066

    Upgrades
    - Level Limit +5
    - Party Slot +3
    - Item Limit +3
    - PC Slots +6
    - 5th Refresh Heart for Alex the Drapion
    - 4th Refresh Heart for Shallot the Mienshao, Enterprise the Drifblim, and Feinne the Meowstic
    - 3rd Refresh Heart for Lisa the Magnezone

    Expeditures outside the Gacha shop
    - Po Town Pokemon Center heal: 10
    - Swords Dance Technical Machine: 10000
    - Clothes: 6435 (after 50% off)
    - Hairstyle: 5000
    - Calm Mind Technical Machine: 10000
    - Hyper Potion x10 for 15000
    - Max Potion for 2500
    - Full Restore x6 for 18000
    - Aerial Ace Technical Machine for 10000
    - Bulldoze Technical Machine for 10000


    Pokemon Stats
    Shallot the Mienshao
    Level: 60
    Rarity: 4-stars
    Ability: Reckless
    Nature: Bold
    Hitpoints: 171
    Attack: 174
    Defense: 104
    Special Attack: 147
    Special Defense: 98
    Speed: 158
    Moves: Aerial Ace, Drain Punch, Jump Kick, and Swords Dance

    Lisa the Magnezone
    Level: 59
    Rarity: 3-stars
    Ability: Sturdy
    Nature: Calm
    Hitpoints: 176
    Attack: 97
    Defense: 167
    Special Attack: 184
    Special Defense: 147
    Speed: 101
    Moves: Light Screen, Thunder Wave, Discharge, and Flash Cannon

    Ras the Larvesta
    Level: 35
    Rarity: 3-stars
    Ability: Swarm
    Nature: Mild
    Hitpoints: 92
    Attack: 85
    Defense: 43
    Special Attack: 57
    Special Defense: 57
    Speed: 56
    Moves: Flame Charge, Leech Life, Magnet Rise, and Acrobatics

    Alex the Drapion
    Level: 58
    Rarity: 4-stars
    Ability: Sniper
    Nature: Adamant
    Hitpoints: 159
    Attack: 154
    Defense: 158
    Special Attack: 80
    Special Defense: 115
    Speed: 146
    Moves: Swords Dance, Cross Poison, Stomping Tantrum, and Night Slash

    Juggernaut the Pangoro
    Level: 52
    Rarity: 4-stars
    Ability: Scrappy
    Nature: Bashful
    Hitpoints: 168
    Attack: 174
    Defense: 110
    Special Attack: 93
    Special Defense: 99
    Speed: 88
    Moves: Swords Dance, Crunch, Bullet Punch, and Brick Break

    Medusa the Kabutops
    Rarity: 3-stars
    Level: 51
    Ability: Weak Armor
    Nature: Serious
    Hitpoints: 142
    Attack: 154
    Defense: 137
    Special Attack: 88
    Special Defense: 83
    Speed: 107
    Moves: Rock Slide, Aqua Jet, Scald, and Swords Dance

    Pecorine the Rapidash
    Rarity: 3-stars
    Level: 52
    Ability: Flame Body
    Nature: Naive
    Hitpoints: 150
    Attack: 144
    Defense: 101
    Special Attack: 113
    Special Defense: 95
    Speed: 159
    Moves: Flare Blitz, Stomp, Wild Charge, and Flame Wheel

    Feinne the (male) Meowstic
    Level: 59
    Rarity: 3-stars
    Ability: Prankster
    Nature: Sassy
    Hitpoints: 170
    Attack: 90
    Defense: 131
    Special Attack: 126
    Special Defense: 129
    Speed: 146
    Moves: Psychic, Light Screen, Charm, and Thunder Wave

    Doctor the Jynx
    Level: 59
    Rarity: 3-stars
    Ability: Dry Skin
    Nature: Timid
    Hitpoints: 151
    Attack: 86
    Defense: 77
    Special Attack: 164
    Special Defense: 129
    Speed: 147
    Moves: Ice Beam, Shadow Ball, Psychic, and Calm Mind

    Rosetta the Cherrim
    Level: 53
    Rarity: 3-stars
    Ability: Reckless
    Nature: Sassy
    Hitpoints: 141
    Attack: 83
    Defense: 105
    Special Attack: 108
    Special Defense: 118
    Speed: 108
    Moves: Petal Dance, Dazzling Gleam, Morning Sun, and Leech Seed

    Fjorm the Dewgong
    Level: 51
    Rarity: 3-stars
    Ability: Thick Fat
    Nature: Modest
    Hitpoints: 156
    Attack: 90
    Defense: 107
    Special Attack: 90
    Special Defense: 109
    Speed: 100
    Moves: Brine, Aurora Beam, Sheer Cold (for fun), and Encore

    Silas the Banette
    Level: 47
    Rarity: 3-stars
    Ability: Frisk
    Nature: Gentle
    Hitpoints: 120
    Attack: 126
    Defense: 75
    Special Attack: 98
    Special Defense: 82
    Speed: 88
    Moves: Feint Attack, Phantom Force, Screech, and Shadow Sneak

    Enterprise the Drifblim
    Level: 57
    Rarity: 4-stars
    Ability: Unburden
    Nature: Naughty
    Hitpoints: 260
    Attack: 147
    Defense: 74
    Special Attack: 132
    Special Defense: 79
    Speed: 124
    Moves: Stockpile, Minimize, Baton Pass, and Ominous Wind

    Raiden the Carbink
    Level: 40
    Rarity: 3-stars
    Ability: Clear Body
    Nature: Hardy
    Hitpoints: 104
    Attack: 49
    Defense: 142
    Special Attack: 47
    Special Defense: 138
    Speed: 59
    Moves: Ancient Power, Reflect, Gyro Ball, and Sharpen

    Lydie the Lopunny
    Level: 35
    Rarity: 3-stars
    Ability: Klutz
    Nature: Relaxed
    Hitpoints: 101
    Attack: 69
    Defense: 71
    Special Attack: 51
    Special Defense: 78
    Speed: 80
    Moves: Splash, Return, Agility, and Baton Pass

    Bettie the Swoobat
    Level: 34
    Rarity: 3-stars
    Ability: Unaware
    Nature: Lonely
    Hitpoints: 100
    Attack: 56
    Defense: 45
    Special Attack: 63
    Special Defense: 53
    Speed: 95
    Moves: Heart Stamp, Charm, Attract, and Air Slash
     
    Back
    Top