
-
Ever thought it'd be cool to have your art, writing, or challenge runs featured on PokéCommunity? Click here for info - we'd love to spotlight your work!
-
Which Pokémon Masters protagonist do you like most? Let us know by casting a vote in our Masters favorite protagonist poll here!
-
Red, Hilda, Paxton, or Kellyn - which Pokémon protagonist is your favorite? Let us know by voting in our poll!
You are using an out of date browser. It may not display this or other websites correctly.
You should upgrade or use an alternative browser.
You should upgrade or use an alternative browser.
Le Beginners Supremo Graphicals Class
- Thread starter moments.
- Start date
More options
Who Replied?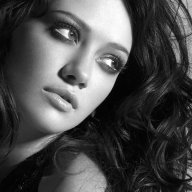
- 2,213
- Posts
- 16
- Years
- Age 30
- Seen Mar 4, 2018
Okay, thanks for you constructive criticism. I knew the banner needed some white in there somewhere.BrightFer
Very very nice for a first use of a C4D in a banner. Because I am still not very experienced with C4D's myself this may not be as in depth as my other rates.
Background is cool, liking the flow created by the C4D and love how the circular ring comes over in front of the render. Nice simple depth created there! The flower brush is ok, but it does seem a little out of place or not strong enough. I am not sure if it actually benefits the banner, but it doesn't make it look worse so it is ok. The little white balls/stars look nice, but some of those on top of the C4D and maybe even intertwining around some parts, maybe her arm could look good.
The render is good and you fixed the problem of a lack of a clear flow by using the C4D so good job! I think you could have added even more depth to it by sharpening the gun barrel and then blurring her body and face just a tiny bit. You could have also added a better light source up the top just left of her head possibly using the method I mentioned in the last rate, or just with a Large White soft brush just put it on and play with settings.
The text is the only real let down on the tag. The colour is a bit hard to read on the C4D and the placement is a bit boring. Also the font itself is a bit big for that simple style. I reckon scrap the text and either leave it without any, or get like a single word with a fancyish font and put it leaning on the forearm on our left ( just before the glove down towards the elbow ). Make it a white colour as well.
Summary: Nice use of C4D as flow! Text is quite boring, make a white, fancyer font on her left forearm. Try adding some depth by blurring and sharpening, ligtening and darkening using the Burn and Dodge tool. Finally chuck a nice light source in there, possibly on Color Dodge to bring out the colours. It is a little monotone, but it still looks great!
..PandA.CharadE..
CUPCAKES :3
- 66
- Posts
- 16
- Years
- Seen Mar 12, 2009
Hey noxious :3 Did what you said. Any better? Tried my best to do it without a psd.
![[PokeCommunity.com] Le Beginners Supremo Graphicals Class](https://i43.tinypic.com/2v9rggo.png "[PokeCommunity.com] Le Beginners Supremo Graphicals Class")
Ok I am not going to give you a full blown rate because I already did for this banner earlier but I will give you some updates on the changes made.
First of all, nice work without a PSD, I know you are limited in what you can do and you did fairly nice barring this in mind.
Can I ask, what method did you use for the lighting? It looks good, but it could've been a bit bigger. Looks good though!
The cropping is the problem in this one though. You didn't quite crop enough off the left to conceal the line of brushing that was the problem last time. I think you could have cropped it all the way to the line. Also on the other side probably should not have been cropped. The text is a little close to the edge and looks squished.
Just a side note, The render doesn't need to be smack bang in the middle. In fact, by placing it to the side, it allows for more flow access. Of course this focal has little flow so it doesn't really matter, but the right side would have looked better without any cropping. Maybe just a tad. 1/4 of what you did.

![[PokeCommunity.com] Le Beginners Supremo Graphicals Class](https://i265.photobucket.com/albums/ii233/shinypkmnfan13/mysecondsigpikachu.png "[PokeCommunity.com] Le Beginners Supremo Graphicals Class")
Well this is better thank your last Pichu! Although once again you went over the focal with effects and brushes. Did you place the render on its own layer? If so just drag it above that of the brushes. Also move the text layers up as they look a bit dodgy covered with brushes.
Otherwise, this is a nicely composed tag with some nice splatter brushes in there.
Otherwise, this is a nicely composed tag with some nice splatter brushes in there.
![[PokeCommunity.com] Le Beginners Supremo Graphicals Class](https://i265.photobucket.com/albums/ii233/shinypkmnfan13/mysecondsigpikachu_2.png "[PokeCommunity.com] Le Beginners Supremo Graphicals Class")
..PandA.CharadE..
CUPCAKES :3
- 66
- Posts
- 16
- Years
- Seen Mar 12, 2009
Better? Sorry if i'm causing you too much trouble..
![[PokeCommunity.com] Le Beginners Supremo Graphicals Class](https://i43.tinypic.com/2s8scjo.png "[PokeCommunity.com] Le Beginners Supremo Graphicals Class")
..PandA.CharadE..
CUPCAKES :3
- 66
- Posts
- 16
- Years
- Seen Mar 12, 2009
As for those..I have no idea what they're doing there XD Oh yes, and would you mind providing me with some smudging tuts? Thanks :3
Last edited:
Okay, I've got two versions, one with lens flare and one without
With Lens Flare
![[PokeCommunity.com] Le Beginners Supremo Graphicals Class](https://i530.photobucket.com/albums/dd341/Tr0ubl3magn3t/IdinaMenzelcopy-1.jpg "[PokeCommunity.com] Le Beginners Supremo Graphicals Class")
Without Lens Flare
![[PokeCommunity.com] Le Beginners Supremo Graphicals Class](https://i530.photobucket.com/albums/dd341/Tr0ubl3magn3t/IdinaMenzelcopy.jpg "[PokeCommunity.com] Le Beginners Supremo Graphicals Class")
I really wished I could have done better, but my normal Photoshop wasn't working so I had to resort to Photoshop Elements, oh, and the reason her face is on the side is because it cuts off there xD. I've got a psd. of it though, so I can make changes and stuff according to your suggestions.
With Lens Flare
Without Lens Flare
I really wished I could have done better, but my normal Photoshop wasn't working so I had to resort to Photoshop Elements, oh, and the reason her face is on the side is because it cuts off there xD. I've got a psd. of it though, so I can make changes and stuff according to your suggestions.
Sorry about the lateness of this, the thread didn't come up with the 'New Post' sign so I missed it for a few days. Oh well! Panda, here is a great tutorial with settings from Comic Tragedy here at PC. Just get the smudge brush, put some settings in and smudge over parts of your tag.
.Twenty Six : First off, nice simple banner! I like it. The image placed there gives the tag overall a nice feel about it. It makes it feel like she is the focal, but not entirely it as she is pushed over to the side if that made any sense. I know she was cut off and you had no other choice, but there is some depth to it so kudos for sticking to the image.
My first concern is the transition between the darker blue and the light-ish area. It looks good, but just a clear straight line down the centre is a bit off putting. You could try smudging that line a little bit, or using a gradient from blue to transparent. So it slowing blends into the light.
I like the bit of smudging of her shoulder, it helps blend her into the tag better and looks pretty cool by itself!
I am not too sure about the text, cool idea using a Clipping Mask, but it looks just a smidgeon hard to read, and it looks a bit low quality as well. You could move it down to the bottom just right of her shoulder, that could look okay...
Not sure about those blue dots either but they work I guess.
The one thing is, this banner has very little flow. I know the image doesn't give you anything to work with, but you can make it up yourself then. There is a cool light source which looks ok and then those blue dots, neither follows an order. Try and establish a flow line, diagonal bottom left to top right (/) and arrange your effects around that.
Lastly, the one without lens flare is better as the smudging of her shoulder doesn't turn an icky grey/white.
Did you save your banner as a PNG? Just as a heads up, everybody PLEASE save your work as a PNG. It results in higher quality when using online.