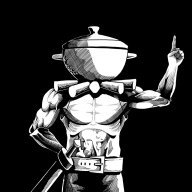
Beginner Garchomp Guide
Overview:
Garchomp is one of the four Power archetype Pokémon in Pokkén Tournament. Like the other three Power Pokémon, it hits hard, but unlike them, it has a higher overall movement speed. It's clear from its movement speed and many of its moves that Garchomp wants to and is designed to get in on the opponent. This however does not mean that you want to rush at your opponent. Patient play is, while important to some degree on all characters, absolutely vital to success with Garchomp. Playing Garchomp as an aggressive rushdown character like Blaziken will end up getting you killed. Rather, you want to focus on reading your opponent and punishing their mistakes (as Garchomp is a brutal whiff punisher), as well as mixing up your gameplay. Garchomp's primary weaknesses are its poor/awkward ranged combat, and its overall lack of safety.
Key Garchomp Moves
While you generally want to make use of as much as your moveset as possible, there are some moves that are important for every (Garchomp) player to master in order to succeed.
Dig (Forward A) - This is one of Garchomp's best tools and the primary reason why it handles zoners fine. Garchomp burrows into the ground and homes in on the opponent. While burrowed, it's invulnerable to all attacks (even the exposed dorsal fin is invincible), allowing it to bypass projectiles and close the gap,
and as well as even punish poor projectile use. Dig is also capable of hitting airborne opponents (ironic when you consider how Ground type moves work in the main series games), making it a solid choice for punishing or pseudo-countering some aerial attacks. This is particularly good in the Suicune matchup, as Suicunes like to jump a lot. The most important part of using Dig though is the ability to mix it up. You can end Dig in three different ways: attacking (how it normally ends), canceling it with R, and canceling it with a jump. Utilize all three options in order to throw your opponent off balance and keep them guessing.
However, Garchomp is also vulnerable both before and after burrowing into the ground, and the move is extremely unsafe on block and whiff, so you must be ready to react to how your opponent is going to react to it.
Stone Edge (Backwards A) - Sand swirls around Garchomp as it prepares to counter the opponent's attack. A fantastic counter, and in many situations better than the standard counter, since you don't need to worry about facing the right way or when you have to release the charge. Don't neglect the regular counter though.
Dragon Rush (Duel Phase, Up A) - This allows you to close the gap between you and your opponent, though the jump at the beginning of the move can make this a bit easy to react to. Fortunately you can cancel Dragon Rush with R or cancel it into Dig to make it less predictable. I personally use it mainly as a grab punish, as Dragon Rush gains a second hit when it's a critical hit. The move also allows Garchomp to handle Sceptile and Chandelure's long-range command grabs, something many Pokémon wish they could do.
Duel Phase Strong Attack (X) - Great for whiff punishing and catching bad jumps due to its speed and the distance covered.
Rising Dragon (hold X, release X) - It's not actually called that and doesn't really have a name, but it's easier (and cooler) to refer to it as that than via the inputs. One of the most versatile parts of Garchomp's moveset, as it can be charged
and released at almost anytime (you can charge it during another move's animation, while landing, even while getting hit!)
and be released at almost anytime. You'll know when the move is ready to go when a pulsing orb appears on Garchomp, as shown here:
When unleashed, the (grounded version of) the attack looks like this:
While the aerial version has Garchomp dive down, and then if high enough, rocket back up into the air.
(<---- reword this sentence; sound incomplete. Maybe something along the lines of "The aerial version of Rising Dragon has Garchomp dive down onto his opponent, and if high enough, allows him to rocket back up into the air once finished.")
Field Phase
Your main objective in Field Phase is to get close to your opponent and initiate Duel Phase. Like
what was mentioned before though, this does not mean run at your opponent and hit buttons. Against non-zoners,
run close to them and then dance with them narrow the gap and get close to them. Patiently waiting wait for an opportunity to strike, allowing your opponent to make the first mistake. Smart use of Dig and the aerial X attack
-(they has have a fairly strong homing ability and sizeable disjoint
)- will allow you get in on zoners
(do you mean non-zoners?). Charged aerial Y is also something to use to get you and your opponent closer together, as it will drag
them your opponent towards Garchomp.
Duel Phase
This is where the majority of your damage will occur. You'll notice here that Garchomp moves on the ground
much more slowly than it does during Field Phase. This is fine though since Garchomp has good mid-range burst (I do not mean burst as in Synergy Burst
what do you mean then) options in Dragon Rush, Dragon Claw, and the strong attack, as well as still having access to Dig. Like in Field Phase, the idea is to play patiently to bait out and punish mistakes, except in Duel Phase Garchomp will get more reward out of it.
Garchomp also gains something called "Running Stance" in Duel Phase, which is not really a stance but is just.....literally Garchomp running. Running Stance can be entered by quickly pressing forward 3 times, or by holding A or Y at the end of Dragon Claw or forward Y-forward Y, respectively. There is one attack unique to Running Stance, an overhead swing that pops the opponent up for follow-up attacks, activated by pressing X while in Running Stance.
Basic Garchomp Combos
Combos. Everybody loves combos
sometimes a little too much. These are a few simple combos with Garchomp to get you started, so you can get something out of your punishes and reads. If you want longer/flashier/more technical combos, go look that shit up on
Youtube YouTube.
Weak Combo->Dig finisher (Duel Phase, Y,Y,Y->forward A) - Does more damage than the standard Dragon Claw finisher.
Strong Attack->Rising Dragon (Duel Phase, X->Rising Dragon) - Hold X from the moment you begin the strong attack, Rising Dragon will be charged as soon as Garchomp lands.
Stone Edge->High Stance X->Strong Attack (Duel Phase, backwards A->Up X->X) - Great for reversing the situation if your back is to the wall, as the Up X will send the opponent over Garchomp and it'll move forward a bit, causing you to effectively switch places.
Sand Tomb (crit)->backwards Y->Poké Combo 1(Duel Phase, Down A (crit)->backwards Y->Y,Y,Y,Y)
Aerial Charged Y->Sandstorm->forward Y (Field Phase, aerial Y, charged->run forward->backwards Y->forward Y)
Synergy Burst
When you activate Synergy Burst, Garchomp will mega evolve into Mega Garchomp. Along with the boosted attack power, the immunity to hitstun from weaker attacks, and the access to Burst Attack, three of Garchomp's moves change a bit. Dig becomes significantly faster, and Sand Tomb and Dragon Rush will always do their second hits, regardless of if they were a critical hit or not. It should also be noted that when not in burst mode
(is burst mode supposed to be capitalized?) and in Duel Phase, low stance will build Garchomp's synergy gauge; every time its tail wags the gauge will fill a tiny bit.
Garchomp's Burst Attack is
Outrage Smasher, as seen below:
Like most Burst Attacks, it has almost no start-up, beats out almost everything, and does a ton of damage.
Unlike most Burst Attacks though, it's actually unsafe and punishable if you screw it up. So you have to
actually be careful with it and not just throw it out and expect everything to be ok like with most of the other ones. In order to get the entirety of that
sexy ass attack I love this phrase so fucking much but probably not the most appropriate lol, the first leaping strike has to connect. If it misses or is blocked, Garchomp will keep swinging away for a while, leaving it open to attacks if you
r opponent is out of the way. If they block it, it will break their guard on the final swing, but due to the attack's endlag and guard break not giving significant frame advantage in this game for some reason, it will at worst get you punished and at best put you into a guessing situation. Garchomp also loses a bit of HP if you don't land that first hit.
As awful as this all might sound, it's more just to reinforce the idea that Garchomp requires patience.
Support Pokémon Suggestions:
Picking a good support set can also help you out a lot. Here I'll recommend a few support Pokémon sets that are useful to Garchomp. Keep in mind that other sets may be useful too.
Cubone/Diglett - Cubone is the star here, as Bonemerang gives you another way to bring the opponent towards you, especially the ones that don't want to get close.
Emolga/Fennekin - Emolga's ability to slow down opponents is great for Garchomp, since it makes it easier to chase down fast Pokémon like Weavile or Pikachu, who can otherwise play keep-away with you all day. Fennekin is a great get off me option, since it's hard to get some breathing room versus characters like Blaziken, Weavile, etc.
Latios/Yveltal - Latios can restrict the opponent's ability to move, making it easier to close in on them, while Yveltal provides you with a long lasting hitbox on a spot, and if it hits, it'll temporarily prevent them from using Synergy Burst, which is just good in general.
Reshiram/Cresselia is also good, but that one's good on everyone really.
I would create a conclusion for your piece; Starting off with an overview is great, but you should end with a "Final Thoughts" or "Fighter Verdict" segment as to the practicality of Garchomp and who's playstyle it best fits!


![[PokeCommunity.com] Pokken Garchomp Guide](https://i.imgur.com/L3gyDts.jpg "[PokeCommunity.com] Pokken Garchomp Guide")
![[PokeCommunity.com] Pokken Garchomp Guide](https://i.imgur.com/udl2Hbe.jpg "[PokeCommunity.com] Pokken Garchomp Guide")
![[PokeCommunity.com] Pokken Garchomp Guide](https://i.imgur.com/pKbExM0.gif "[PokeCommunity.com] Pokken Garchomp Guide")

![[PokeCommunity.com] Pokken Garchomp Guide](https://i.imgur.com/bAFyvbS.png "[PokeCommunity.com] Pokken Garchomp Guide")